Integration via Google Tag Manager
Table of contents
In short
Follow this integration guide if you use the Google Tag Manager on your website and when you want to evaluate your experiments in Google Analytics 4 .
In the section Analytics Connection under the item A/B Testing Options you need to select the "Google Tag Manager" setting.
Step-by-Step Tutorial
Analytics integration via Google Tag Manager
Set up the Varify.io®GA4 integration in four steps:
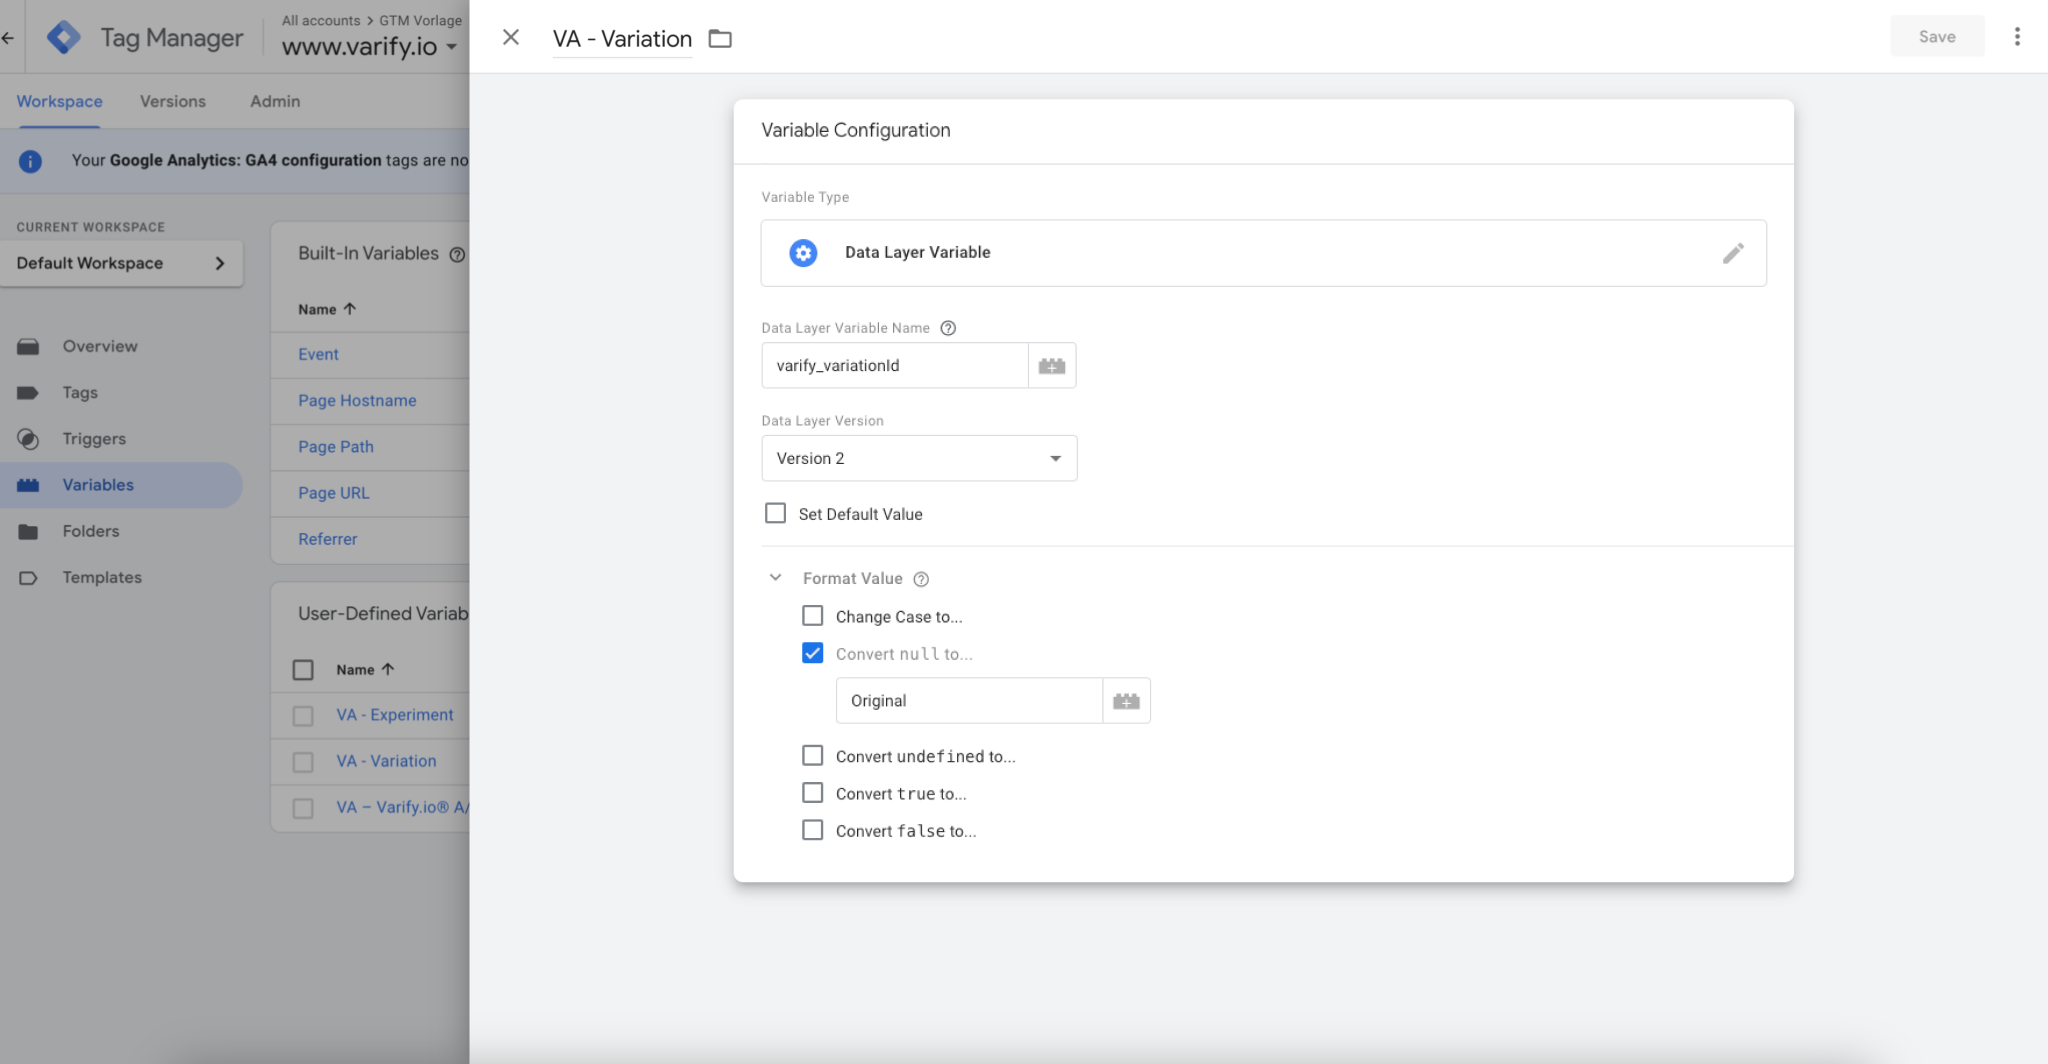
1. Create two data layer variables
These variables are used to provide tags with information of the A/B test.
- Names of the variables: e.g. "VA - Experiment" and "VA- Variation" (or choose your own name)
- Name of the 1st data layer variable: "varify_experimentId" (mandatory)
- Name of the 2nd data layer variable: "varify_variationId" (mandatory)
- For the data layer variable "VA - Variation", "Convert null to..." must also be selected under "Format Value" and "Original" must be entered (mandatory)

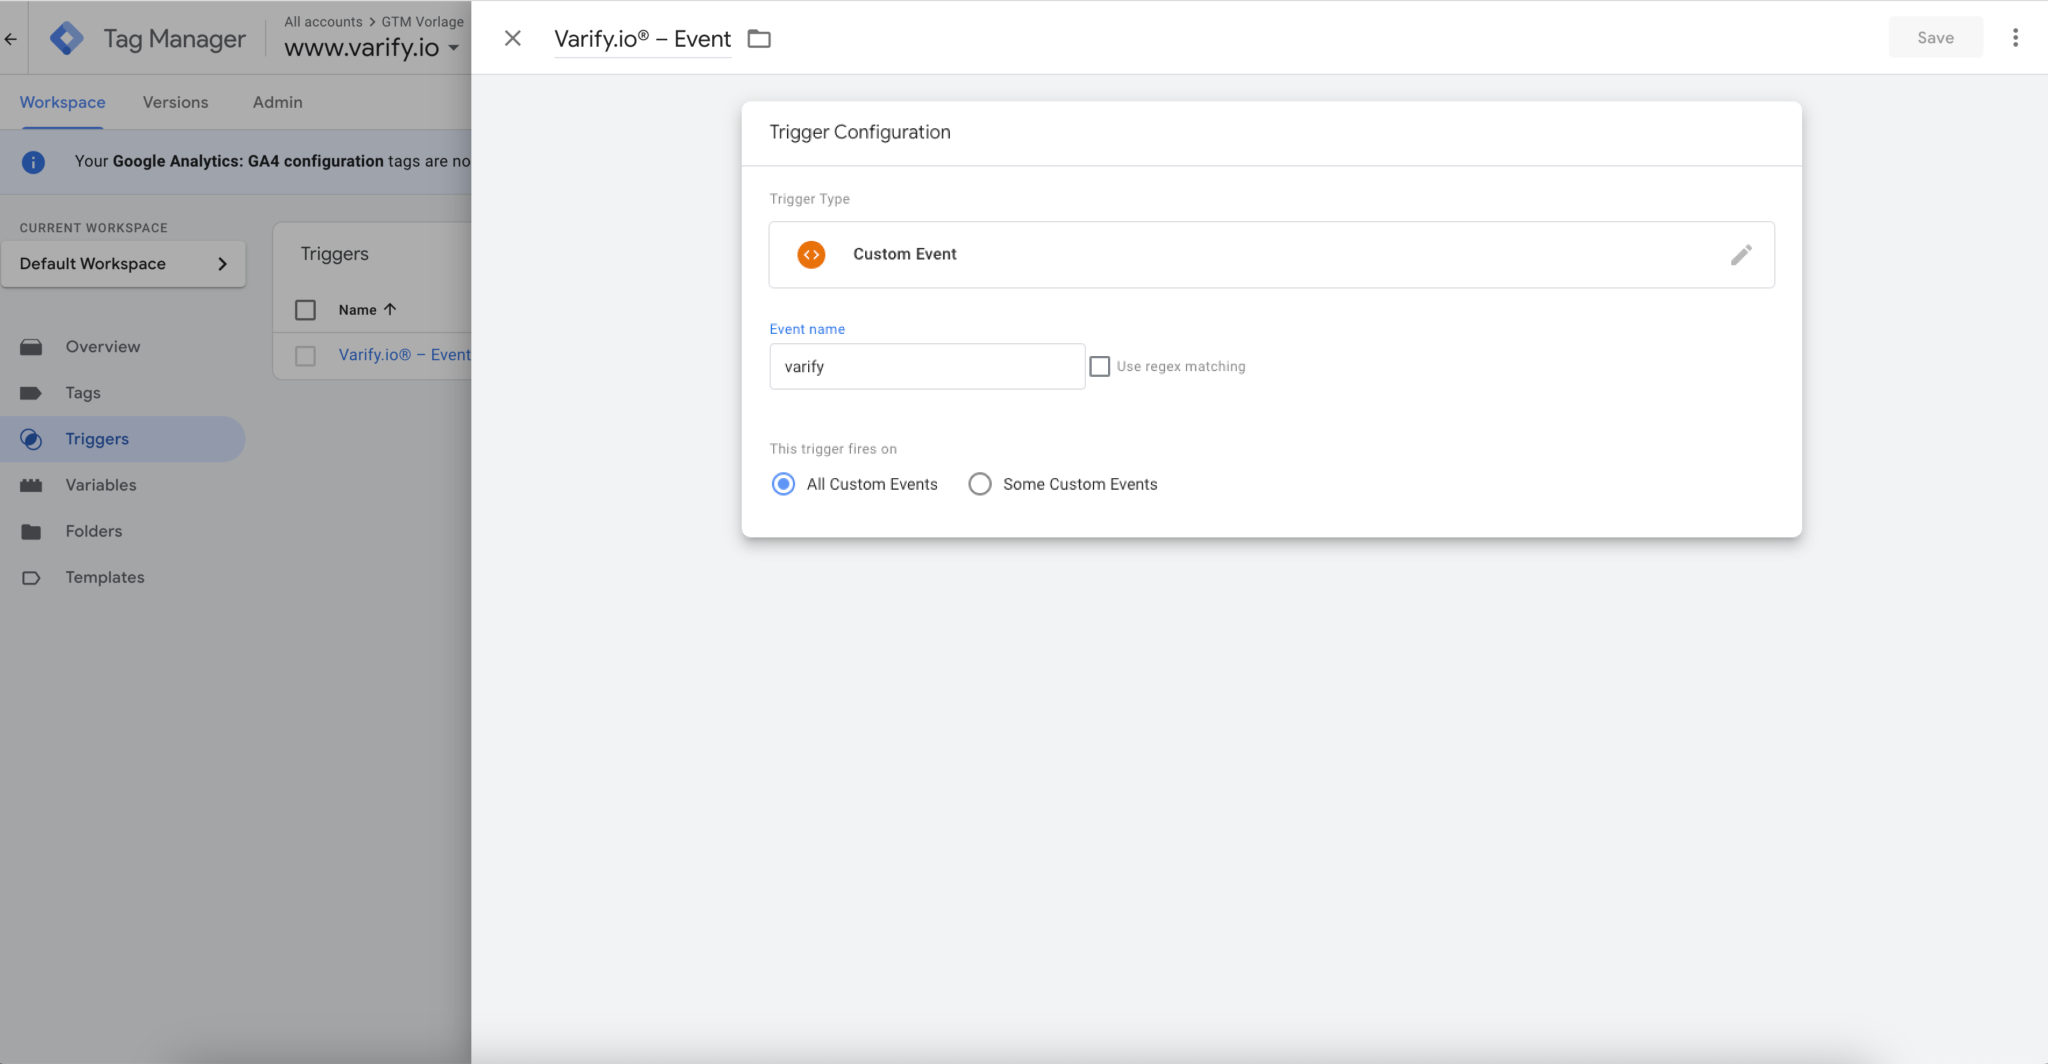
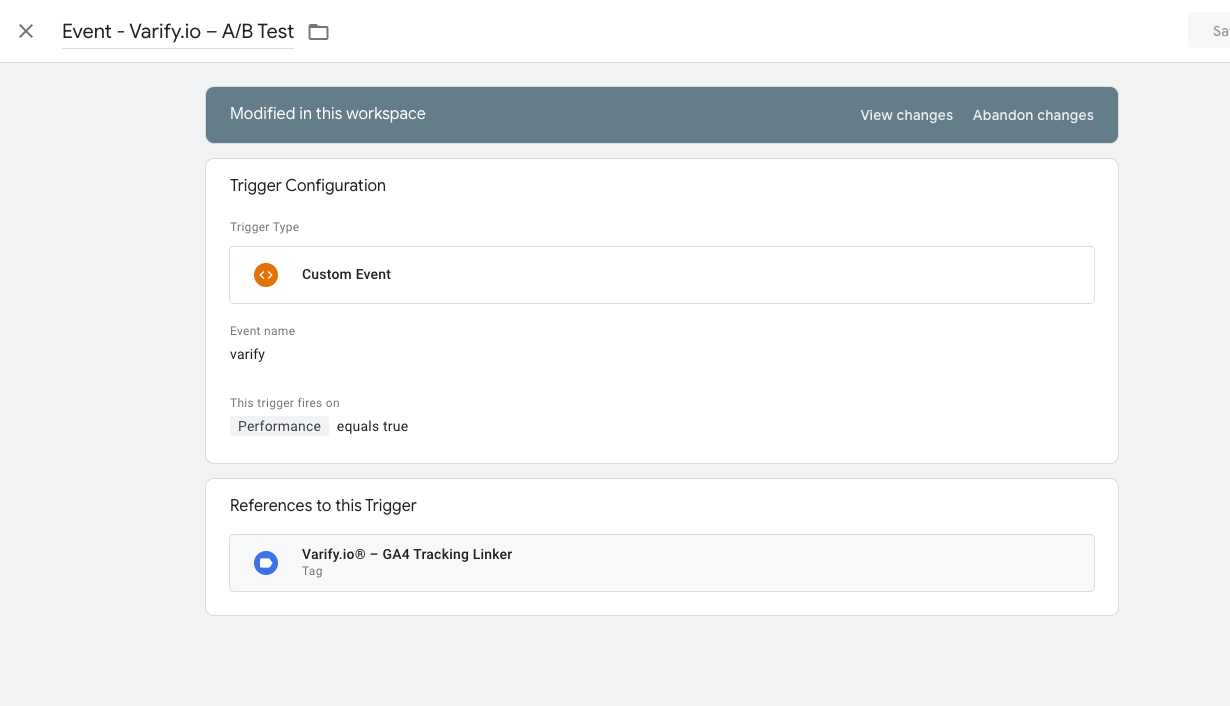
2. Create a trigger
The trigger is the decisive event that triggers the transmission of data to the Analytics system.
- Name of the trigger: e.g. "Varify.io® - event" (or choose your own name)
- Trigger type: "User defined event" (mandatory)
- Event name: "varify" (mandatory)
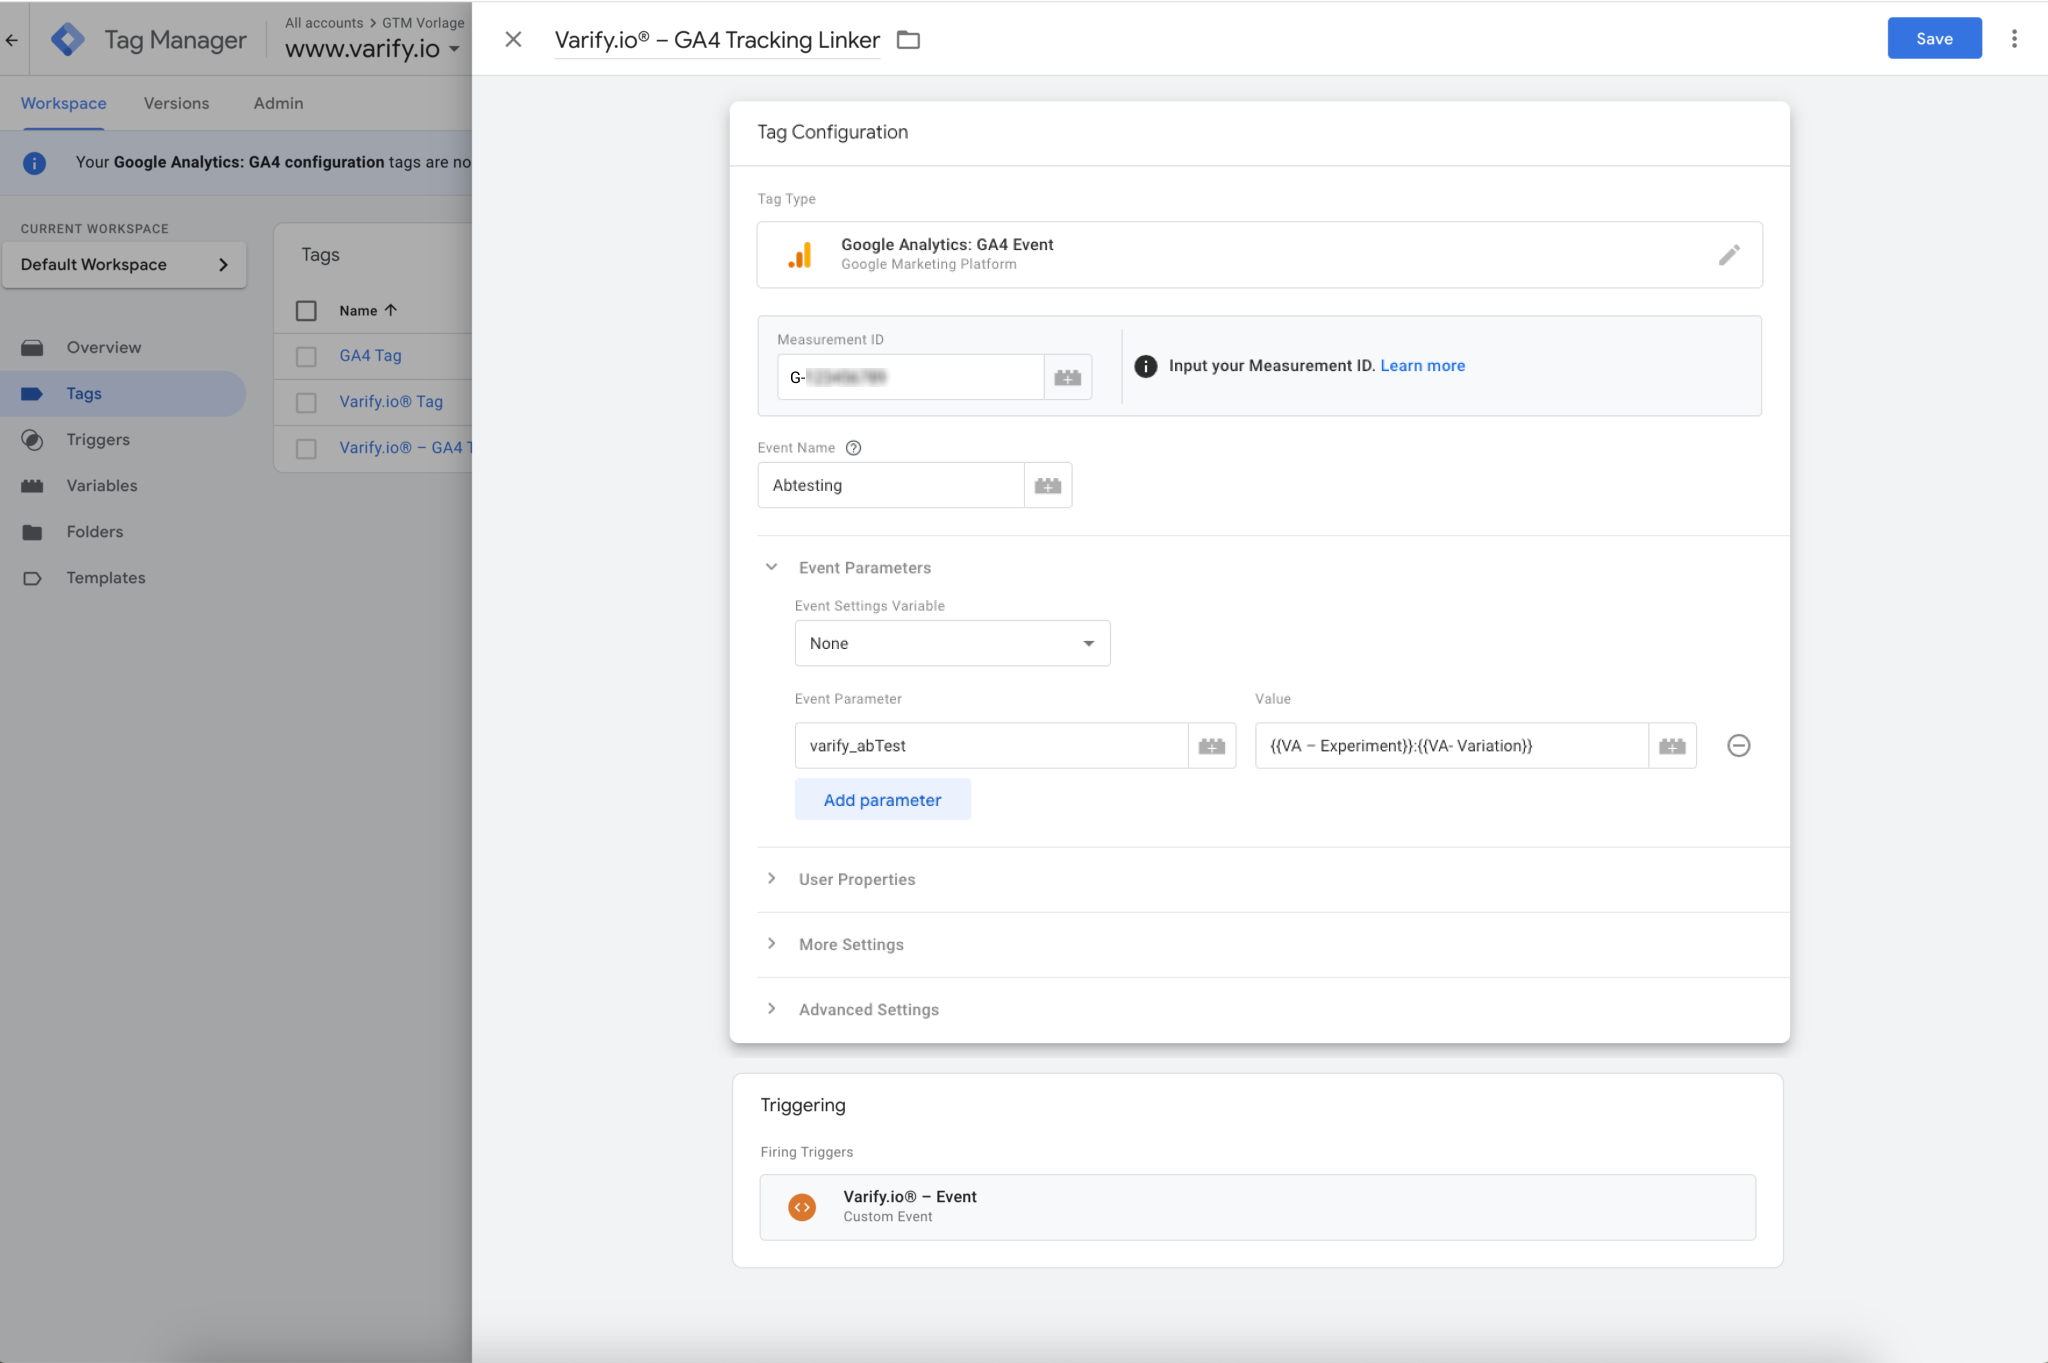
3. Create a GTM tag
Important: If Google Analytics 4 is implemented via the Google Tag Manager with a consent condition, the Varify tag may also only be triggered with a consent code!
The following screenshot shows an example. Please note that each setup is different and must be customized individually.
Tags are snippets of code that send values stored in variables to your analytics tool, such as Google Analytics.
- Tag name: e.g. "Varify.io® - GA4 Tracking Linker" (or choose your own name)
- Configuration tag: [use your existing GA4 tag].
- Event name: e.g. "Abtesting" (or choose your own name)
- Parameter name: e.g. varify_abTest (or choose your own name)
- Values (from step 1): {{naming 1st data layer variable}}:{{naming 2nd data layer variable}}
- Trigger: [Select trigger from step 2]
4. Setup of the custom dimension in GA4
1. open your GA4 settings and select the menu item "Custom definitions"
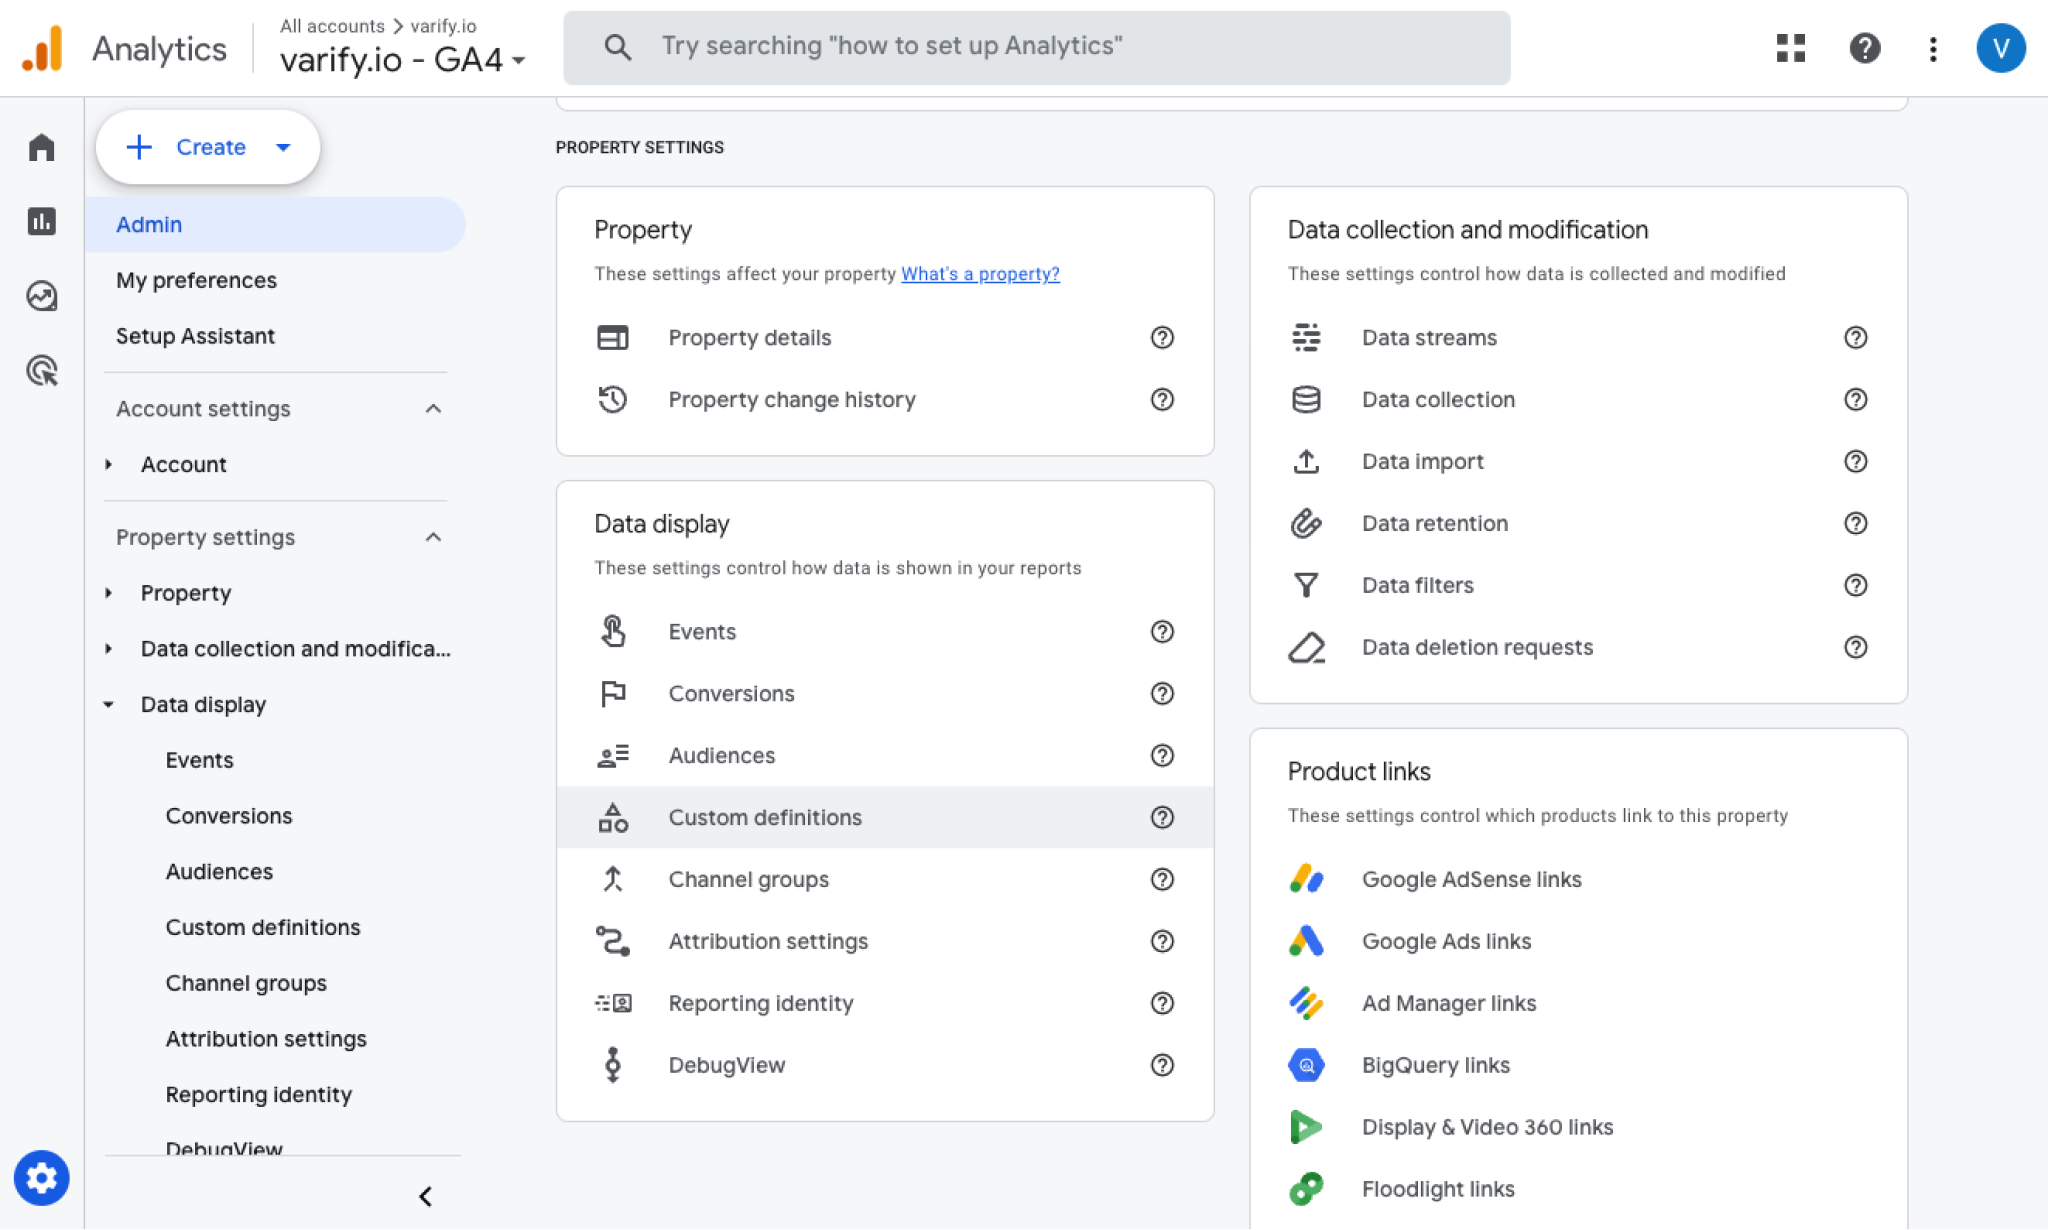
2. create a new user-defined dimension ("Create custom dimension")
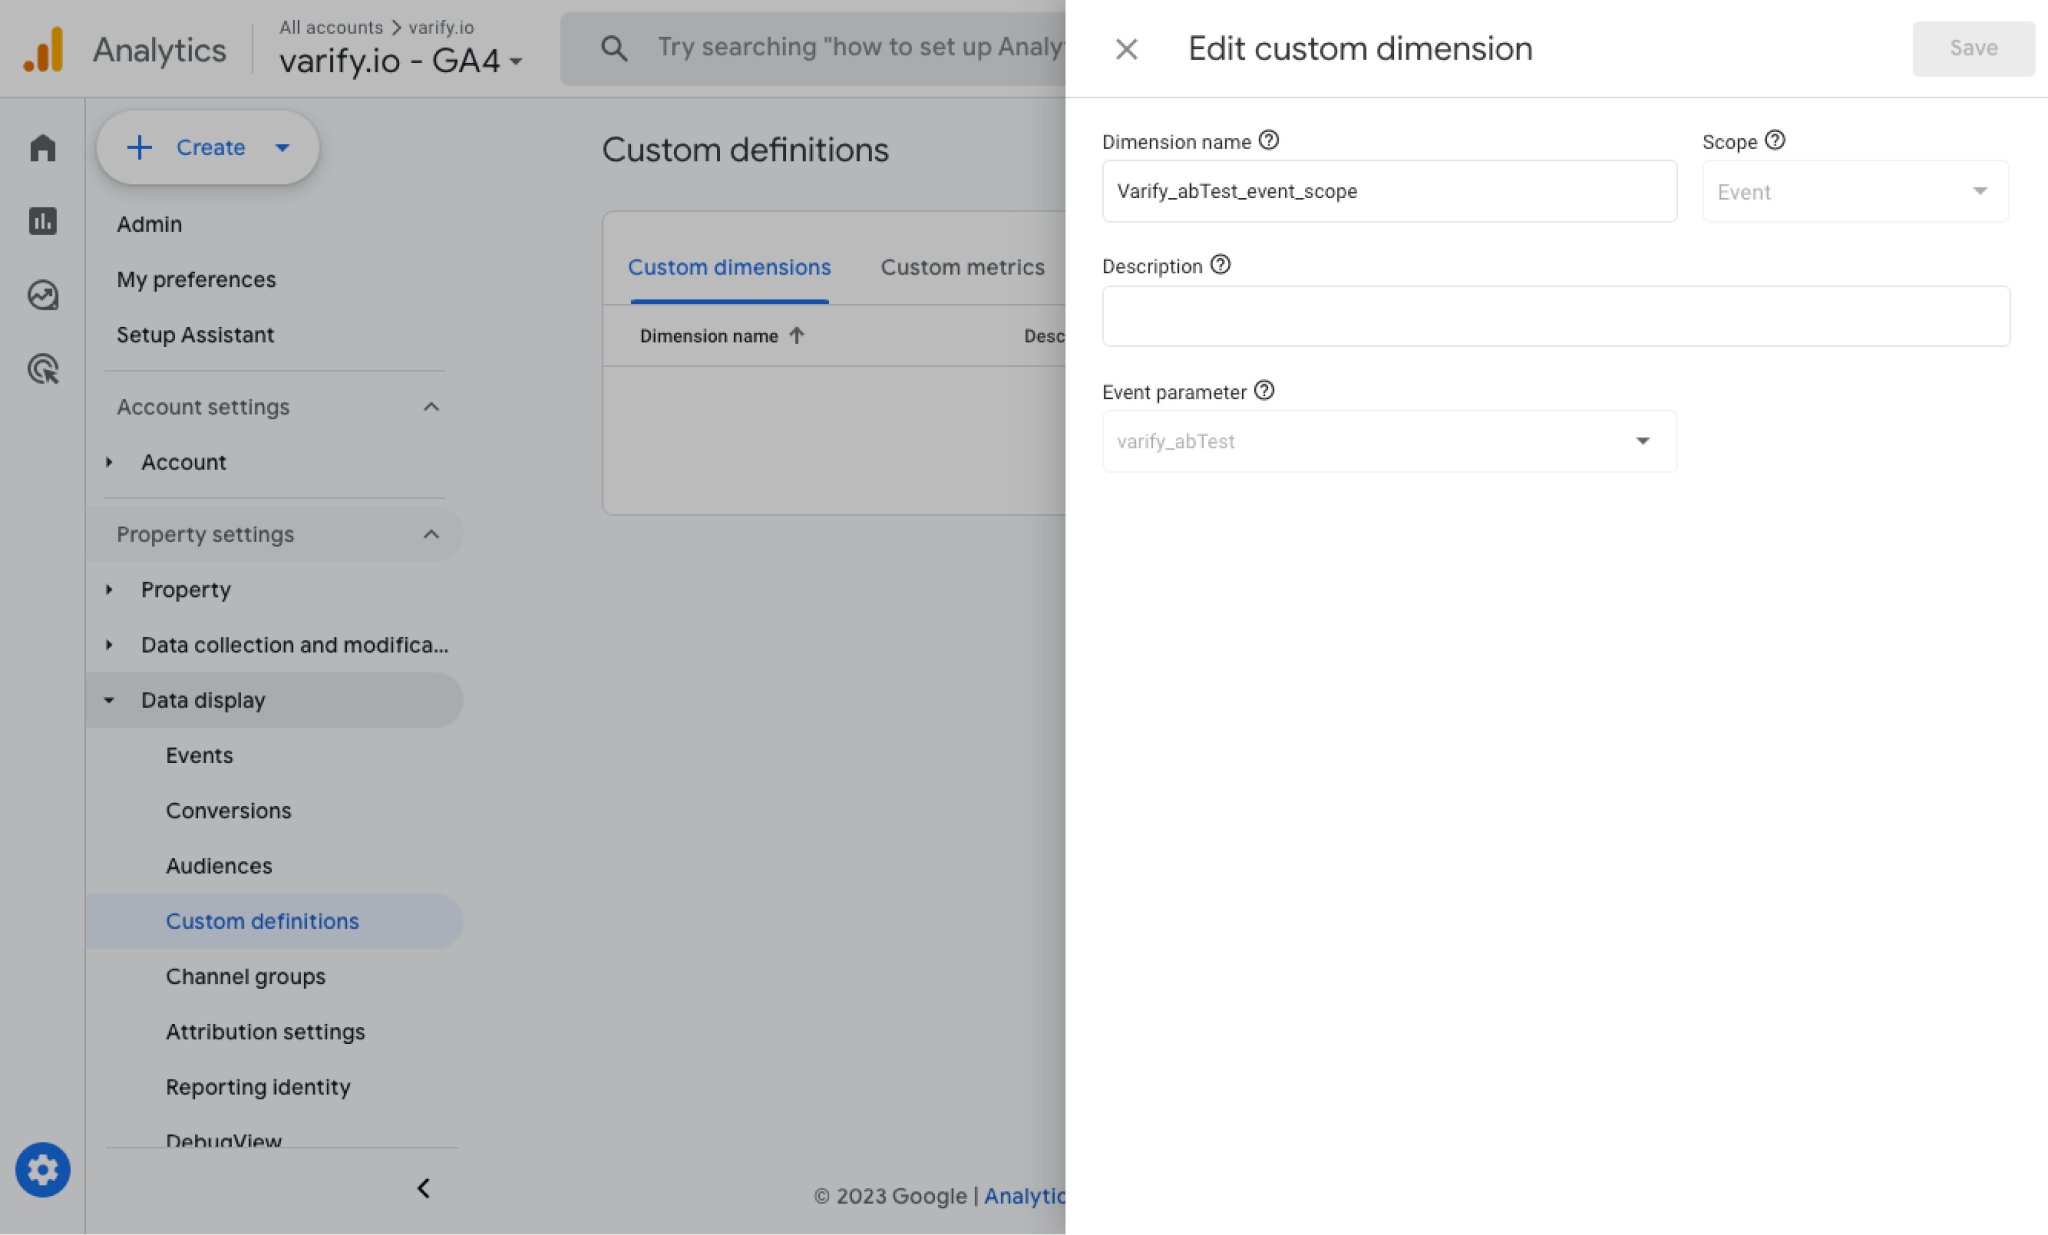
Choose a dimension name e.g. "Varify_abTest_event_scope" and select the event parameter "varify_abTest". Make sure that you specify the event parameter in the correct notation.
Important Notice: Important note: You will be able to select the event parameter "varify_abTest" in the section custom dimensions only after GA4 has received the first test data from you. After that it can take up to 24 hours until you find the value in the dropdown.
4. then save your dimension.
Viewing the A/B test data in GA4
You can analyze the data of the variations of your A/B test in GA4 with the Explorative Data Analysis. You can find more information here: Evaluation of results in GA4