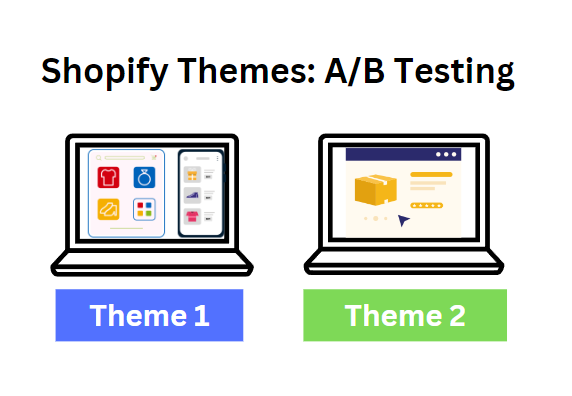
By A/B testing Shopify themes, you can pit an outdated or poorly adapted theme against a significantly better alternative. This allows you to find out which design and layout is best received by your customers, increases the conversion rate and ultimately increases your sales.
By testing different themes, you gain valuable insights into the behavior and preferences of your users. On this basis, you can continue with targeted, more detailed optimizations after the theme tests. In this blog post, we'll show you how you can use strategic testing to create the ideal basis for your Shopify store and for further A/B testing in Shopify and exploit the full potential of your online store.

1. create a Varify.io® A/B testing account with 30 days free trial phase
Visit https://varify.io/registrierung and create an account for your store. As soon as you have confirmed the welcome email, you can log in and start the setup. The trial phase is usually sufficient to carry out your Shopify Theme A/B test.
2. connect Varify.io® with your Shopify Store
There are three different ways to connect your store to Varify.io®:
1. insert the snippet into the Theme.liquid file (recommended)
Copy the Varify.io snippet from the dashboard and paste it as high up as possible in the theme.liquid file of your store. To do this, go to "Online Store"-> "Themes" in the Shopify backend and click on "edit code"
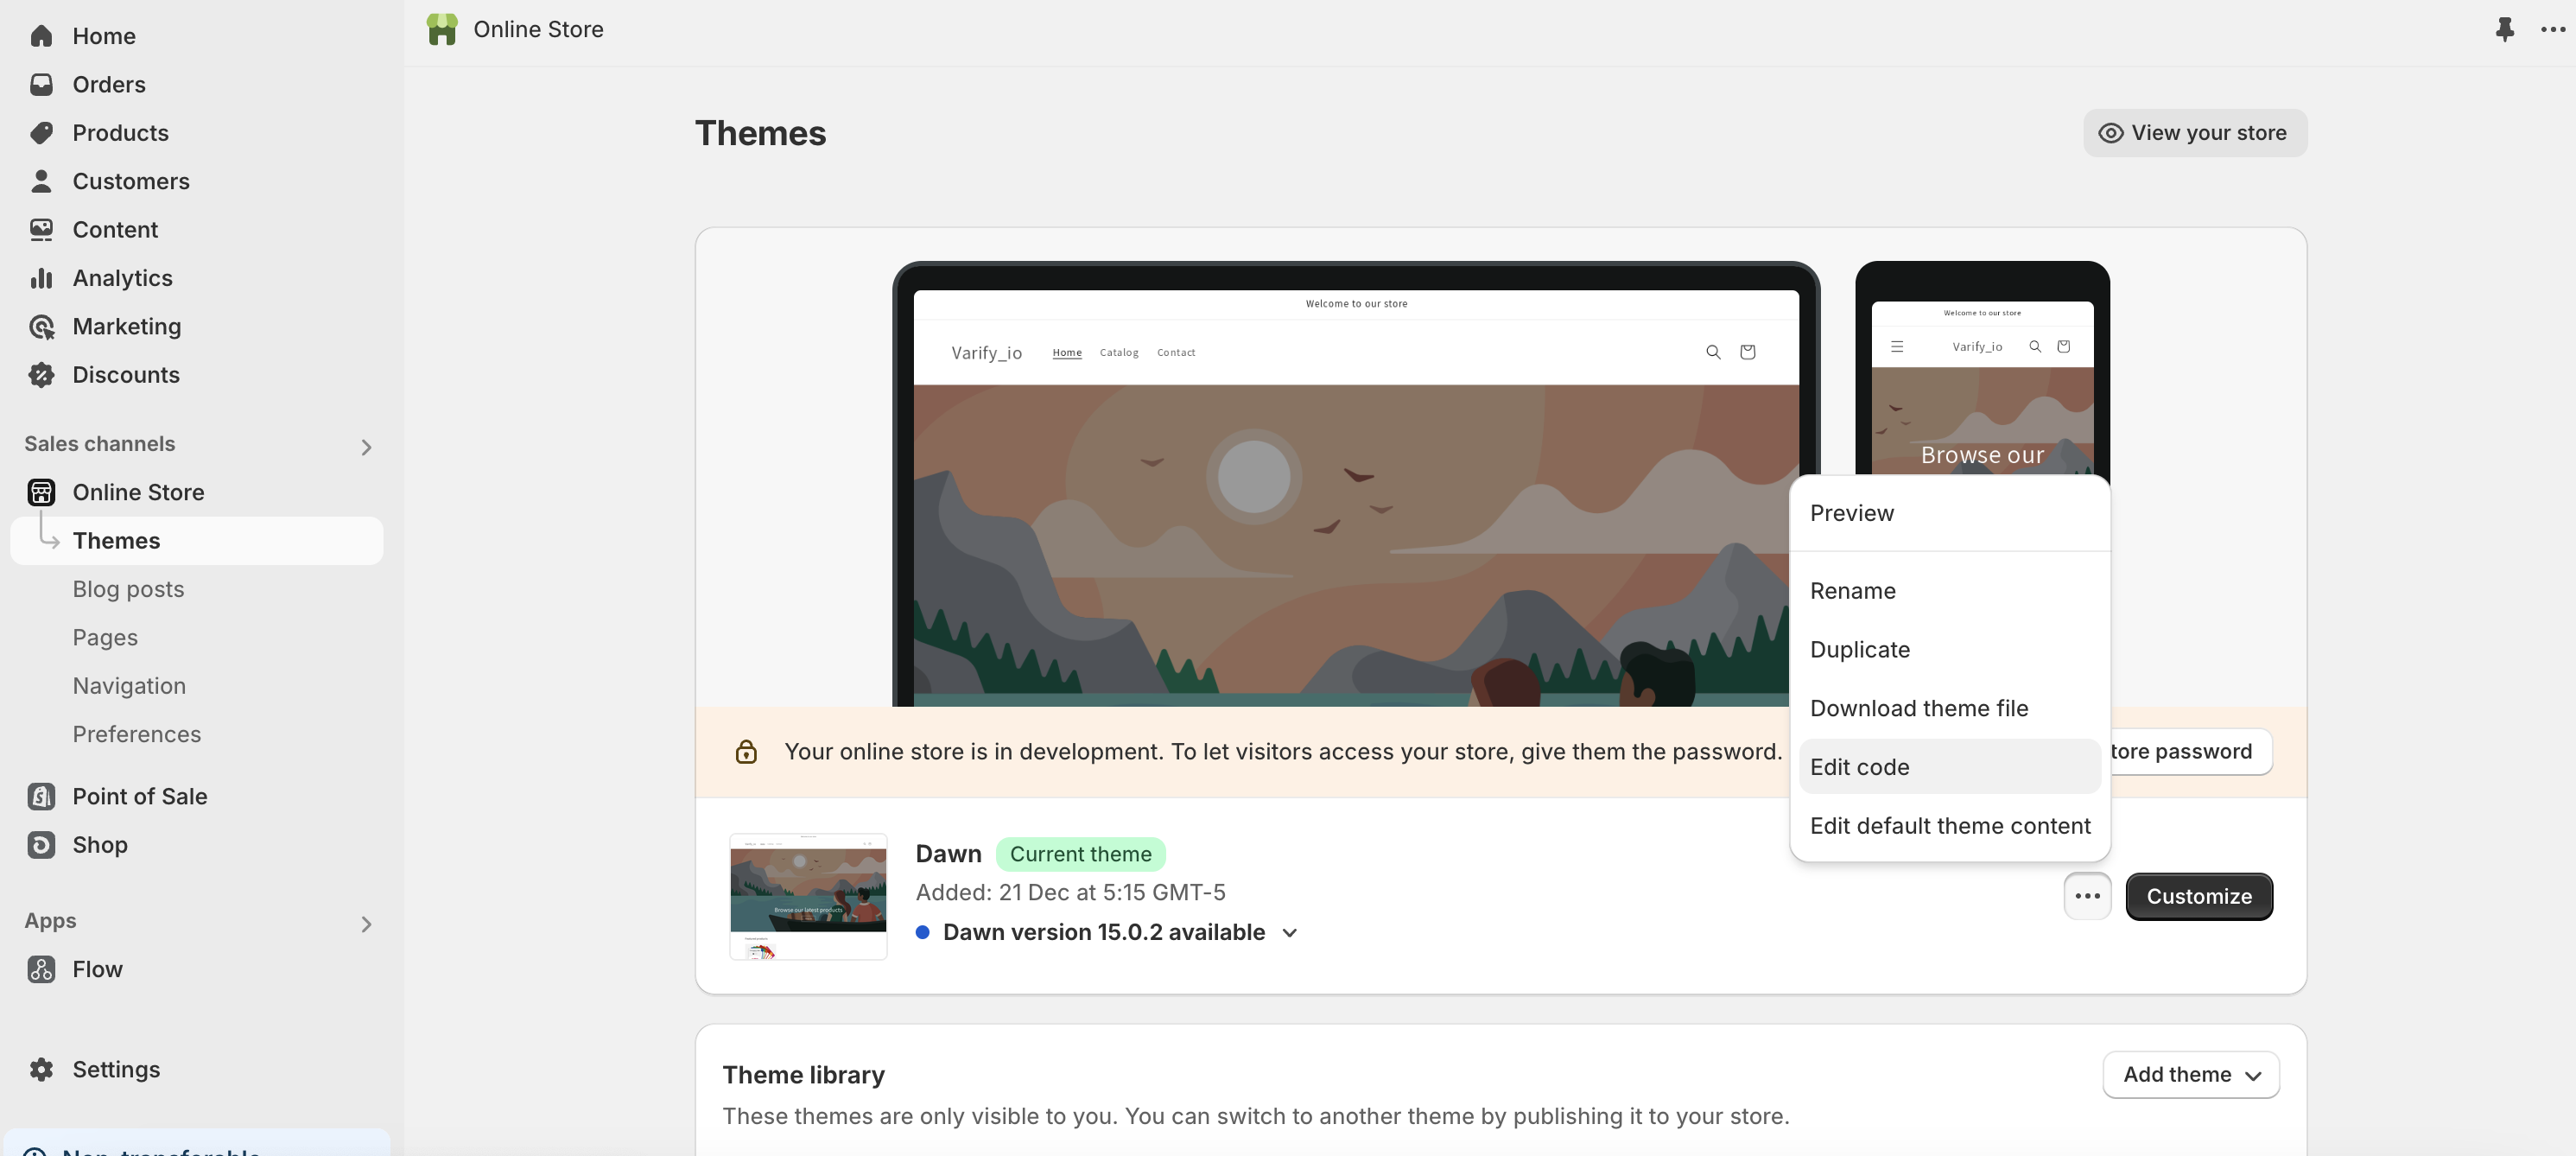
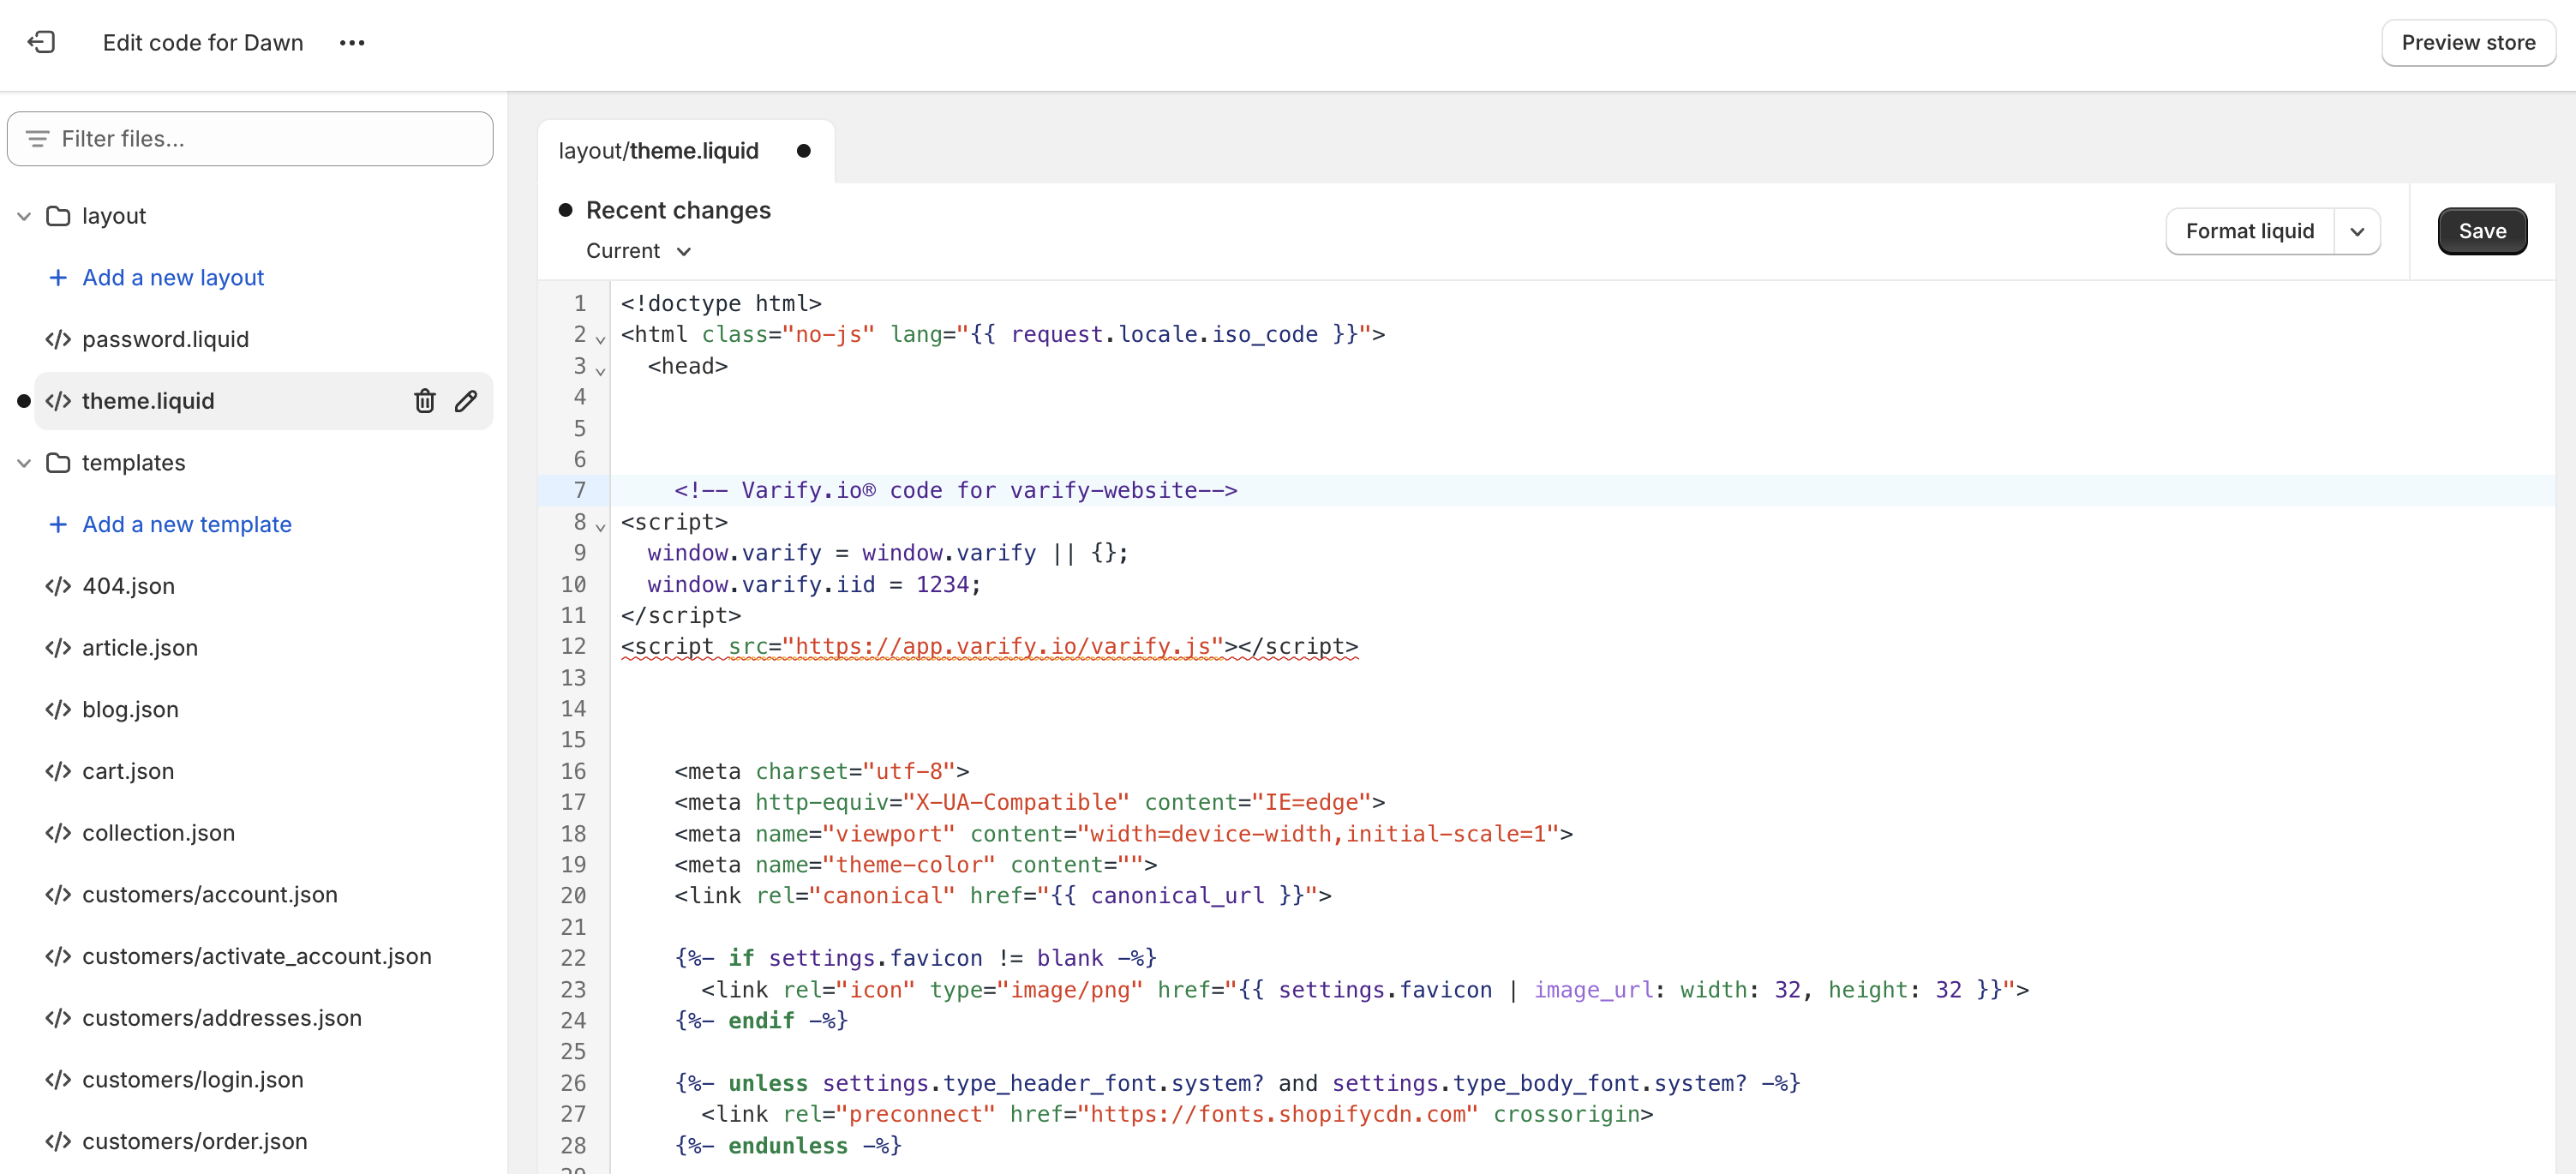
You can then insert the Varify.io snippet as in the following example. Please do not change anything in the snippet, even if Shopify makes suggestions for changes - changes will cause flicker effects or the A/B test will no longer work.
2. implement the snippet alternatively with the Google Tag Manager (not recommended). You can find out how here.
3. download the Varify.io A/B Testing Shopify app and enter your account ID(coming soon).
And so it goes on:
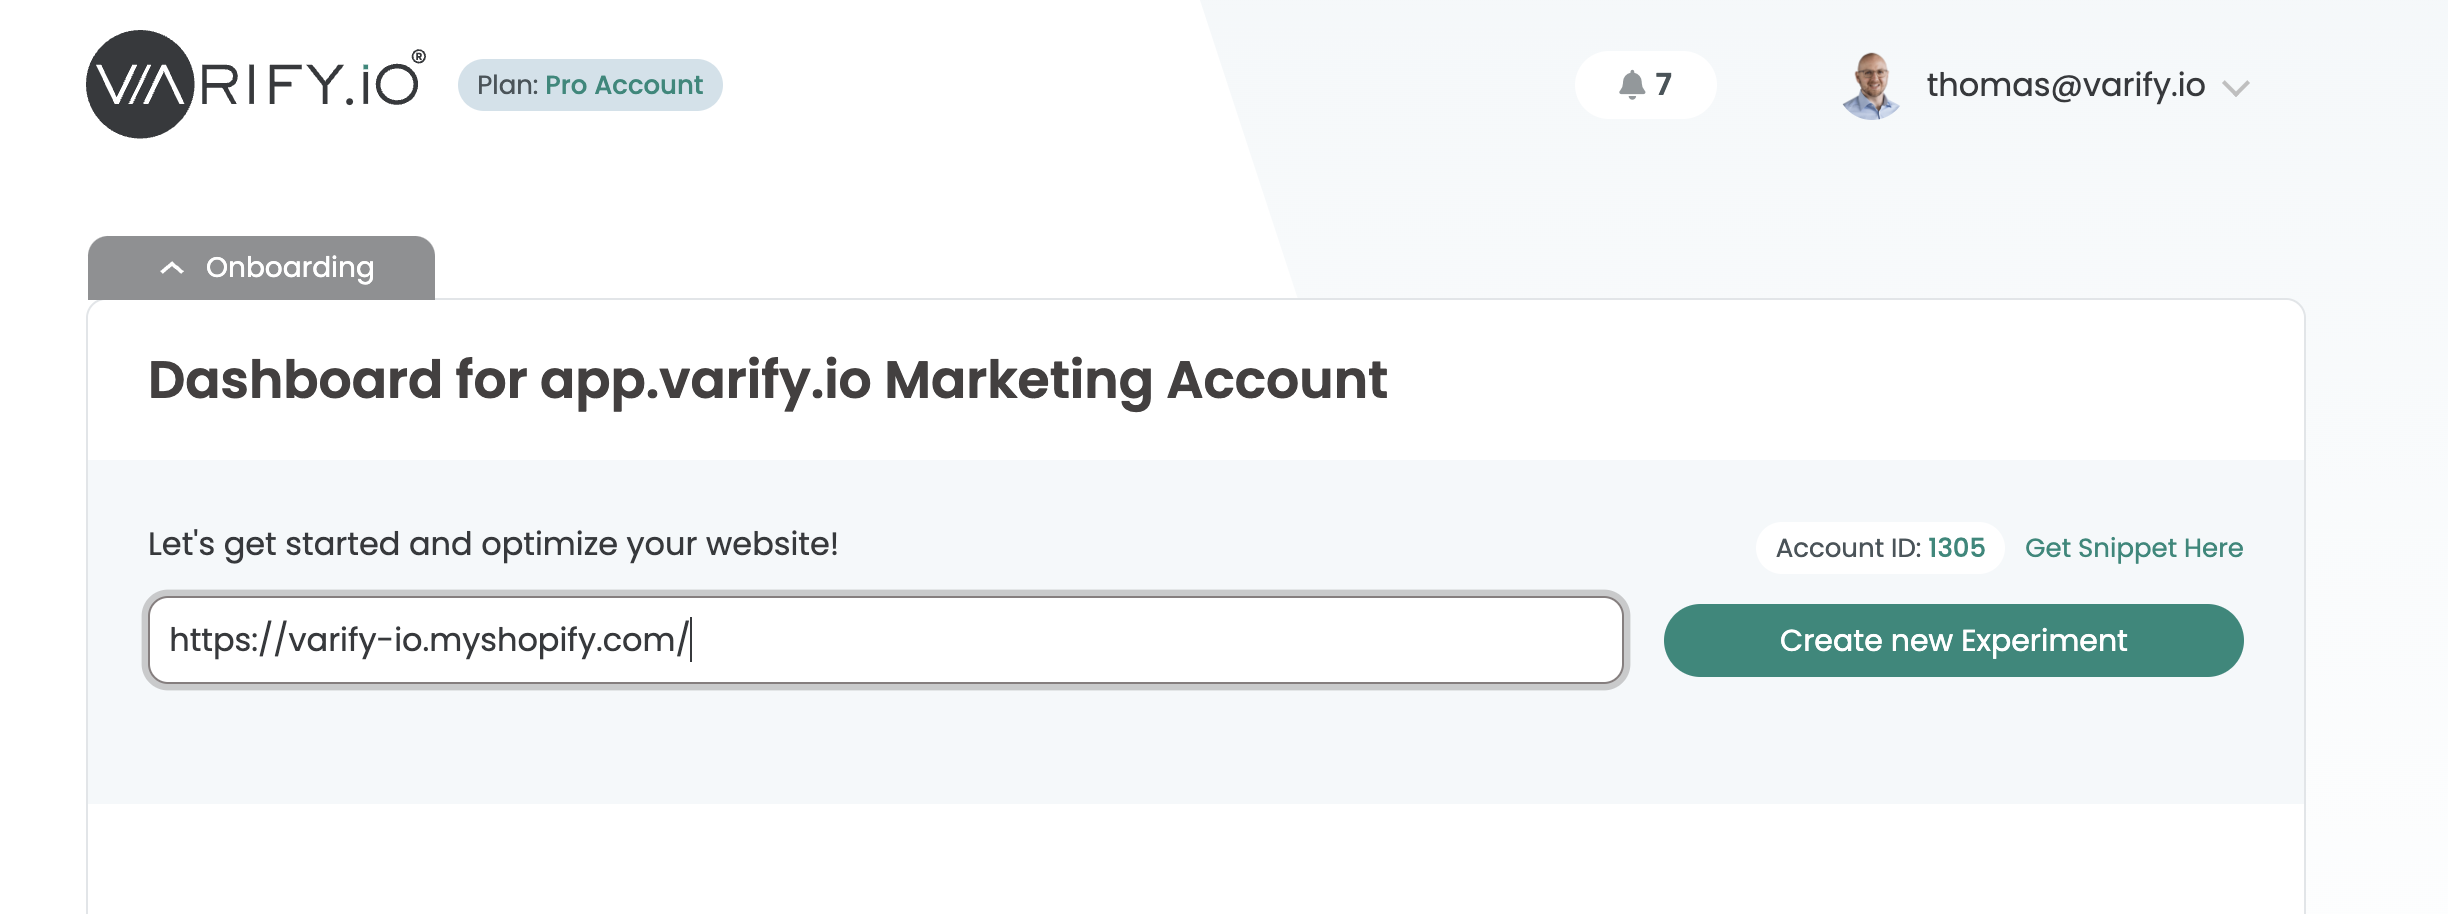
After the snippet has been implemented, open one of your product detail pages in the Varify.io dashboard. If the editor opens in your store, the implementation was successful.
3. find the theme ID of the new theme you want to test
We need the theme ID to tell Shopify which theme the test participants should see. Here is a step-by-step guide on how to find the theme ID from the preview link:
1. go to: Sales channels > Online store > Themes > Theme library.
2. select the theme you want to test.
3. click on: Actions.
4. right-click on Preview and copy the link.
Your preview link will look something like this: https://deinshop.myshopify.com/?preview_theme_id=1234567890
The number at the end of the link (1234567890) is the theme ID you need.
4. create the experiment
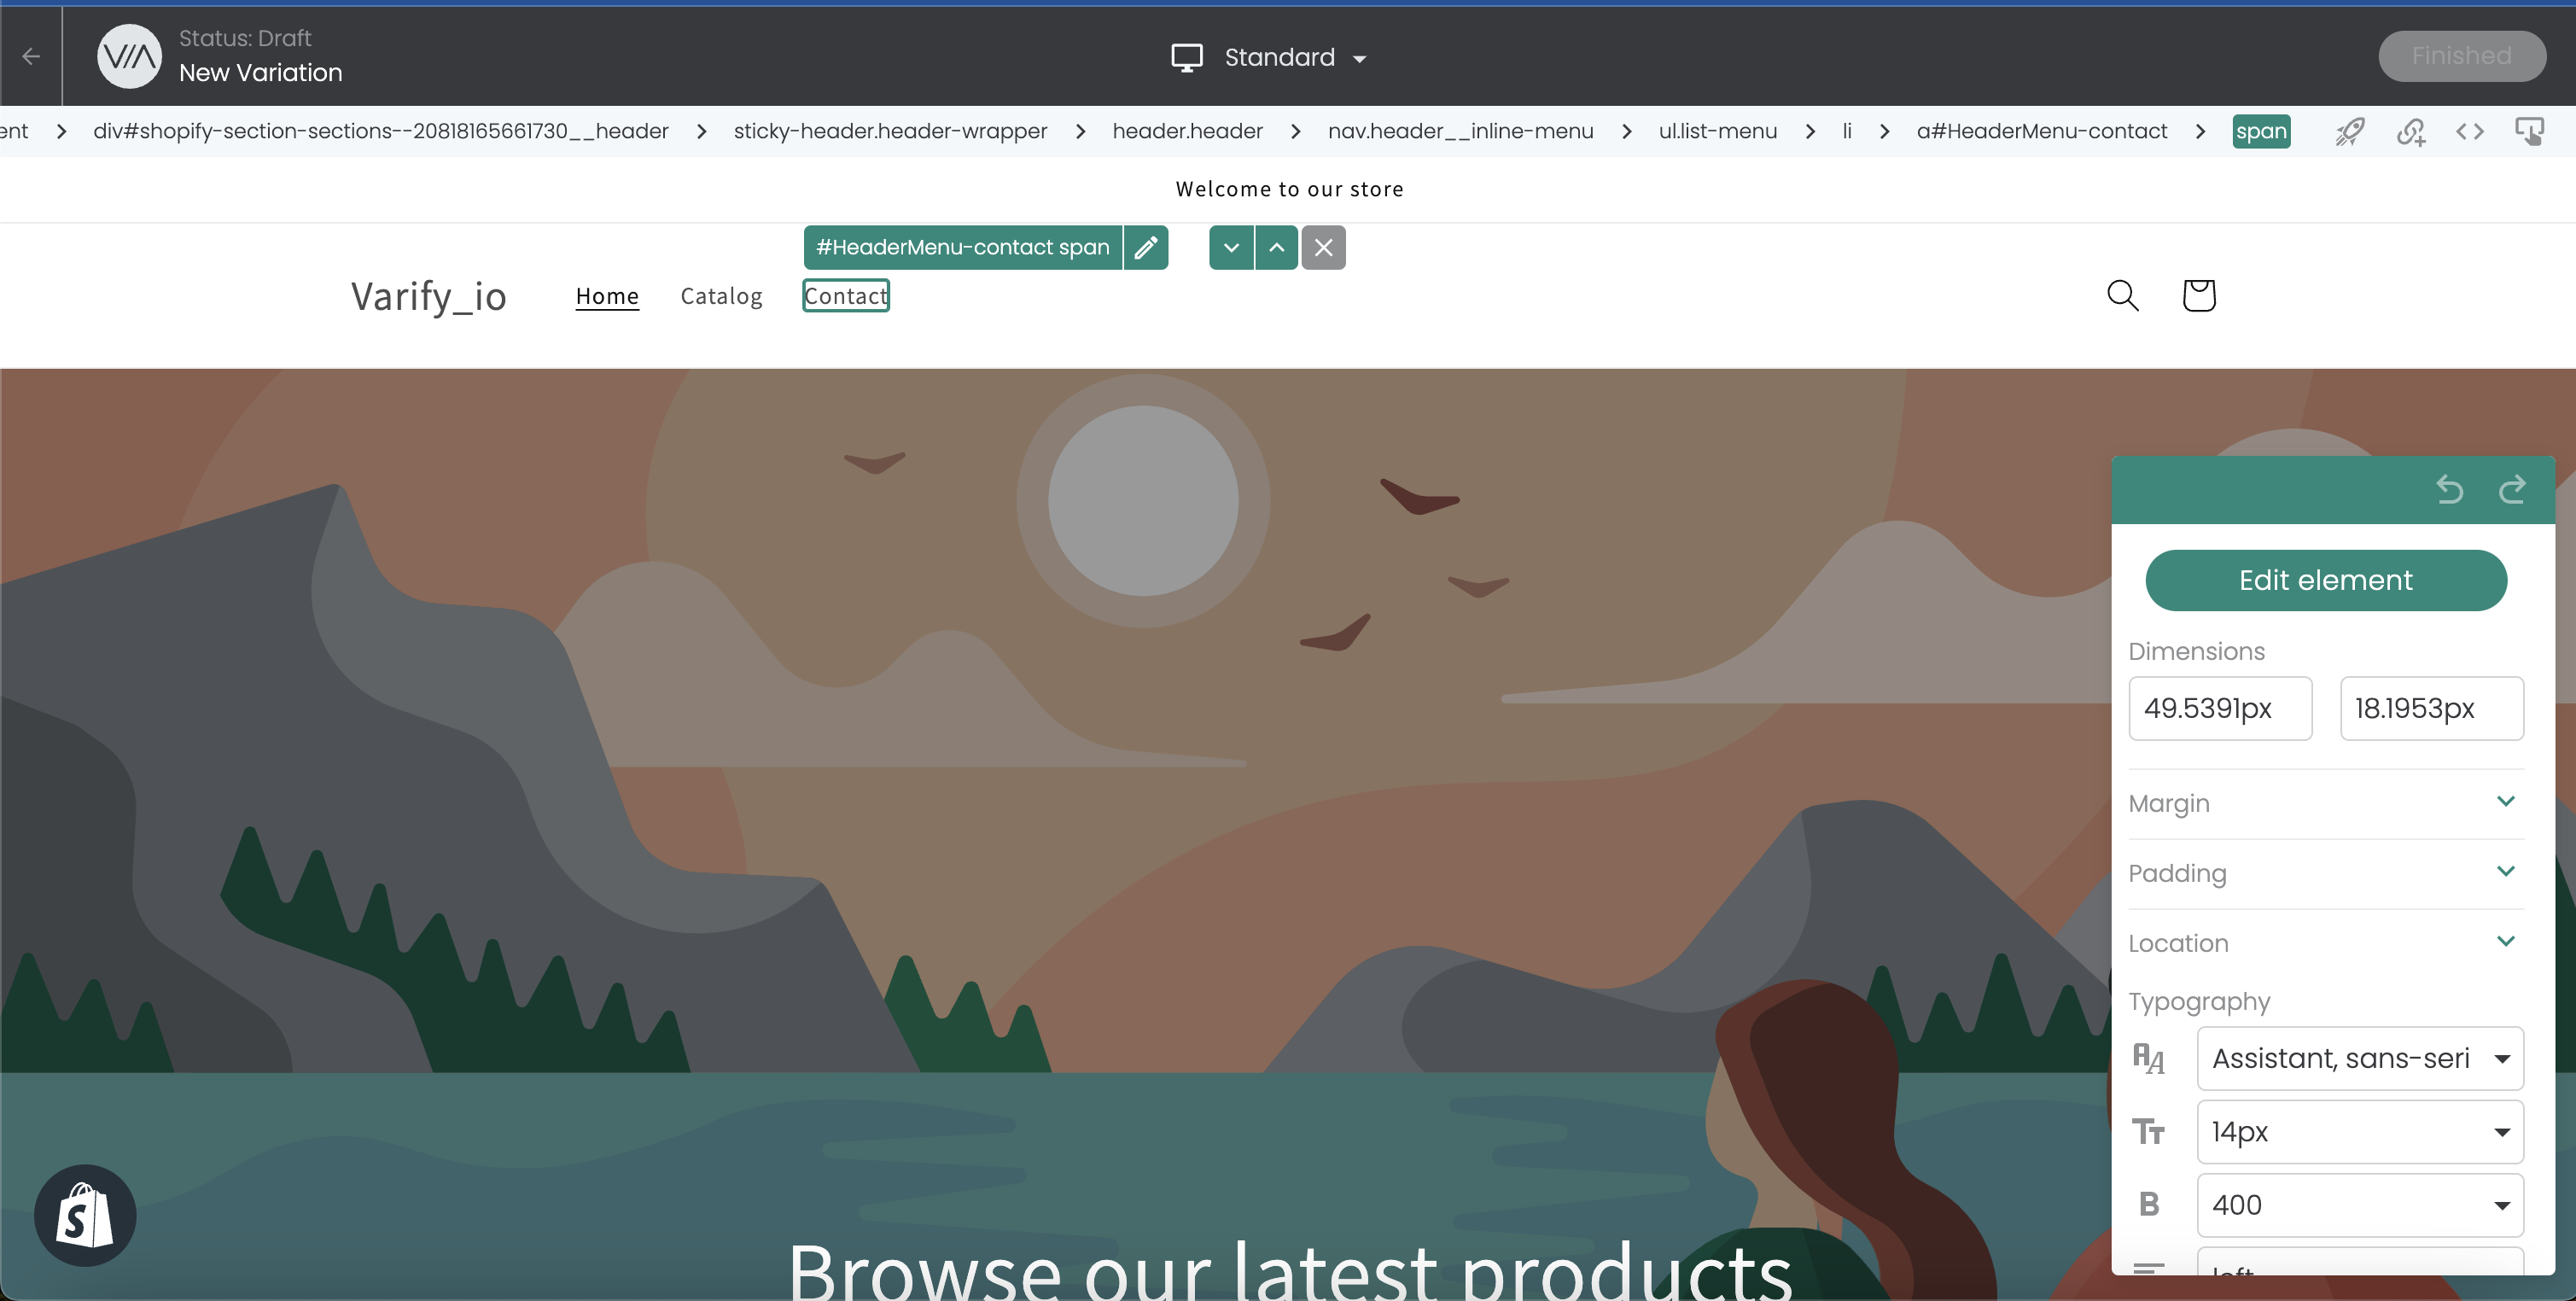
Open any page of your store with the editor. Next, you need to add the following JavaScript to the experiment. IMPORTANT: Please do not forget to replace the theme ID from the previous step.
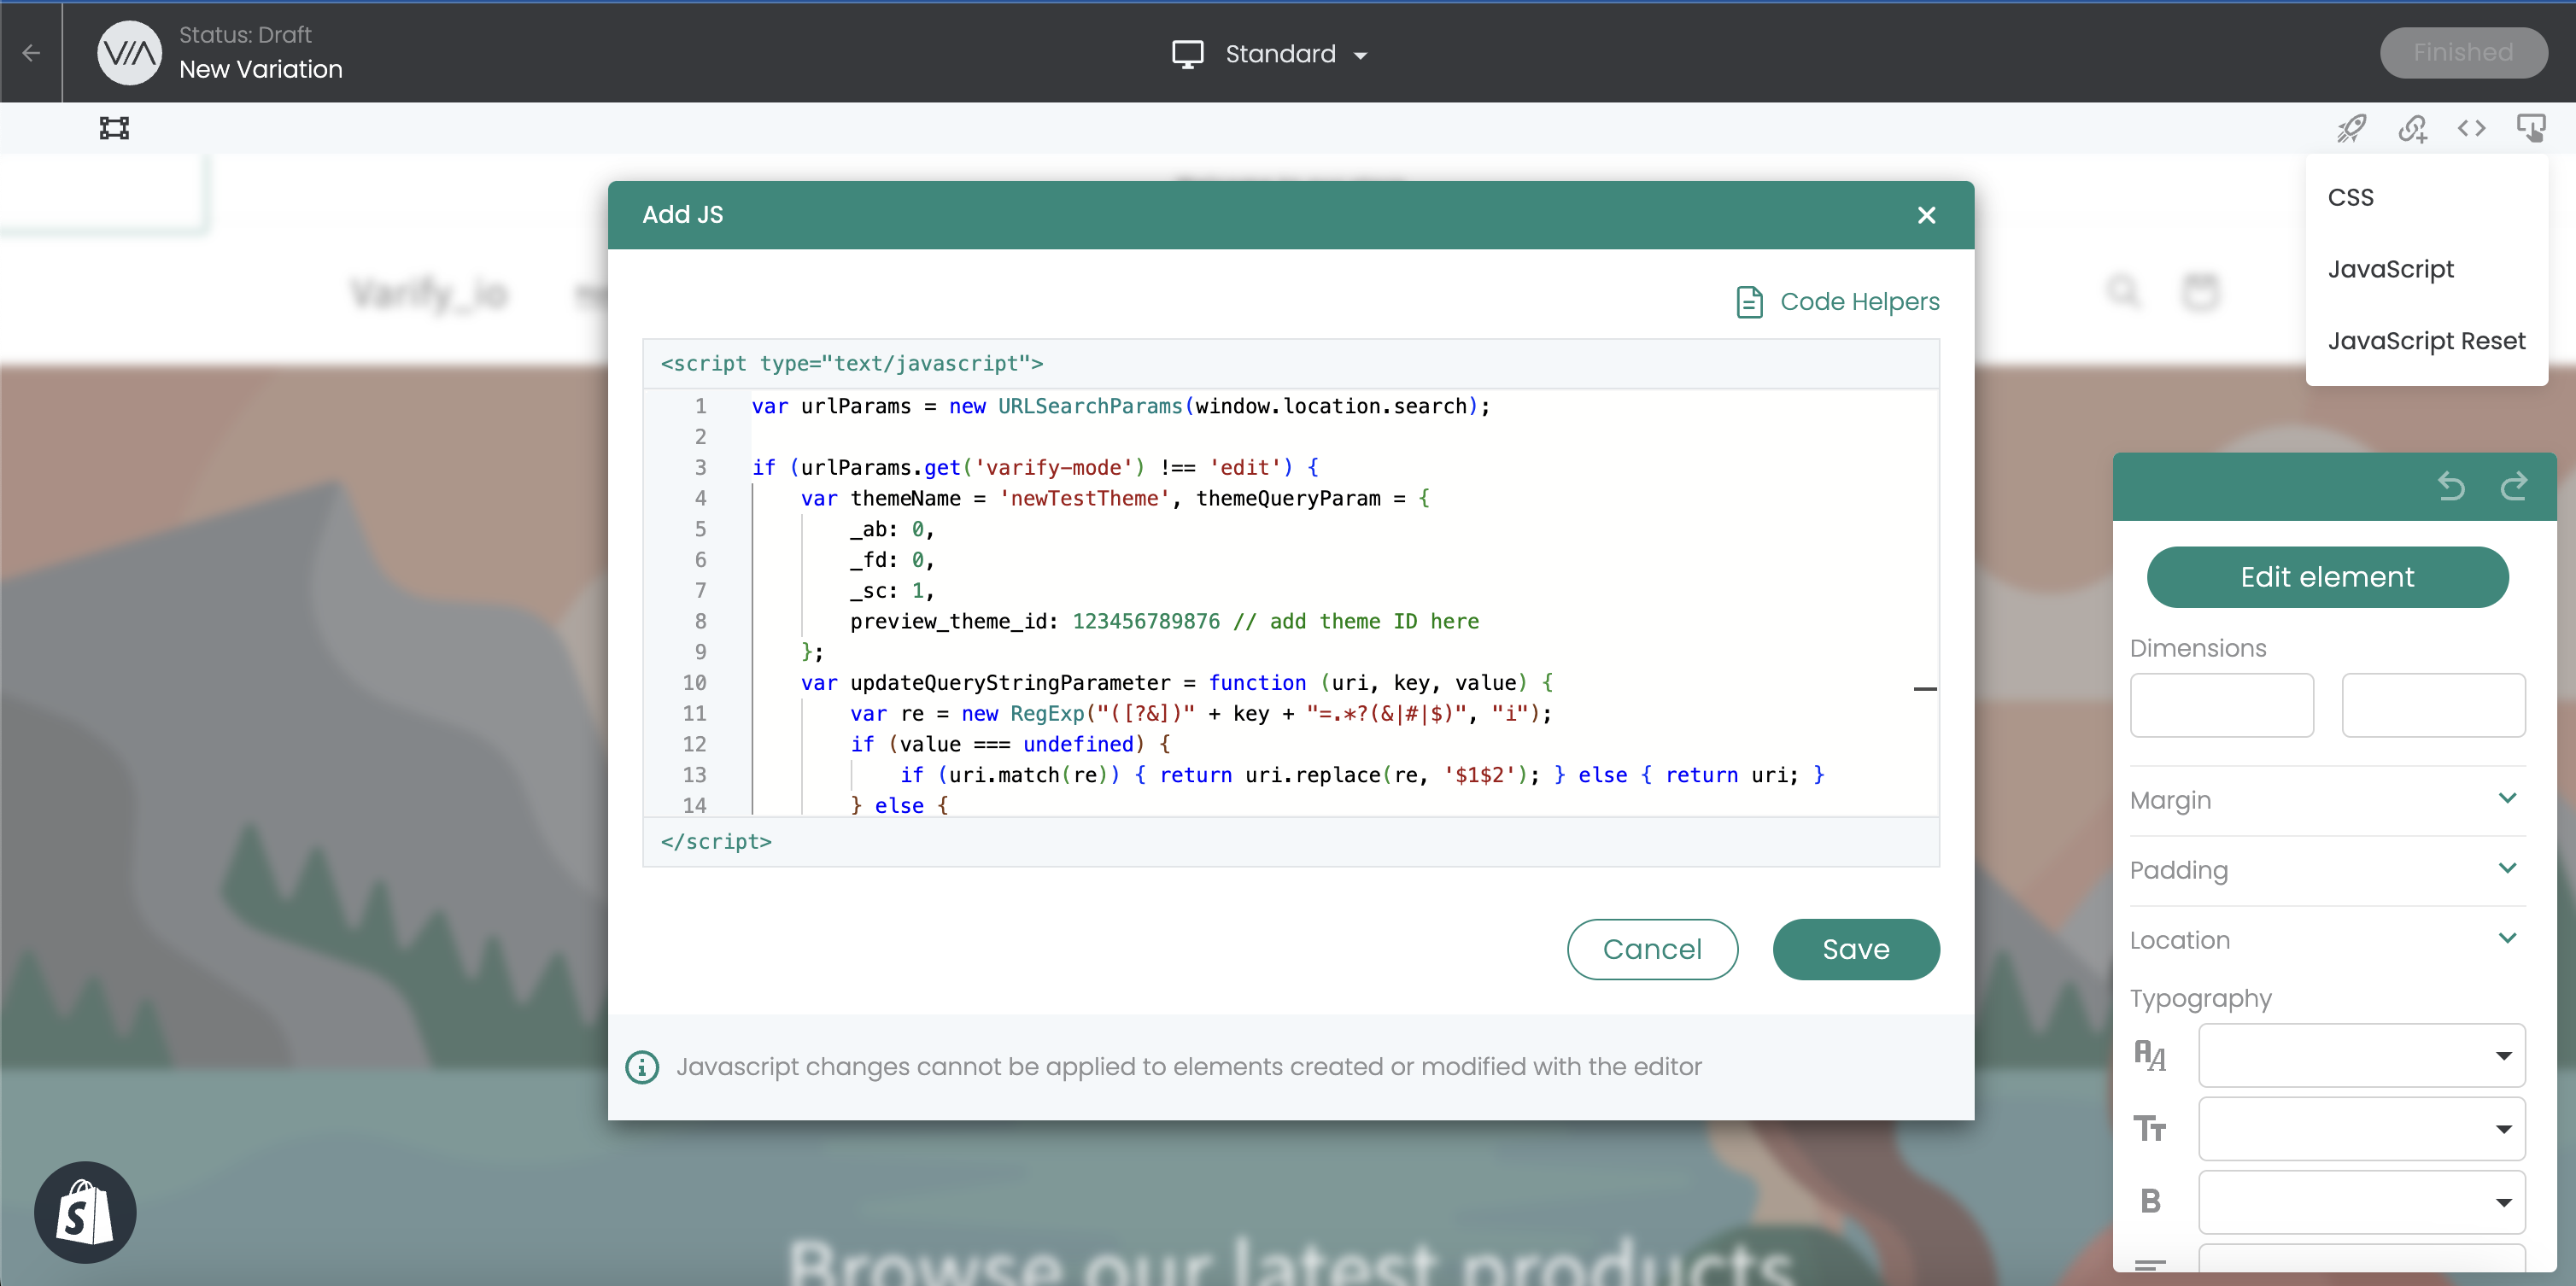
This JS code must be inserted at the top right under "JavaScript" - with the theme ID that we found earlier.
					var urlParams = new URLSearchParams(window.location.search);

if (urlParams.get('varify-mode') !== 'edit') {
    var themeName = 'newTestTheme', themeQueryParam = {
        _ab: 0,
        _fd: 0,
        _sc: 1,
        preview_theme_id: 123456789876 // add theme ID here
    };
    var updateQueryStringParameter = function (uri, key, value) {
        var re = new RegExp("([?&])" + key + "=.*?(&|#|$)", "i");
        if (value === undefined) {
            if (uri.match(re)) { return uri.replace(re, '$1$2'); } else { return uri; }
        } else {
            if (uri.match(re)) {
                return uri.replace(re, '$1' + key + "=" + value + '$2');
            } else {
                var hash = '';
                if (uri.indexOf('#') !== -1) { hash = uri.replace(/.*#/, '#'); uri = uri.replace(/#.*/, ''); }
                var separator = uri.indexOf('?') !== -1 ? "&" : "?";
                return uri + separator + key + "=" + value + hash;
            }
        }
    };
    var themeUrl = window.location.href;
    for (var key in themeQueryParam) {
        themeUrl = updateQueryStringParameter(themeUrl, key, themeQueryParam[key]);
    }
    if (!(sessionStorage.getItem('theme-' + themeName) == 'true')) {
        sessionStorage.setItem('theme-' + themeName, 'true');
        window.location.href = themeUrl;
    }

};
Next, we add the following CSS to the CSS function to hide the preview bar in Shopify:
#preview-bar-iframe{display: none !important;}
In the editor, it will then look like the following image. Once you have successfully saved both snippets in the experiment, you can click on "Finished" and give the experiment a name.
5. targeting and quality assurance
After you have implemented the JavaScript and CSS and saved the experiment, you can save your store URL in the page targeting of the experiment. You can also use the "Preview" links to check whether the redirect works and whether all settings have been made correctly.
A tip: If the redirect does not appear immediately, but you see the current theme for a moment, you should check whether you can move the snippet from step 2.1 further up.
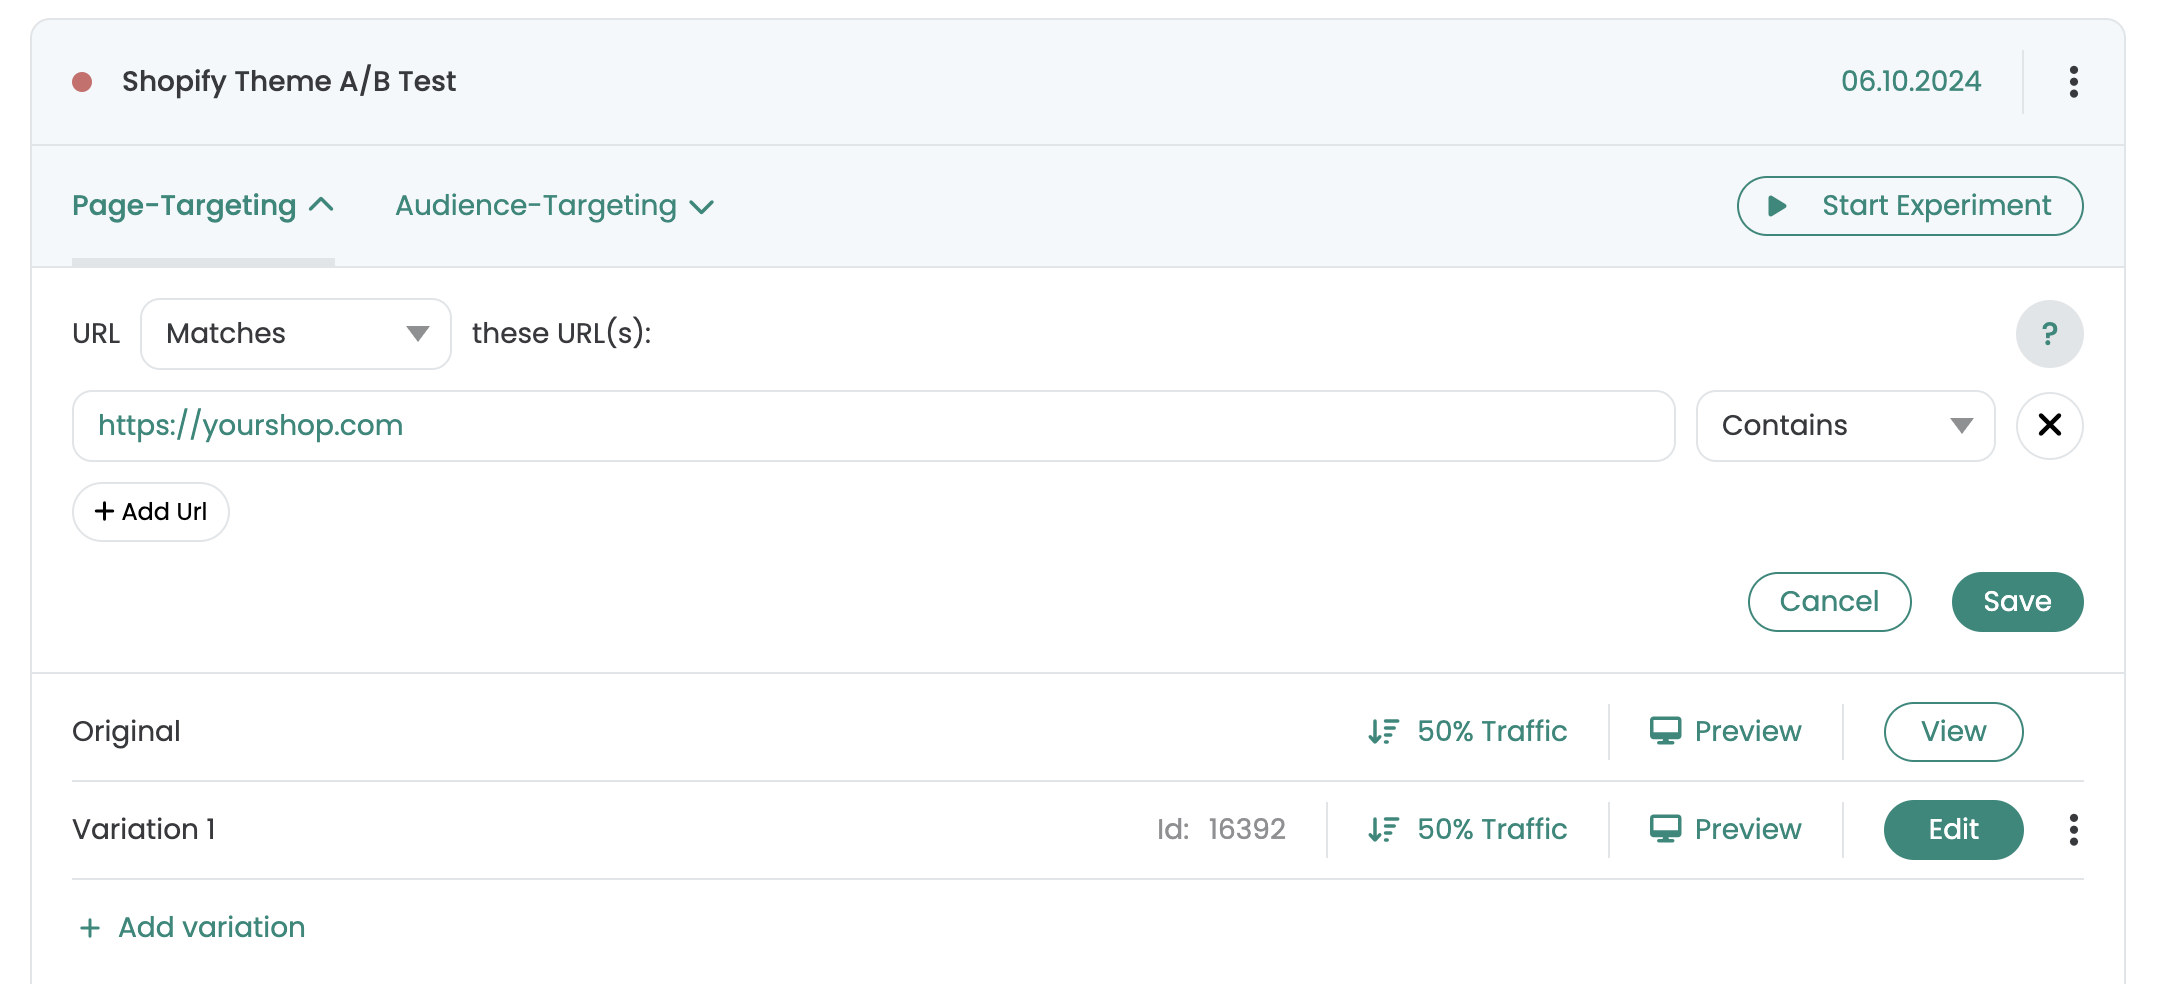
6. start the A/B test
Now start the experiment with "Start Experiment". In a few moments, the first visitors to your store will appear to be directed to the new theme. Varify.io® will now track how many users have purchased in the original and new theme. After some time you will recognize which theme performs better.
