Integration via Google Tag Manager - Server Side
Table of contents
In short
Server-side tracking with Google Tag Manager (Server GTM) enables reliable data collection by sending tracking data to a dedicated tracking server rather than processing it directly in the user's browser. This improves data quality, minimizes ad blocker restrictions and reduces website loading times.
In contrast to client-side tracking, server-side tracking offers more control over the collected data and increases data security. By using a data layer, A/B testing data can be forwarded precisely and used for detailed analyses in GA4.
This guide shows how GA4 and your A/B testing data can be efficiently collected via Server GTM and integrated into GA4.
Advantages of GA4 Server-Side Tracking
GA4 Server-Side Tracking offers numerous advantages over conventional Client-Side Tracking:
- Higher data quality - Fewer restrictions due to ad blockers and browser rules.
- More accurate attribution - More conversion data thanks to more reliable recording.
- Better data security - Encrypted transmission minimizes the risk of manipulation.
- Data protection & anonymization - Sensitive data can be anonymized before being passed on.
- Compliance with regulations - Full control over data storage and processing.
How to set up GA4 server-side tracking with Varify.io
Implementation of GA4 server-side tracking
To carry out the following steps, the following conditions must be met:
- You need a "normal" client-side Google Tag Manager container that is already integrated on the website.
- a Server-Side Google Tag Manager (Server GTM) must already exist. Without an existing server GTM instance, the implementation of GA4 Server-Side Tracking is not possible. If your company does not yet have an instance, the provider is Stape.io recommended. The setup does not take long and is described very simply.
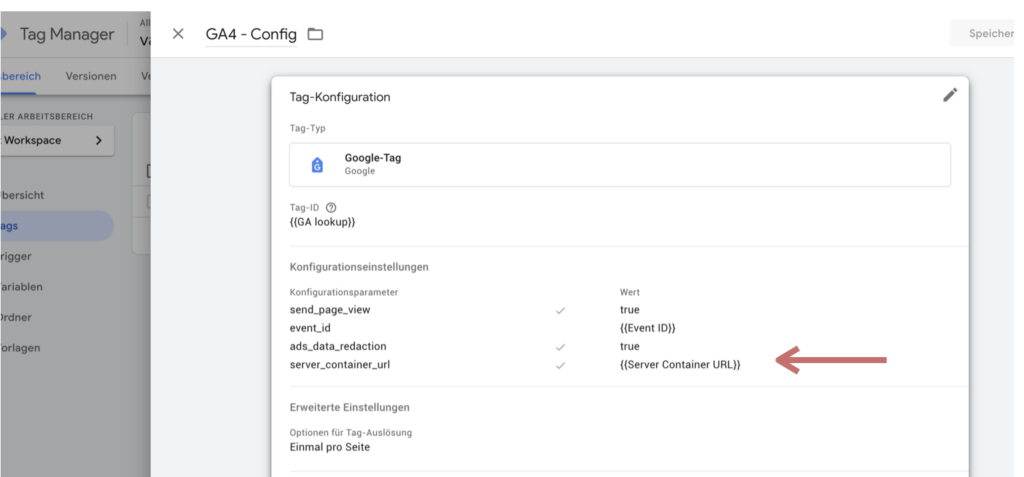
Step 1: Connect Google Analytics 4 to the GTM server
If GA4 is already in the Web GTM container is set up, it is sufficient to make the following adjustment:
- Add server container URL - Go to the Tag settings in GA4 and add the parameter server_container_url to your website.
- Enter tagging server URL - Enter the URL of your tagging server as the value.
This forwards the GA4 data to the server GTM. You can see a parameter in the screenshot, but you can also enter the URL directly.
Step 2: Create a client in the server GTM
Open your server GTM container and create a GA4 client. You only need to do this if this client does not yet exist.
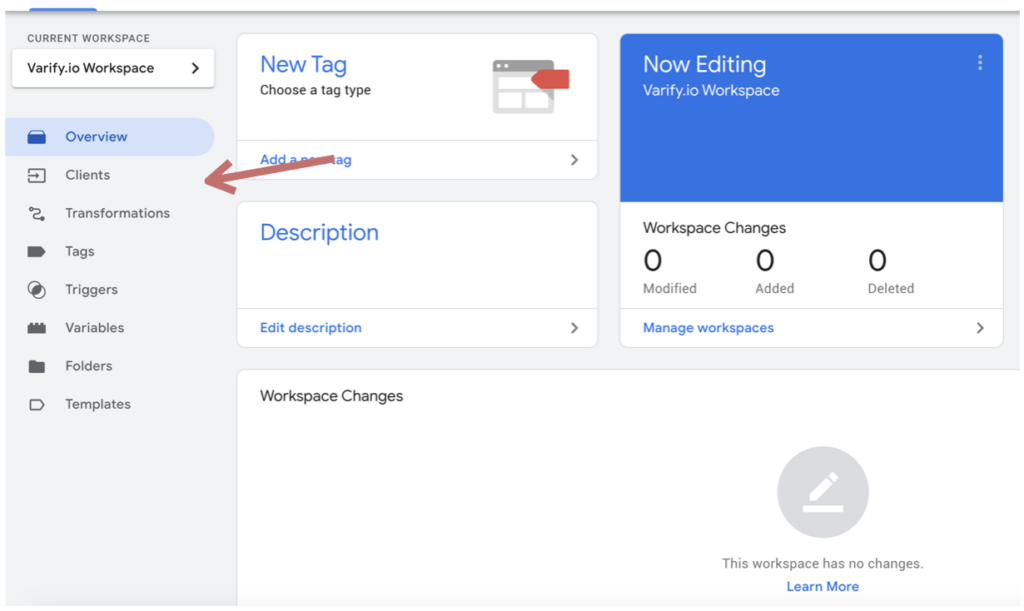
- Open clients area - In the server GTM container, navigate to the Clients-section.
- Create a new client - Click on Create a new client.
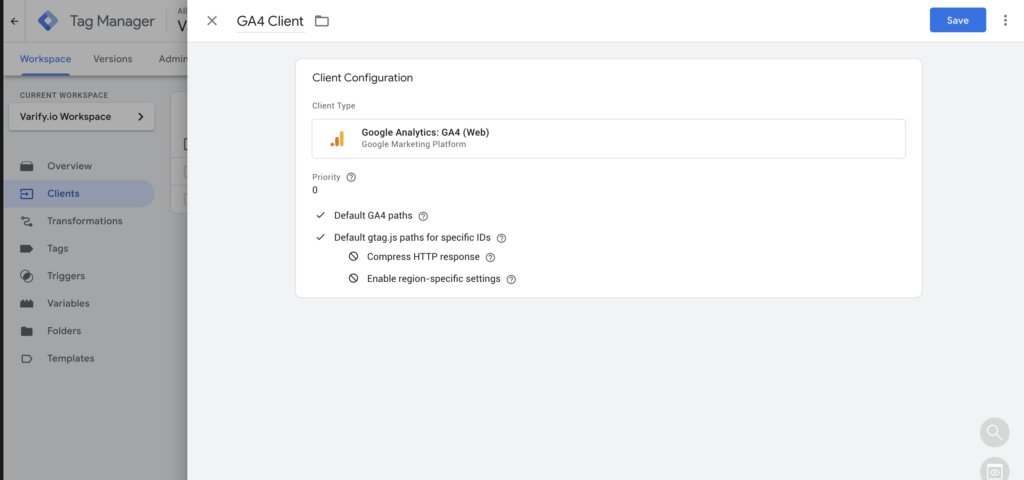
- Select client type - Choose Google Analytics: GA4 (Web) as client type.
- Name client - Enter a name for the client.
- Save - Click on Saveto complete the setup.
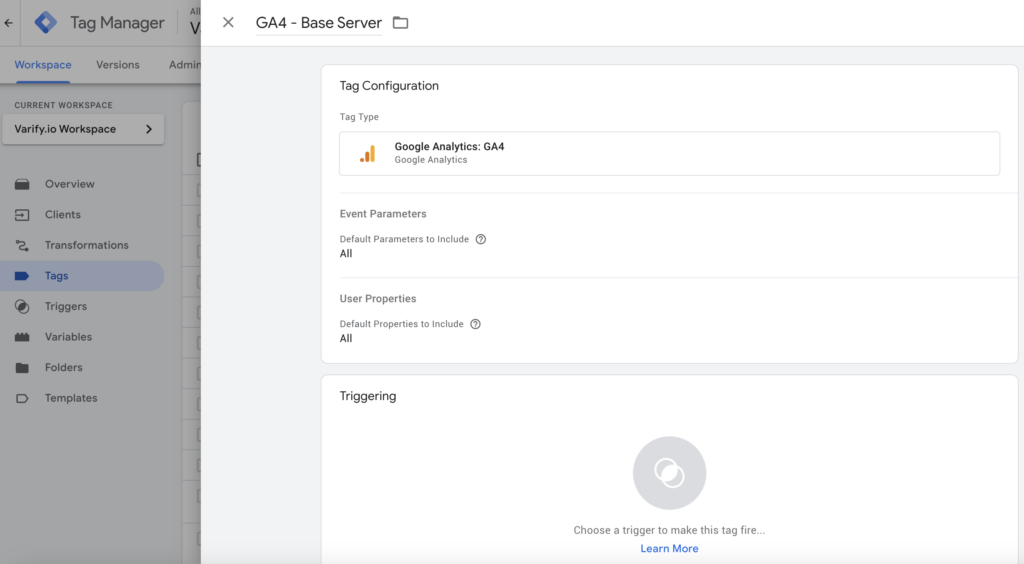
Step 3: Create GA4 tag in the server GTM container
- Create new tag - Open the Server GTM container and navigate to the Tags section.
- Select tag type - Click on New tag and select Google Analytics: GA4 as tag type.
- Finalize configuration - Adjust the settings as required and save the tag.
With this procedure, all GA4 data is processed by the server. For the A/B testing data, it is particularly important that the parameters are also included.
Step 4: Configure trigger for GA4 tag in server GTM
- Open triggering - In the GA4 tag created, click on Triggering.
- Create new trigger - Choose New trigger and set the Trigger type to User-defined.
- Set condition - Configure the trigger so that it is triggered when the Client name = GA4 (or the name you have chosen for the GA4 client).
- Save - Confirm the settings with Save.

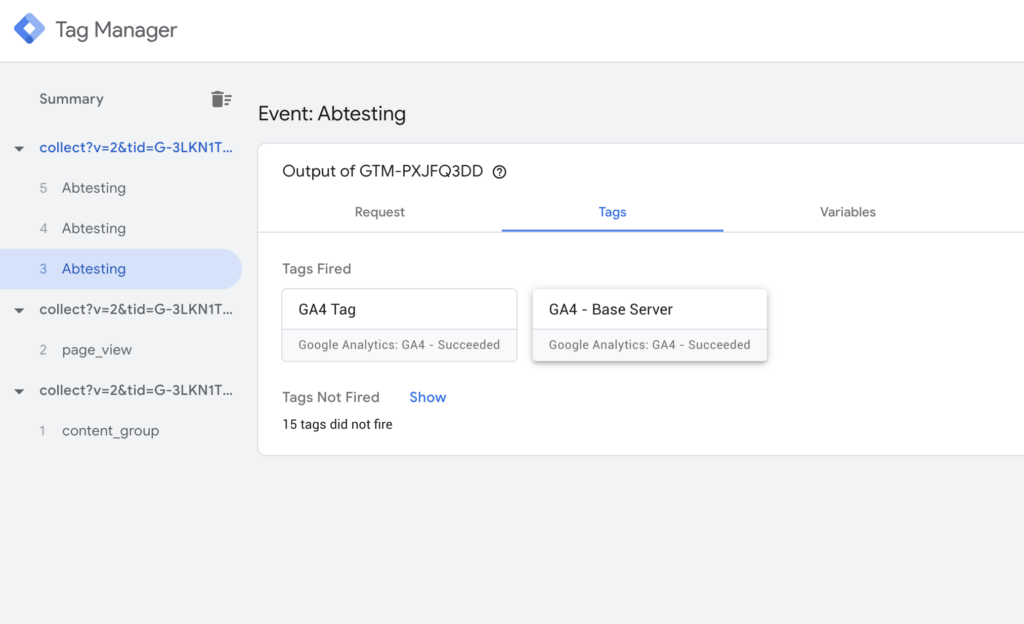
Step 5: Test and publish the setup
Activate debugging
- Open the Preview mode in the Web GTM and Server GTM. Ideally with a URL on which an A/B test is live.
- Check whether GA4 requests in the Server GTM debugger are recorded.
Troubleshooting
- Ensure that GA4 events are forwarded correctly.
- If no requests appear, check the Server container URL and the Trigger settings.
Publish changes
- If everything works, publish the updated Server and web GTM container. For A/B testing, the A/B testing events are particularly important and that the previously created GA4 tag fires.
Congratulations! You are now tracking your GA4 data and A/B tests on the server side.
Step 4: Using Google Tag Manager (optional)
If you use Google Tag Manager, you can also set up cross-domain tracking there:
Adjust tags:
- Open the Google Tag Manager and go to Tags.
- Select the GA4 configuration tag that is used on both domains.
- Go to the advanced settings and activate Automatic link tagging under Cross-domain tracking.
- Add the domains that are to be linked.
Check trigger:
- Make sure that your tags are configured so that they are triggered on all relevant pages (e.g. "All pages").
Activate preview mode:
- Test your setup in the Tag Manager preview mode. Navigate between the domains and check whether the
_gl-parameter is transferred correctly.
- Test your setup in the Tag Manager preview mode. Navigate between the domains and check whether the