Redirect & Split URL Testing
Table of contents
In short
With the redirect function, you can redirect incoming users from one or more pages to another page. If you use this function in an A/B test, you can carry out a “redirect test”. This allows you, for example, to test your current page against a new version of the page that is accessible via a different URL.
In principle, there are two methods available to you for carrying out a redirect test.
Method 1: Create redirect test in the editor
Step-by-Step Tutorial
Create a split URL test with Varify.io
This method is only suitable if you want to forward exactly one website to another website.
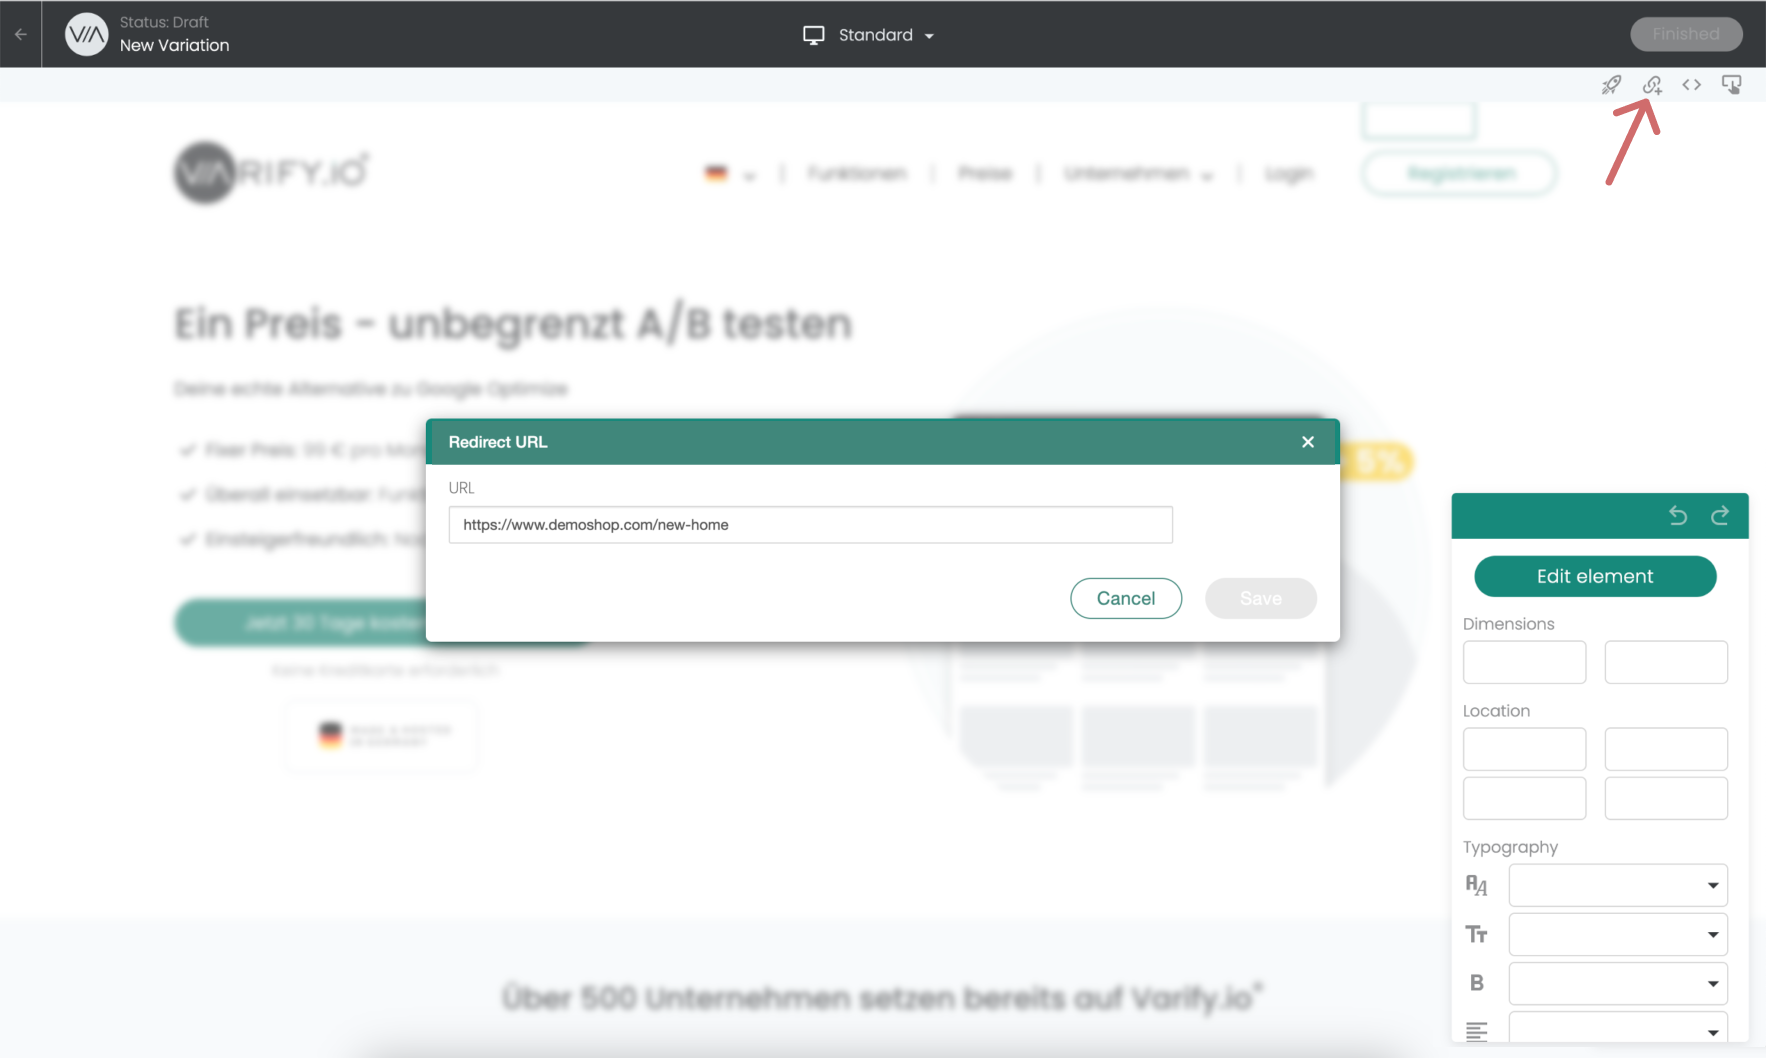
Create a new variant and click on the “Redirect URL” icon. Then enter the URL to which incoming users are to be redirected in the URL input field. When redirecting to the new target URL, existing URL parameters of the original URL called up are retained, such as UTM parameters, and are appended to the new redirect URL.
Important Notice: When entering the URL, be sure to enter the full, absolute URL.
-> "https://www.demoshop.com/new-home" and not "demoshop.com/new-home"
Contact us if you have any questions: https://varify.io/kontakt/
Method 2: Define redirect via JavaScript
You can use JavaScript for more complex redirects. However, it is important that you also append the va-red parameter including the correct experiment ID and variation ID to the URL so that tracking is also triggered on the target page and you measure the correct results. Here are two use cases for more complex experiments, including a tracking example:
Forwarding of each URL to itself - with additional URL parameter
Change the constants in the following code experimentId and variationId according to the values of your experiment and your variation. Also adjust the value of the constant needsViewParam by entering your desired URL parameter there.
Example:
Original page:
https://www.test.com/products/product1
https://www.test.com/products/product2
Variation:
https://www.test.com/products/product1?view=2
https://www.test.com/products/product2?view=2
					(function () {
  const experimentId = 21952;
  const variationId = 32490;
  const needsViewParam = 'view'; // <-- definiere hier den gewünschten Parameter-Namen

  function isInEditor() {
    const p = new URLSearchParams(location.search);
    return p.has('varify-variation-name') || p.has('varify-variation-id');
  }
  if (isInEditor()) return;

  const params = new URLSearchParams(window.location.search);
  const paramAsBase64 = btoa(`${experimentId}:${variationId}`).replace(/=/g, '');
  const needsView = params.get(needsViewParam) !== '2';
  const needsVa = params.get('va-red') !== paramAsBase64;

  if (needsView || needsVa) {
    params.set(needsViewParam, '2');
    params.set('va-red', paramAsBase64);

    const newUrl = `${window.location.origin}${window.location.pathname}?${params.toString()}${window.location.hash || ''}`;
    window.location.href = newUrl;
  }
})();
Important: To prevent the variant from falling into an endless loop, the page targeting still needs to be adjusted. You can find out how to do this here: Avoid endless loops in url split tests
Forwarding of all URLs to the same URL with additional sub-path
Change the constants in the following code experimentId and variationId according to the values of your experiment and your variation. Also adjust the value of the constant newPathSuffic by entering your desired subdirectory there.
Example:
Original page:
https://www.test.com/products/product1
https://www.test.com/products/product2
Variation:
https://www.test.com/products/product1/new
https://www.test.com/products/product2/new
…
					(function () {
  const experimentId = 21952;
  const variationId = 32490;
  const newPathSuffix = '/new'; // <-- ändere diesen Wert, um das neue Pfad-Suffix festzulegen

  function isInEditor() {
    const p = new URLSearchParams(location.search);
    return p.has('varify-variation-name') || p.has('varify-variation-id');
  }
  if (isInEditor()) return;

  const params = new URLSearchParams(location.search);
  const basePath = location.pathname.replace(/\/+$/, '');
  const endsWithNew = basePath.endsWith(newPathSuffix);

  const vaValue = btoa(`${experimentId}:${variationId}`).replace(/=/g, '');
  const hasVa = params.get('va-red') === vaValue;

  if (endsWithNew && hasVa) return;

  params.set('va-red', vaValue);

  const newPath = endsWithNew ? basePath : basePath + newPathSuffix;
  const newUrl = `${location.origin}${newPath}?${params.toString()}${location.hash || ''}`;

  location.href = newUrl;
})();
Forwarding of all URLs to the same URL with a different subdomain
Change the constants in the following code experimentId and variationId according to the values of your experiment and your variation.
Also adjust the value of the constant targetSubdomain by entering your desired subdomain there.
Example:
Original page:
https://www.test.com/products/product1
https://www.test.com/products/product2
Variation:
https://subdomain.test.com/products/product1
https://subdomain.test.com/products/product2
…
					(function () {
  const experimentId = 21952;
  const variationId = 32490;
  const targetSubdomain = 'subdomain'; // <-- configure your subdomain here

  function isInEditor() {
    const p = new URLSearchParams(location.search);
    return p.has('varify-variation-name') || p.has('varify-variation-id');
  }
  if (isInEditor()) return;

  const params = new URLSearchParams(window.location.search);
  const paramAsBase64 = btoa(experimentId + ':' + variationId).replace(/=/g, '');
  const needsVa = params.get('va-red') !== paramAsBase64;

  const hostNoWww = location.hostname.replace(/^www\./, '');
  const parts = hostNoWww.split('.');
  const registrable = parts.length >= 2 ? parts.slice(-2).join('.') : hostNoWww;
  const targetHost = targetSubdomain + '.' + registrable;
  const needsHost = location.hostname !== targetHost;

  if (needsVa || needsHost) {
    params.set('va-red', paramAsBase64);
    params.delete('view');
    const port = location.port ? ':' + location.port : '';
    const newUrl =
      location.protocol + '//' + (needsHost ? targetHost : location.hostname) + port +
      location.pathname +
      (params.toString() ? ('?' + params.toString()) : '') +
      (location.hash || '');
    if (needsHost) {
      window.location.href = newUrl;
    } else {
      history.replaceState(null, '', newUrl);
    }
  }
})();
Set up page targeting
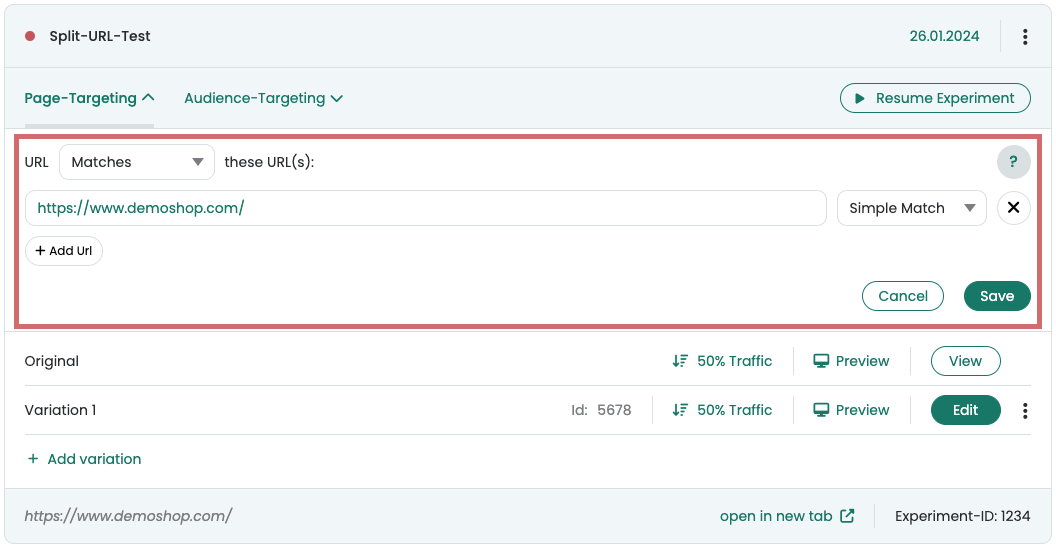
After you have created and saved the redirect URL in the visual editor, you can define the settings for the split test in the Varify.io dashboard.
- In Page Targeting, enter the URL on which your experiment should take place. This is the URL from which you want to redirect to the redirect URL. -> Do NOT enter the redirect URL!
- Set the matching type to "Simple Match"
- Set the desired traffic distribution for your variant
- Start the redirect experiment
Example: The screenshot shows the setting that 50% users who come to https://www.demoshop.com/ are now redirected to the URL that was previously entered in the created variant under Redirect URL.
Before starting the experiment, check whether the forwarding works correctly and does not create any endless loops.
Redirect variant creates an infinite loop
Under certain circumstances, page targeting can create an endless loop for redirected users. However, this will not happen if your newly created page has its own URL.
For example, if your redirect URL only contains one additional parameter to the original URL:
Original: https://www.demoshop.com
Redirect: https://www.demoshop.com?page=newlp
You can find out how to easily solve the problem here: Avoid endless loops in url split tests
Evaluation of the split URL test
Evaluation in Varify.io
With the Varify.io Google Analytics 4 Connection, you can easily display your results directly in your Varify.io dashboard. You can find out how to do this here: To the result evaluation in Varify.io
Evaluation in GA4
You can analyze the data of the variations of your A/B test in GA4 with the Explorative Data Analysis. You can find more information here: To evaluate the results in GA4