
Test Shopify themes with Varify.io
Table of contents
In short
Use the „Shopify Theme Preview“ feature to easily A/B test a new Shopify theme against your old one with Varify.io. To do this, create a new experiment and use the provided JavaScript code. Customize it with your new theme ID and test the new theme before switching over your store.
Only use theme tests if you really want to test a new theme. We generally recommend making changes with the Varify visual editor or with JSS and/or CSS changes. We do not guarantee the functionality of the code provided and the functionalities of Shopify. A thorough QA is absolutely necessary for a theme test.
Why test Shopify themes
A new Shopify theme should be A/B tested before switching to ensure that it does not degrade store performance. Changes in design can affect customer behavior and KPIs such as conversion rate. A/B testing enables a data-supported check as to whether the new theme delivers better or worse results.
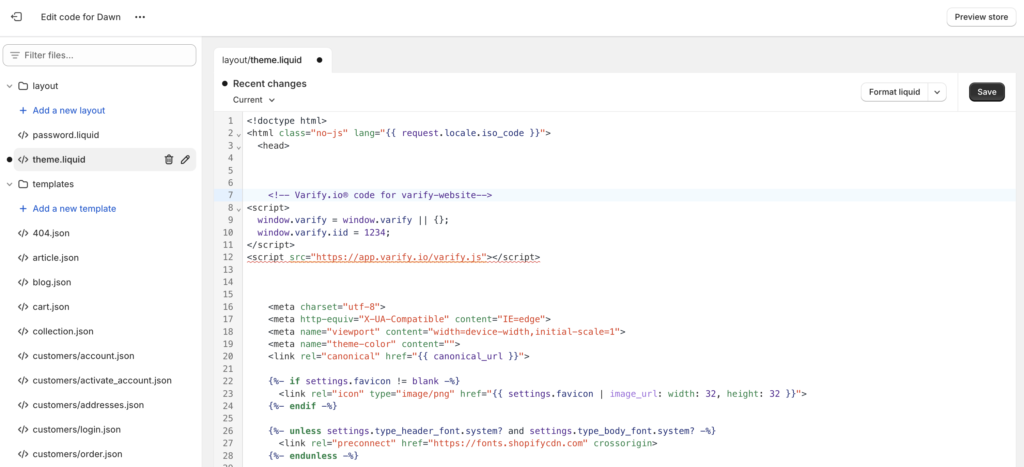
Step 1: Insert Varify.io snippet into the theme.liquid file
💡Note: We recommend integrating the Varify snippet via the themes.liquid file for testing themes. Step 1 only needs to be carried out if the Varify snippet is not yet installed on your site.
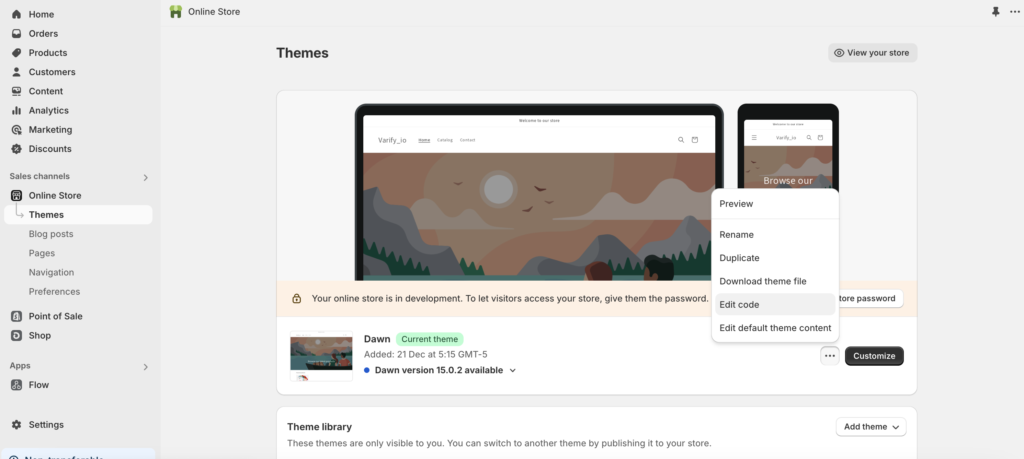
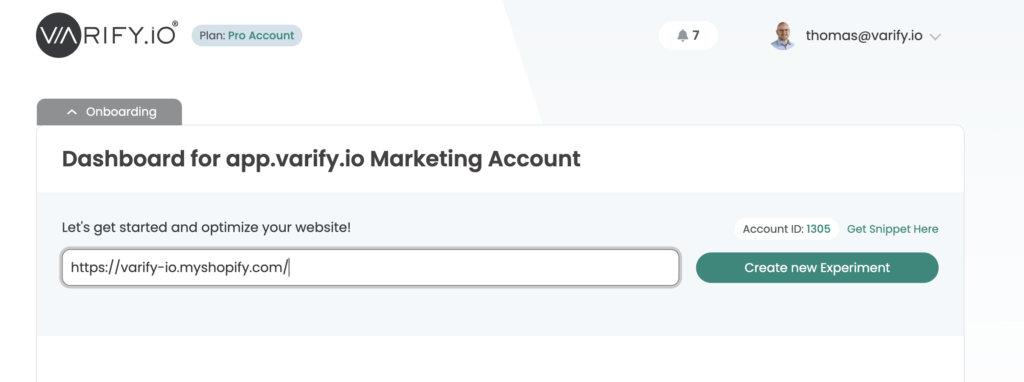
Copy the Varify.io snippet from the dashboard and paste it as high up as possible in the theme.liquid file of your store. To do this, go to "Online Store"-> "Themes" in the Shopify backend and click on "edit code"
Step 2: Find the theme ID of the new theme you want to test
We need the theme ID to tell Shopify which theme the test participants should see. Here is a step-by-step guide on how to find the theme ID from the preview link:
1. go to: Sales Channels > Online Store > Themes > Theme Library.
2. search for the theme you want to test.
3. click on the three dots (Actions)
4. Click „Preview“ and copy the link.
Your preview link will look something like this: https://deinshop.myshopify.com/?preview_theme_id=1234567890
The number at the end of the link (1234567890) is the theme ID you need.
Now do the same for your current theme and copy the theme ID here too.
Step 3: Create experiment
Create a new experiment. Simply enter the homepage of your store as the editor URL in the Varify dashboard. Then click on "Add JS" and add the following JavaScript to the experiment.
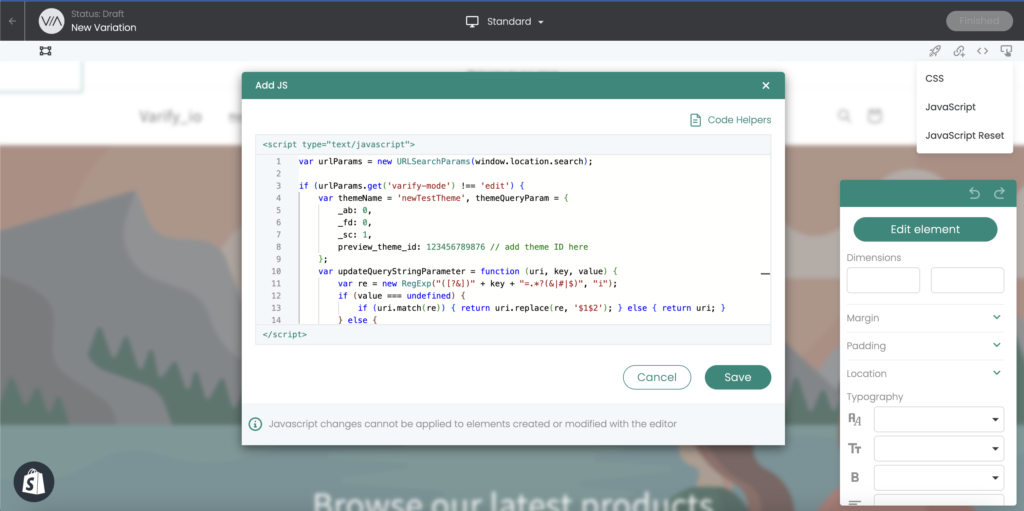
💡Note: Enter the theme ID of your currently used theme in line 6 and the theme ID to be tested in line 17.
					// Add the experimentId and variationId of your Experiment in order to track your Experiment correctly
const experimentId = 21952;
const variationId = 32490;
// Add your original theme id here
window.varify.helpers.waitFor(
  '[data-theme-instance-id="148175061290"]',
  (themeElement) => {
    // …then run your redirect logic.
    (function () {
      const url = new URL(window.location.href);
      const params = url.searchParams;
      const shadow = document.querySelector('div#varify-shadow-root');

      // only redirect when the variation-param is missing AND the shadow-root isn't present
      if (!params.has('pb') && !shadow) {
      // Add your preview theme id here
        params.set('preview_theme_id', '177143382392');
        params.set('pb', '0');   // hide the preview bar
        const paramAsBase64 = window
          .btoa(`${experimentId}:${variationId}`)
          .replace(/=/g, '');
        params.append(
          'va-red',
          paramAsBase64,
        );
        // replace so you don't add a new history entry
        window.location.replace(url.toString());
      } else {
        console.log('Redirect skipped:', {
          hasVarifyVariation: params.has('varify-variation-id'),
          varifyShadowRootExists: !!shadow
        });
      }
    })();
  }
);
Once you've updated the code snippet with the new theme IDs, click „Finished“ and give the experiment a suitable name. Then, open „Page Targeting“ in the experiment and change the „Match Type“ from „Simple Match“ to „Contains.“ Then click „Save Page Targeting.“.

Once you or a visitor has seen the test version, they will continue to see the preview version even after the experiment has been completed. So that you can also see the original theme again in the original variant, create a new variant with the name "New Original". Then click on "Add JS" in the visual editor and insert the following JavaScript code and replace the data-theme-instance-id with the preview theme ID of the Shopify theme you want to test.
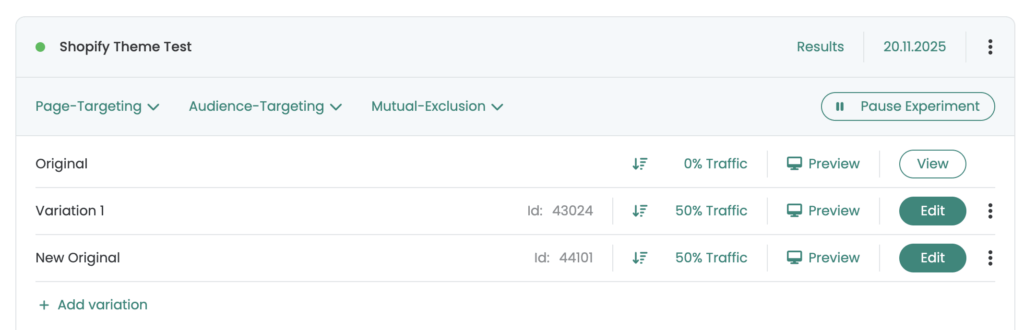
					// Add your correct preview theme ID here
window.varify.helpers.waitFor(
  '[data-theme-instance-id="167804502324"]',
  (themeElement) => {
    let currentUrl = window.location.href;

    if (!currentUrl.includes('varify-variation-id')) {
        if (currentUrl.includes('?')) {
            currentUrl += '&exitPreview=1';
        } else {
            currentUrl += '?exitPreview=1';
        }

        window.location.href = currentUrl;
    }
  }
);
Step 4: Targeting and quality assurance
Once you have implemented the JavaScript and saved the experiment, you can save your store URL in the page targeting of the experiment. You can also use the "Preview" links to check whether the redirect works and whether all settings have been made correctly. To do this, simply search for the corresponding theme ID in the store code. Either the original theme ID or the preview theme ID should be found in the test version.
Step 5: Start the experiment
Now start the experiment with "Start Experiment". From now on, 50% of your visitors will be directed to the new theme and 50% will continue to see the old theme. The visitors always remain assigned to the same variant for the duration of the experiment. This means that the theme they have seen once, they will see again during the experiment. After some time, you will recognize which theme performs better.
Step 6: Resetting the preview mode after ending the experiment
Once your users have seen the preview theme variant, they will continue to see it even after the experiment has ended. You can start a "Clean Up" experiment so that users can see your original theme again. Simply create a new experiment and insert the JavaScript code of the "New Original" variant (see above) under "Add JS". Save the experiment under a name of your choice. Set the traffic allocation to 100% variant and start the experiment.
The preview mode is now ended for all previous test participants who have seen the variant. Please check the functionality of the code before you start the experiment, as in the previous steps.