WordPress Redirect & Split URL Testing
Table of contents
In short
With WordPress, you can create and optimize new versions of websites very quickly using page builders. To check whether these optimizations work better on the new page than on the existing version, you can use a redirect test. To do this, you duplicate an existing page, make the adjustments directly with a page builder in WordPress and redirect some of the users from the old page to the optimized page via the redirect test.
In the following example, we use "Elementor" as the page builder.
Step-by-Step Tutorial
Create a split URL test with Varify.io
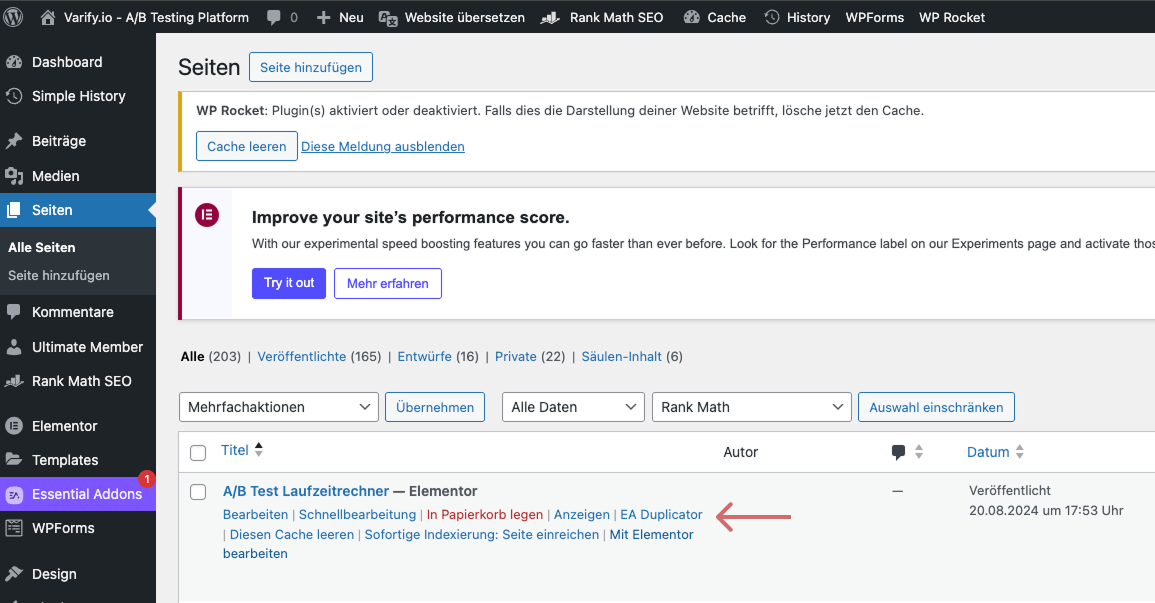
Duplicate WordPress page/post
Duplicate the page or post you want to customize - the easiest way to do this is with the "Essential Addons for Elementor" plugin.
This is how it works:
Search for the relevant page or post in the corresponding overview in the WordPress backend.
Click on "EA Duplicator" - the plugin automatically creates a copy. (Alternatively, you can of course create a completely new page without duplicating it)
Edit and optimize the copy according to your ideas
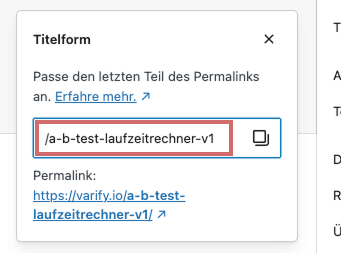
Edit URL and content of the duplicated page/post
The duplicate is usually saved as a draft. Therefore, adapt the URL first - for example, by simply adding "/new-home" to the original URL. This new URL will be used later in the redirect test to redirect some of the users to the customized page.
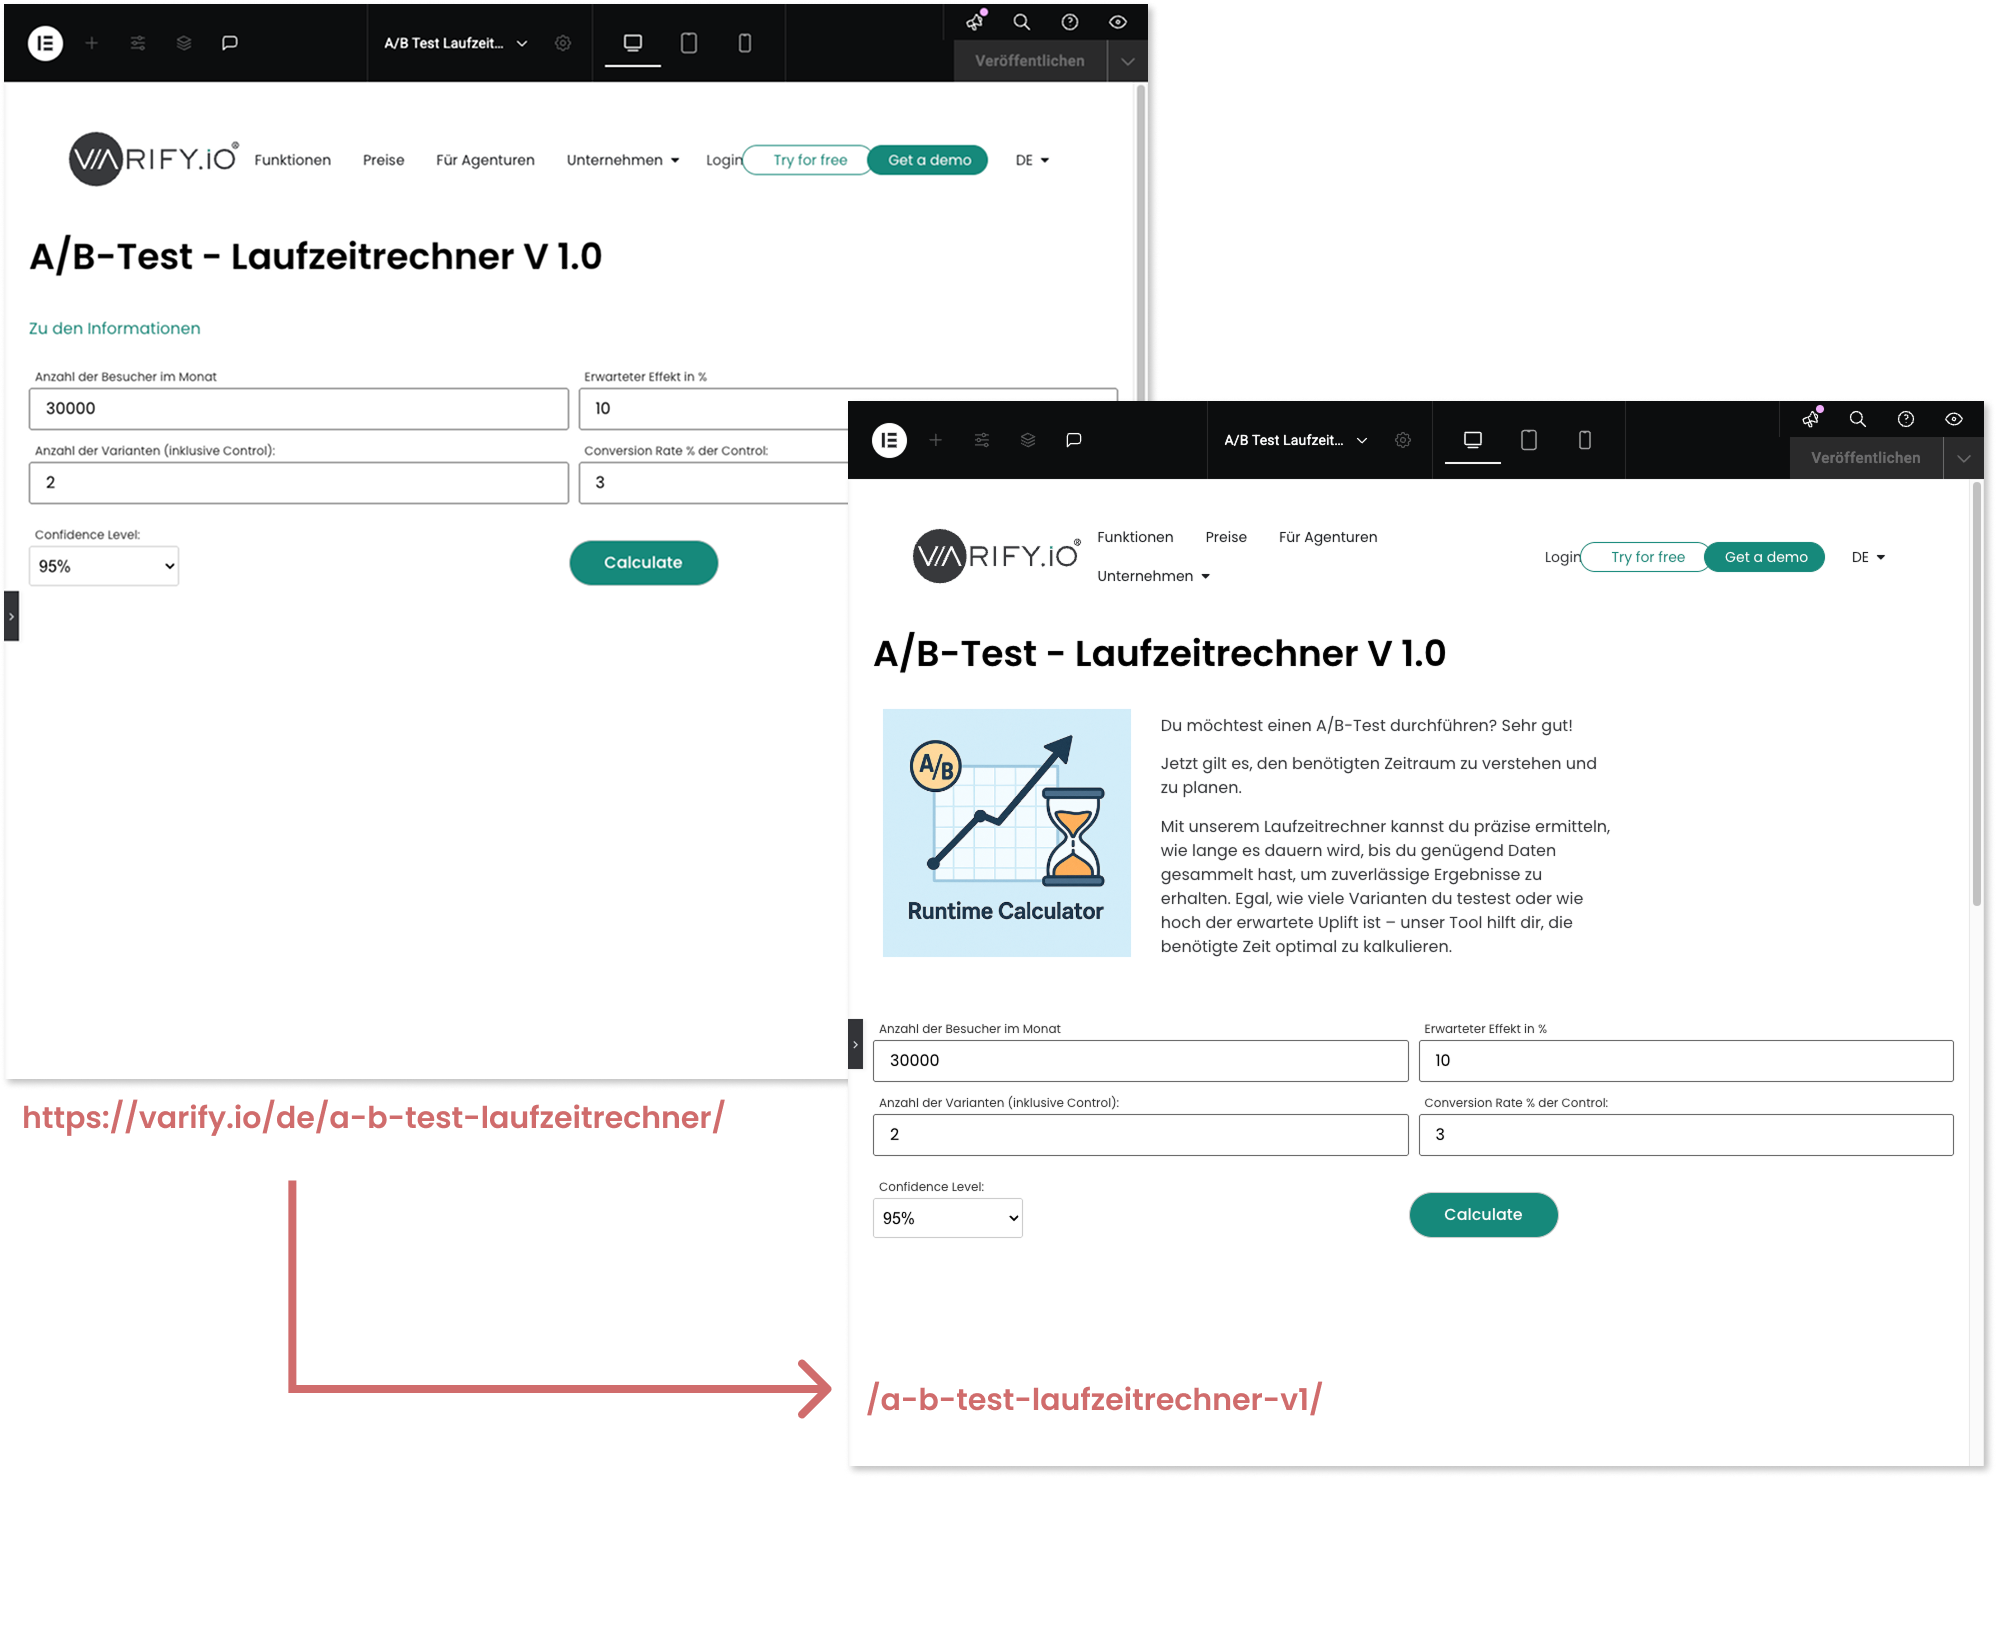
Now make the desired changes in Elementor. Save your adjustments and publish the page as soon as you are finished.
As you can see from the example below, changes have been made to the duplicated page.
Create redirect experiment
Create a new experiment in Varify. Go to the Varify Dashboard and enter the corresponding original website as "Editor URL" and click on "Create new Experiment". Then click on the "Redirect URL" icon. In the input field, enter the target URL of your website to be tested, to which incoming users should be redirected.
Important Notice:
When entering the URL, be sure to enter the full, absolute URL.
-> “https://www.demoshop.com/new-home" and not "demoshop.com/new-home".
Contact us if you have any questions: https://varify.io/kontakt/

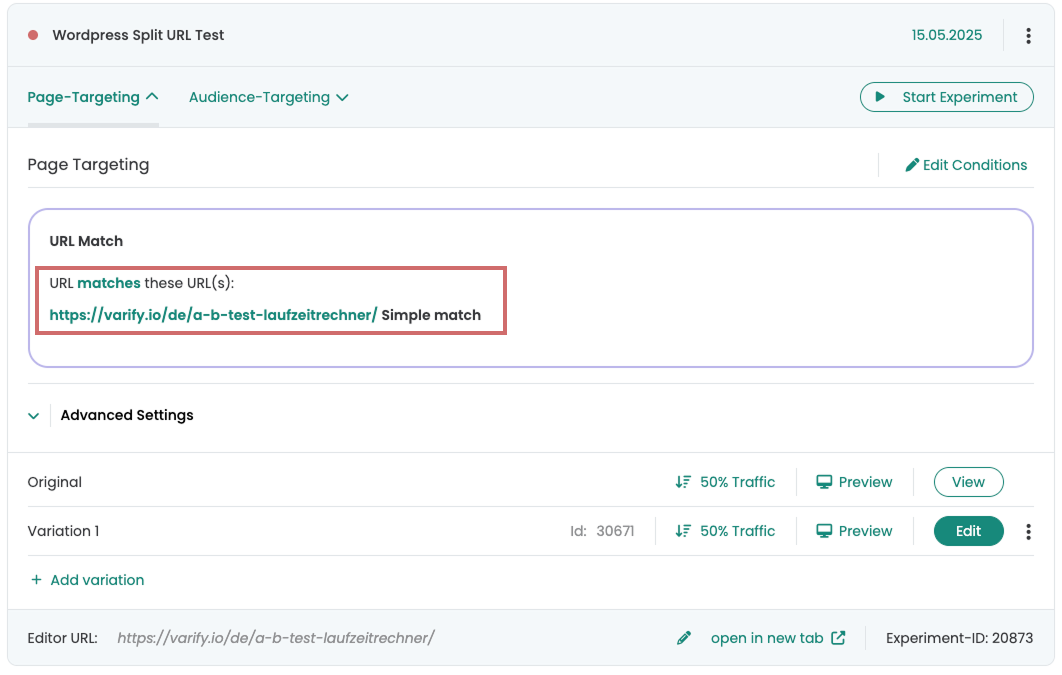
Set up page targeting
After you have created and saved the redirect URL in the visual editor, you can define the settings for the split test in the Varify.io dashboard.
- Page targeting is already set correctly by default. Please enter here do not enter the redirect URL!
- Set the desired traffic distribution for your variant (ideally 50/50)
- Start the redirect experiment
Evaluation of the split URL test
Evaluation in Varify.io
With the Varify.io Google Analytics 4 Connection, you can easily display your results directly in your Varify.io dashboard. You can find out how to do this here: To the result evaluation in Varify.io
Evaluation in Google Analytics 4
You can analyze the data of the variations of your A/B test in GA4 with the Explorative Data Analysis. You can find more information here: To evaluate the results in GA4