Chrome browser extension
Table of contents
In short
With the Varify Chrome extension, you can use the Varify Editor locally, even if the code snippet is not directly integrated into your page. It also allows you to check whether your script has been implemented correctly. The Responsive Device Switcher is also available to you, even if it is blocked by default on your website. In addition, the extension shows all active experiments and offers you the opportunity to switch effortlessly between the Variants of an experiment to change.
Step-by-Step Tutorial
Varify.io Chrome extension
Installing the Chrome extension
- Download the extension:
- Download the Varify.io Chrome extension.
- You can find the extension under: Varify.io Chrome Extension
- Installation and activation in Chrome:
- Click on "Add" to install the extension.
- Activate the extension after installation.
- Add them to your extension bar in Chrome
Functions of the Varify.io Chrome extension
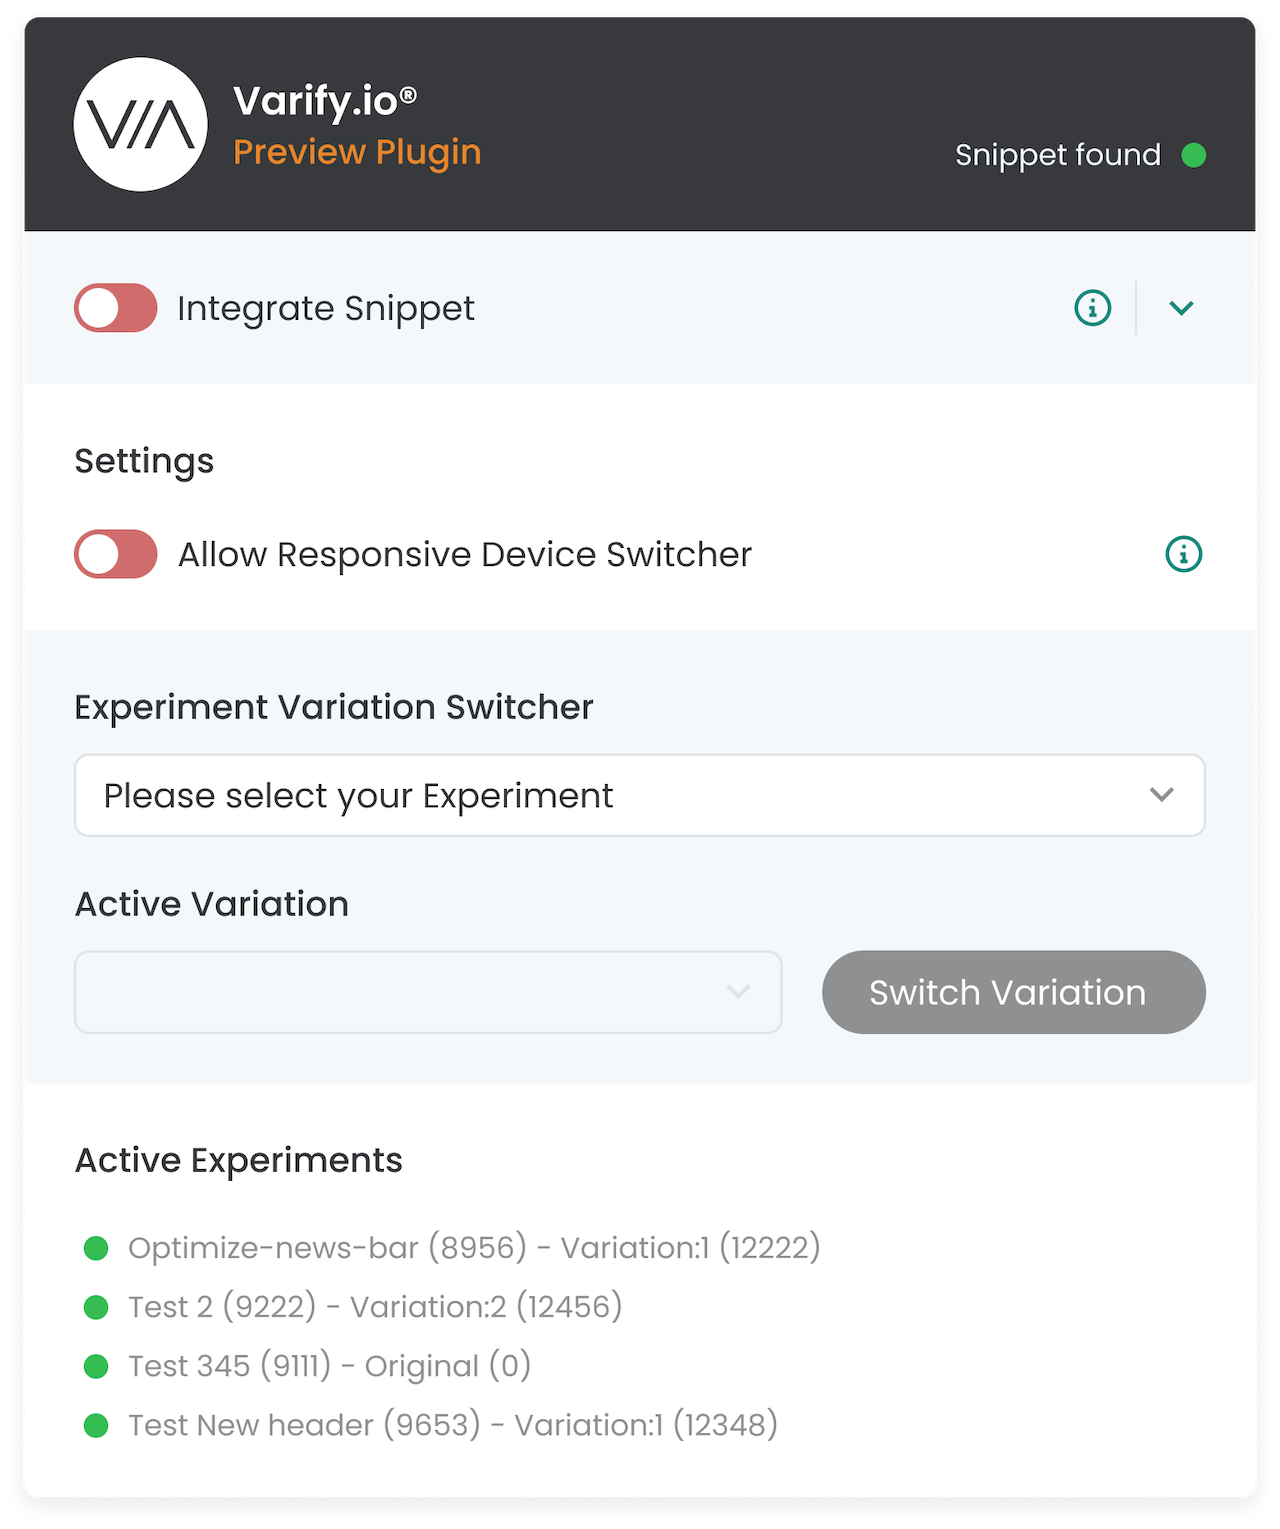
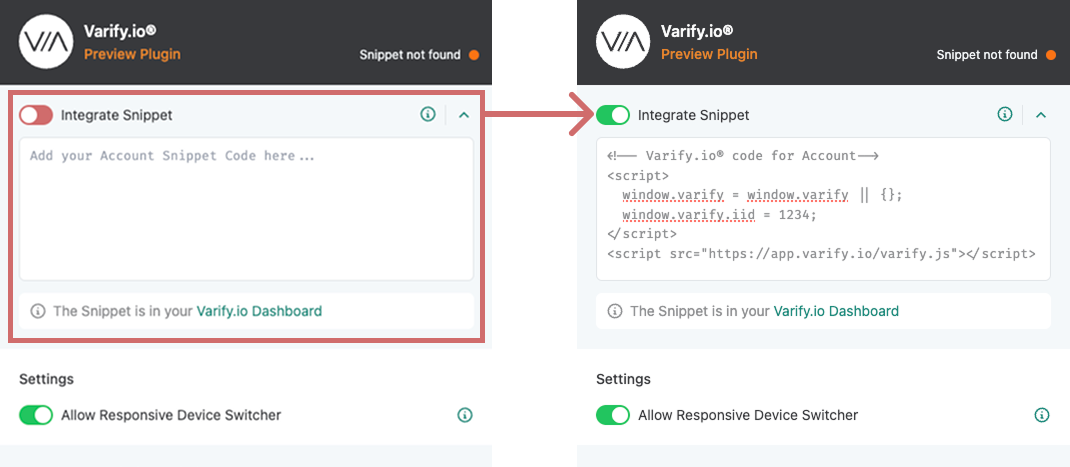
Local integration of the Varify snippet
With the Varify Chrome extension, you can run the Varify code snippet only locally in your browser to test the editor and the functions of Varify.
This is how it works:
- Open the Varify dashboard and search for "Get Snippet Here".
- Copy the Varify snippet displayed there.
- Open the Varify.io Chrome extension.
- Paste the copied snippet into the "Your Snippet Code" field within the extension.
- Activate the toggle switch "Integrate Snippet" to execute the snippet only in your browser.
❗️Important: This version only applies to your browser and is not visible to other users. As soon as the Varify snippet directly into the website has been integrated, you should use the Deactivate toggle switch againto avoid duplicate implementations.
Example 1: Test Varify Editor
You can try out the Varify Editor without integrating the snippet directly into your website. This allows you to familiarize yourself with the functions and test initial changes.
Example 2: Creating initial test experiments
Set up initial experiments and only display them in your own browser. This way you can check how changes look before you permanently integrate the snippet into the website.
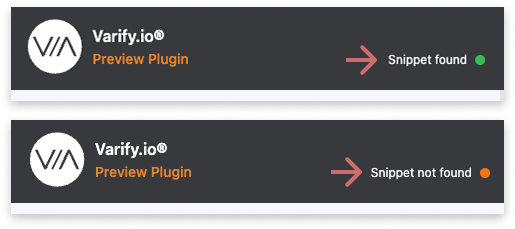
Check code snippet integration
In the upper right area of the Varify Chrome extension, you can see at a glance whether the Varify code snippet is already integrated into the website code.
❗️Wichtig: This is about the integration directly in the website code, not the snippet that you inserted via the Chrome extension.
🟢 Green dot & "Snippet found" → The snippet is successfully integrated into the website.
🟠 Orange dot & "Snippet not found" → The snippet was not found and still needs to be integrated.
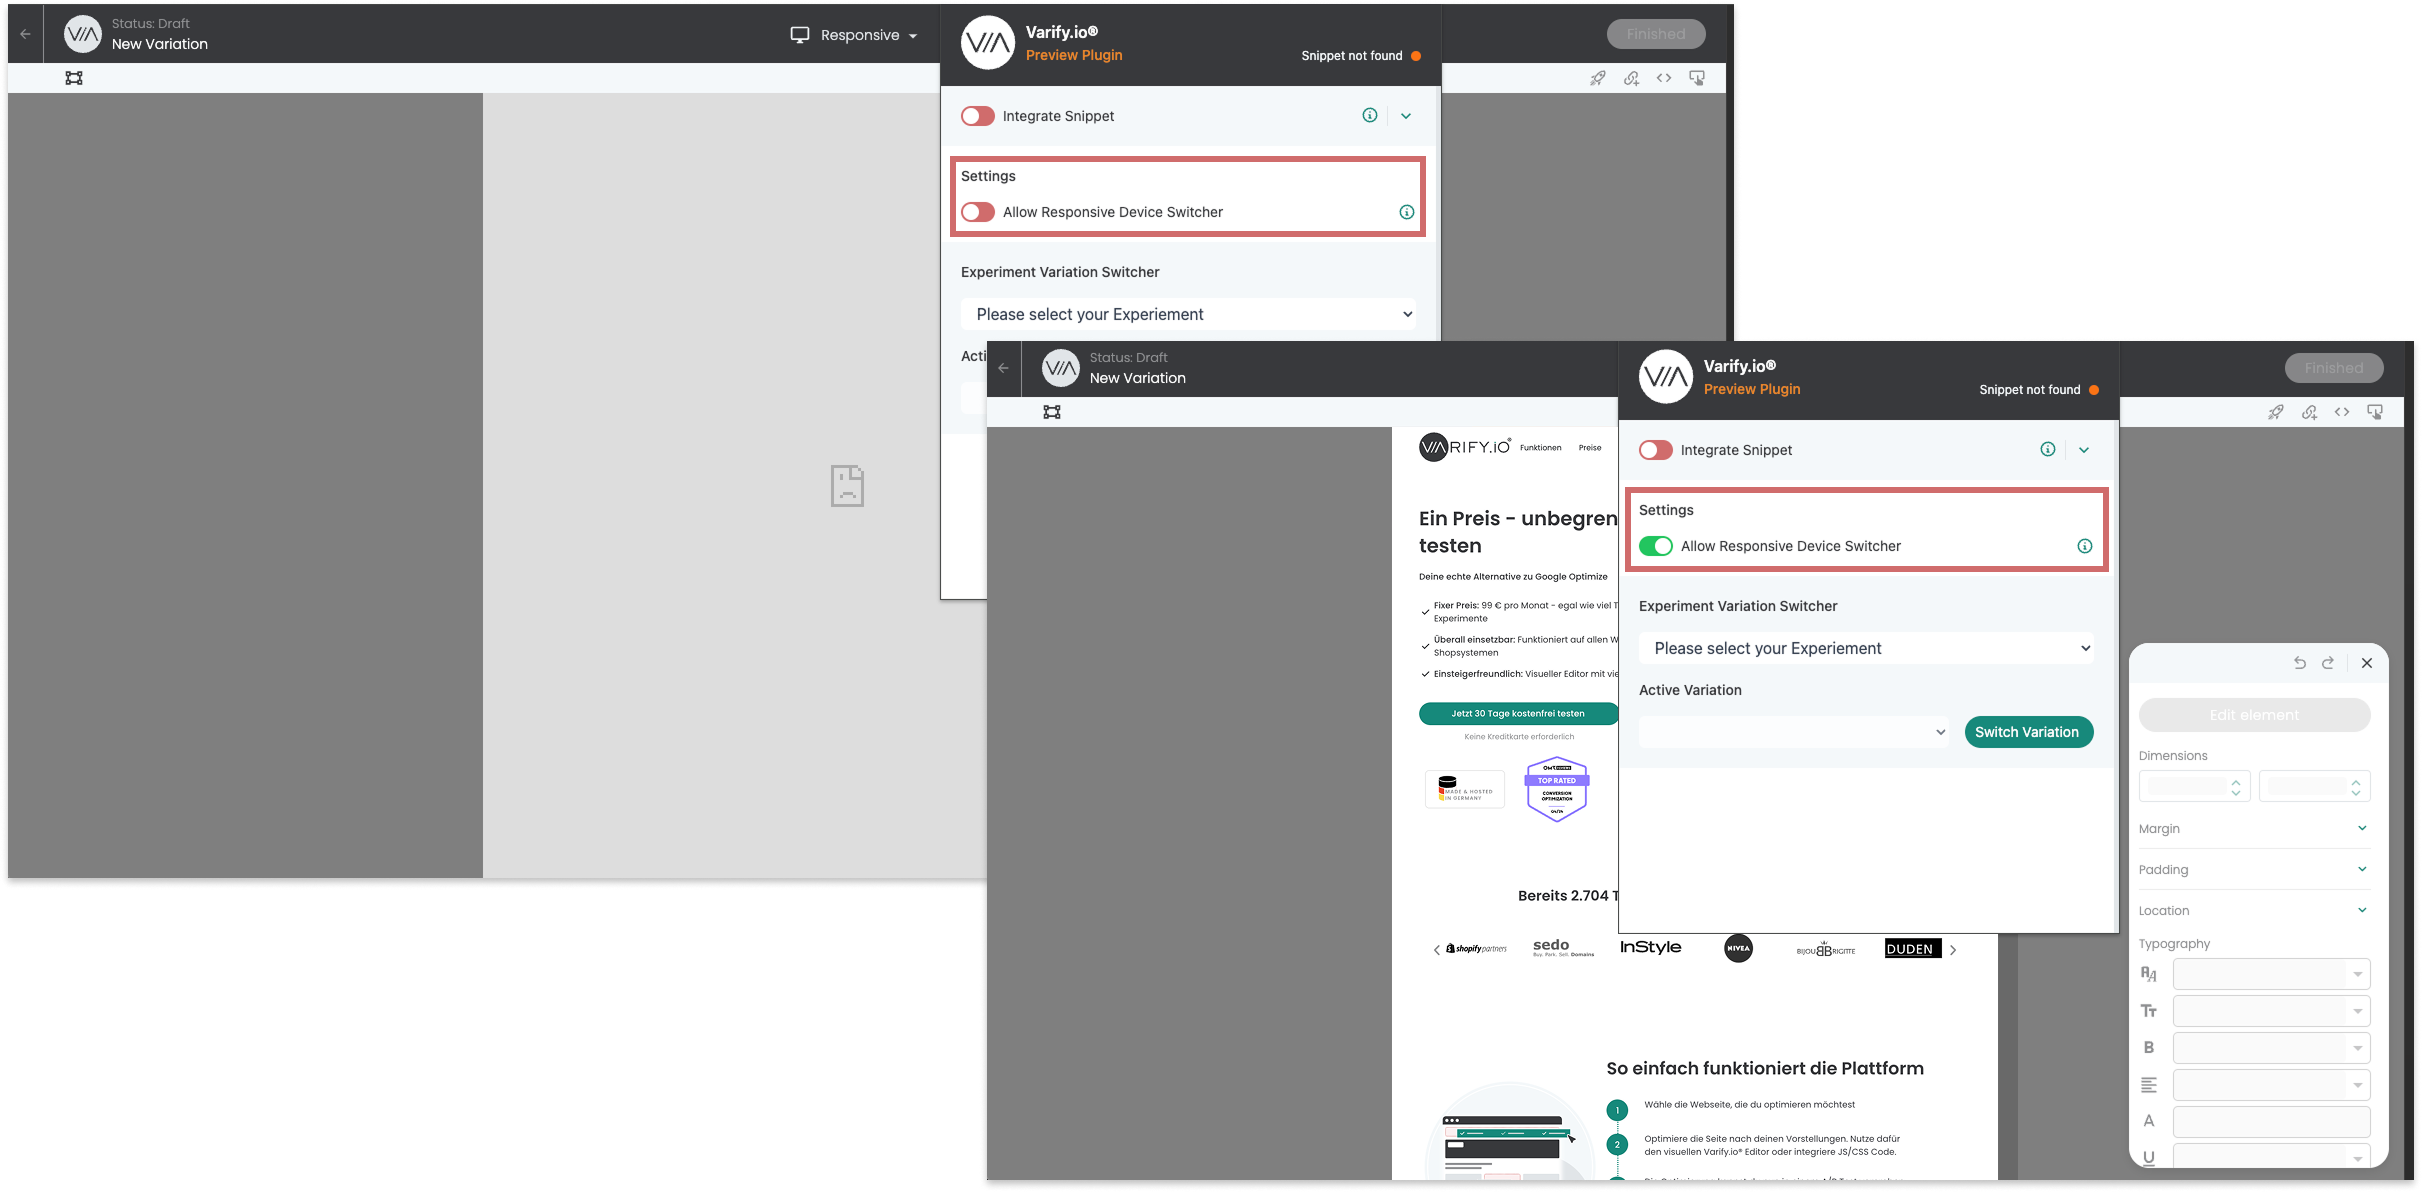
Bypassing problems with the Responsive Device Switcher
The "Responsive Device Switcher" in the visual editor allows you to display a website in different screen widths.
In some cases, framing restrictions may prevent the device switcher from loading the website. If this occurs, the Varify Chrome extension offers a simple solution:
- Activate the "Allow Responsive Device Switcher" switch in the Chrome extension.
- Reload the page.
Active experiments
Under "Active Experiments" you can see all active experiments on the page you are currently viewing. As well as the variant to which you are currently assigned
This allows you to quickly check whether the "Page Targeting" and "Audience Targeting" settings are correct and whether the experiment is being played out for you as intended.
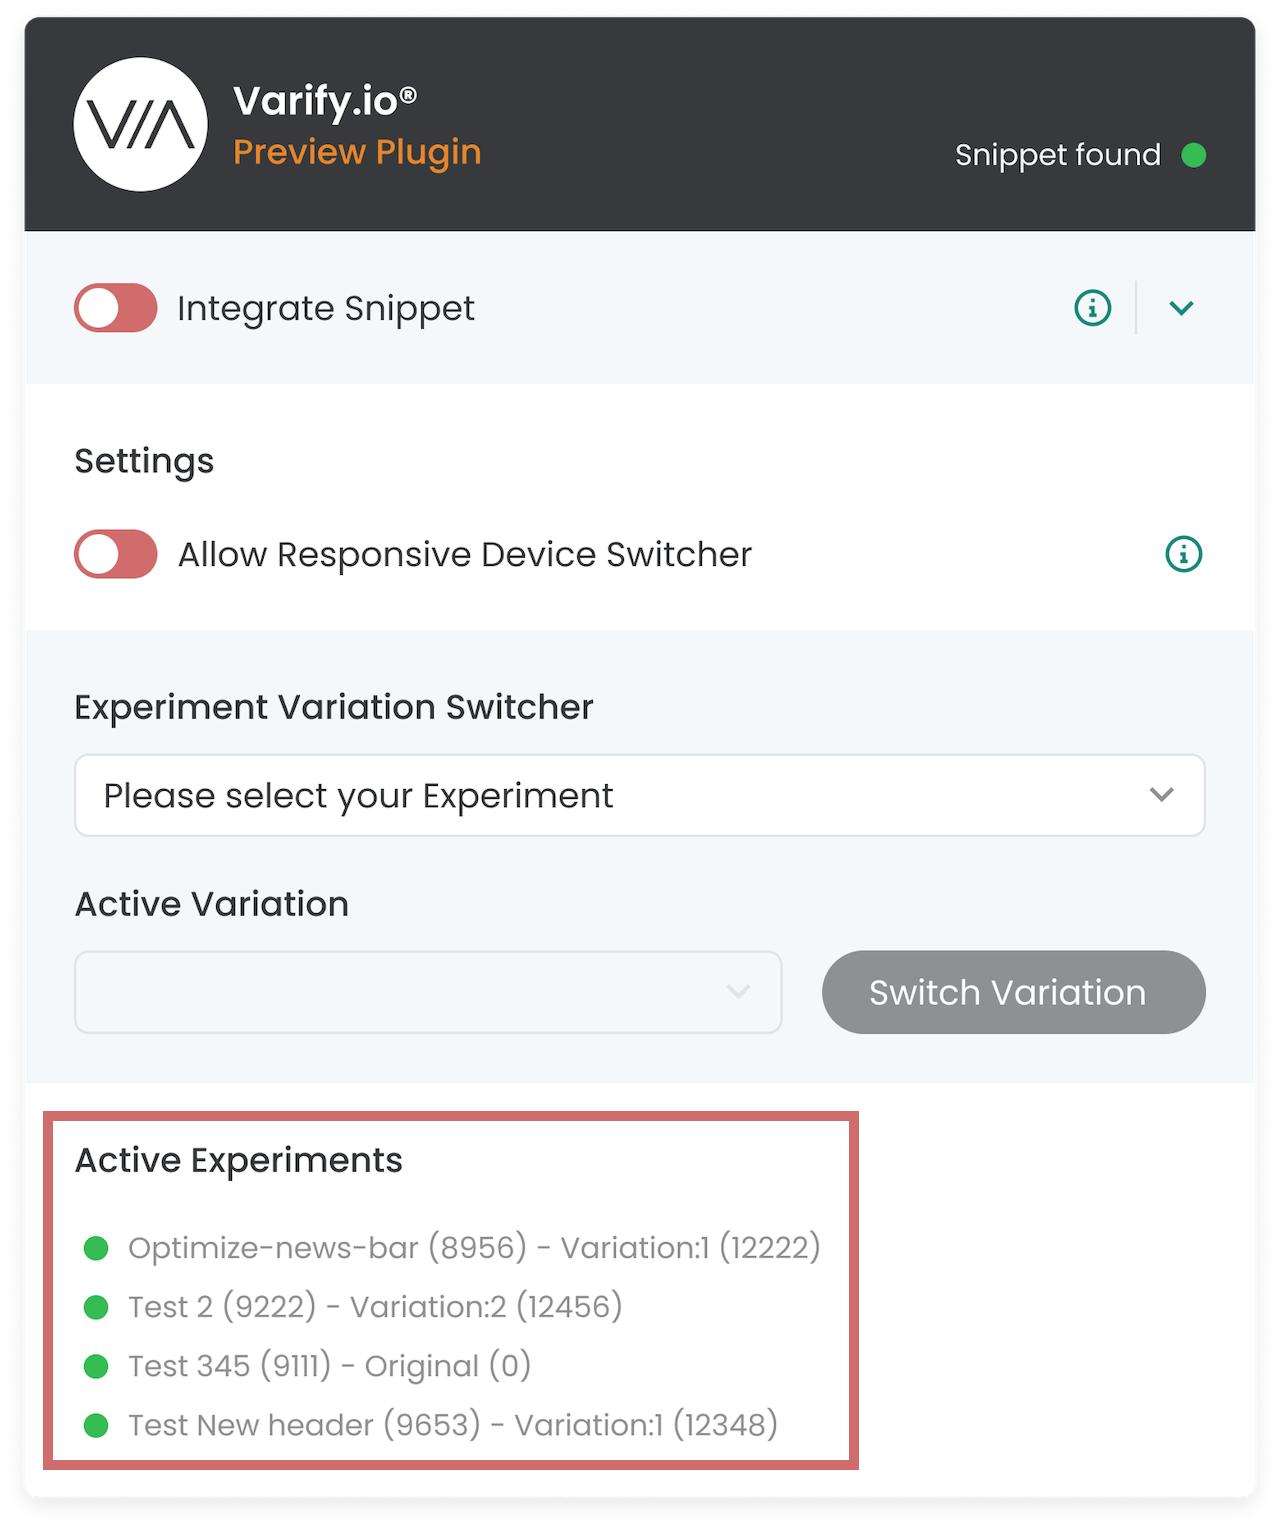
Experiment Variation Switcher
The Experiment Variation Switcher in the Varify Chrome extension allows you to change your assigned variation for the experiments played on the page.
This is how it works:
- The dropdown under "Experiment Variation Switcher" lists all active experiments on the page. Select the experiment for which you want to change the variation.
- The currently active variation is displayed in the dropdown under "Active Variation". Select the variation you want to switch to here.
- Click on "Switch Variation" to change them.
💡TIP: This function is particularly useful for Quality assuranceas you can switch between variants and check their display.
You can find out more here: A/B testing - quality assurance
