Varify® Snippet - Integration
Table of contents
In short
Embedding the Varify.io® snippet in your website or store systems can be done quickly. It's best to include the JavaScript snippet in the -tag of your web page to prevent page flickering. If necessary, you can also use a tag manager for integration.
If you're unable to immediately integrate the snippet, you can try out our Google Chrome extension .
Snippet implementation
Integration in the head tag of the website
If you want to integrate the Varify.io snippet on your website, it is important to place it as high up as possible on the page - ideally within the the head tag This ensures that the snippet loads correctly and without any delay.
There are two ways to implement the snippet: synchronous and asynchronous. Both have their own advantages and disadvantages. Here they are presented in a table:
Synchronous implementation
| Advantage | Disadvantage |
|---|---|
| Guarantees that the script is loaded before displaying the web page . | May increase the loading time of the web page if there are problems loading the script. |
| No page flickering | If the script does not load, the entire web page may not be displayed. |
How to integrate the Varify.io script synchronously
					<!-- Varify.io® code for YOUR ACCOUNT-->
<script>
  window.varify = window.varify || {};
  window.varify.iid = YOUR ACCOUNT ID;
</script>
<script src="https://app.varify.io/varify.js"></script>
Asynchronous implemenation
| Advantage | Disadvantage |
|---|---|
| Does not affect the loading time of the web page, because the web page is loaded in parallel. | There is a possibility that other scripts will be executed first, which may cause odd side effects. |
| The web page will continue to load even if there are problems loading the script. | Page flickering may occur |
Depending on the specific requirements and structure of your website, you decide which implementation method is best for you.
How to integrate the Varify.io script asynchronously
					<!-- Varify.io® code for YOUR ACCOUNT-->
<script>
  window.varify = window.varify || {};
  window.varify.iid = YOUR ACCOUNT ID;
</script>
<script async src="https://app.varify.io/varify.js"></script>
Integration via the Tag Manager
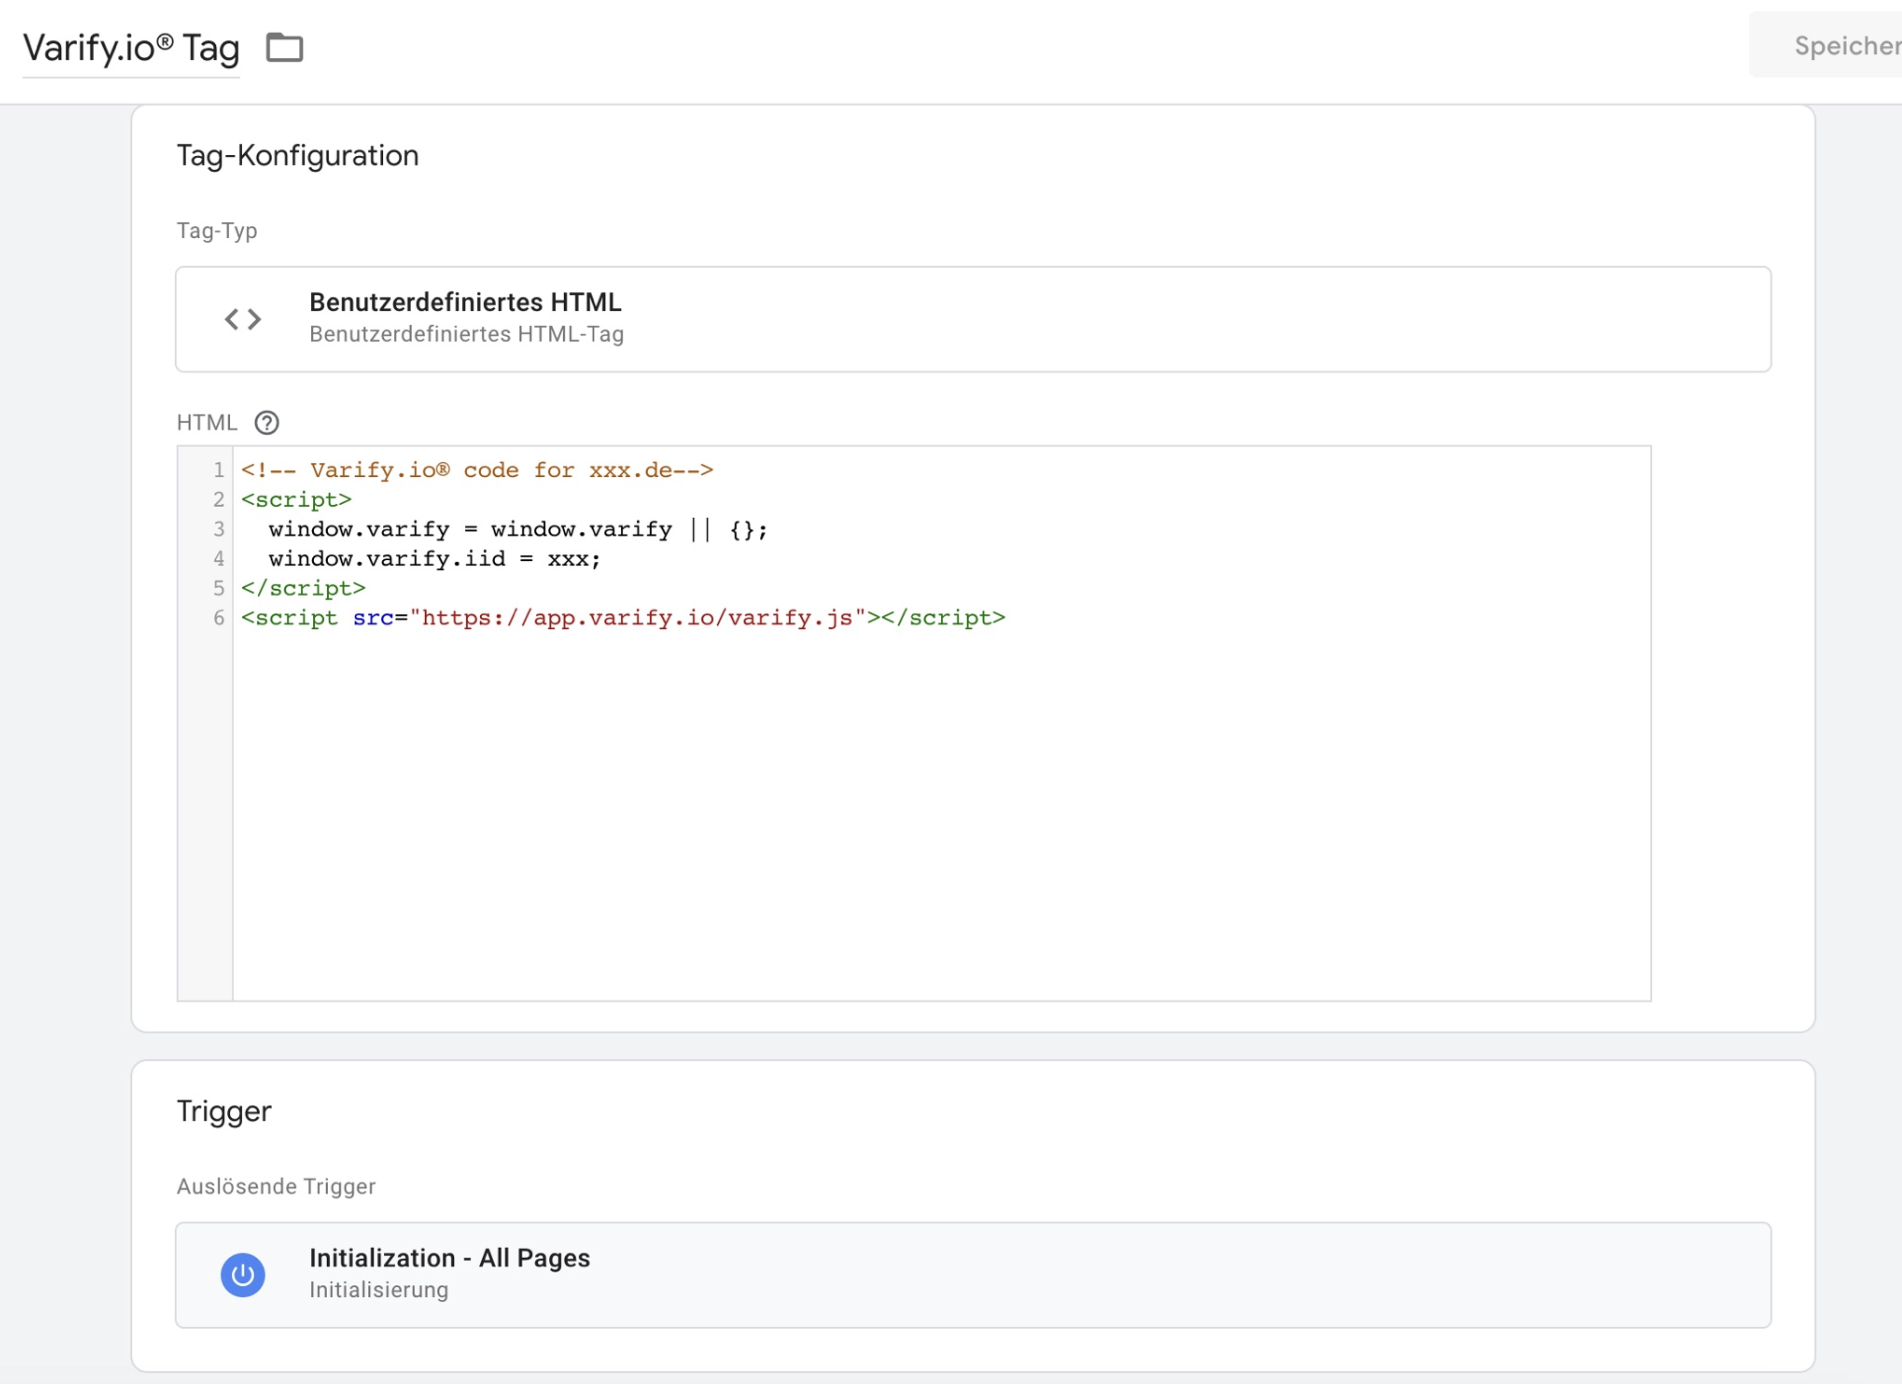
The integration of the JS snippet via Google Tag Manager is a quick way to integrate Varify.io® on your website. However, this option also carries the risk that when the variant is displayed, a Flickering effect is visible.
Simply create a custom HTML tag in your Tag Manager and insert the JavaScript code snippet. As a trigger, select the option to fire the tag on all pages as soon as possible. An option would be for example "Initialization - All pages". Note that there may be other options depending on the setup of your website.
Make sure that you replace "xxx" to the right hand side of "window.varify.iid =" with your account ID.

When integrating the Varify script via the GTM or when integrating it directly into the <body>deactivate the "Start Tracking on Activation Event" setting under Advanced Setup. This will ensure that your Varify Tracking works correctly.
Try out Varify.io via Chrome extension
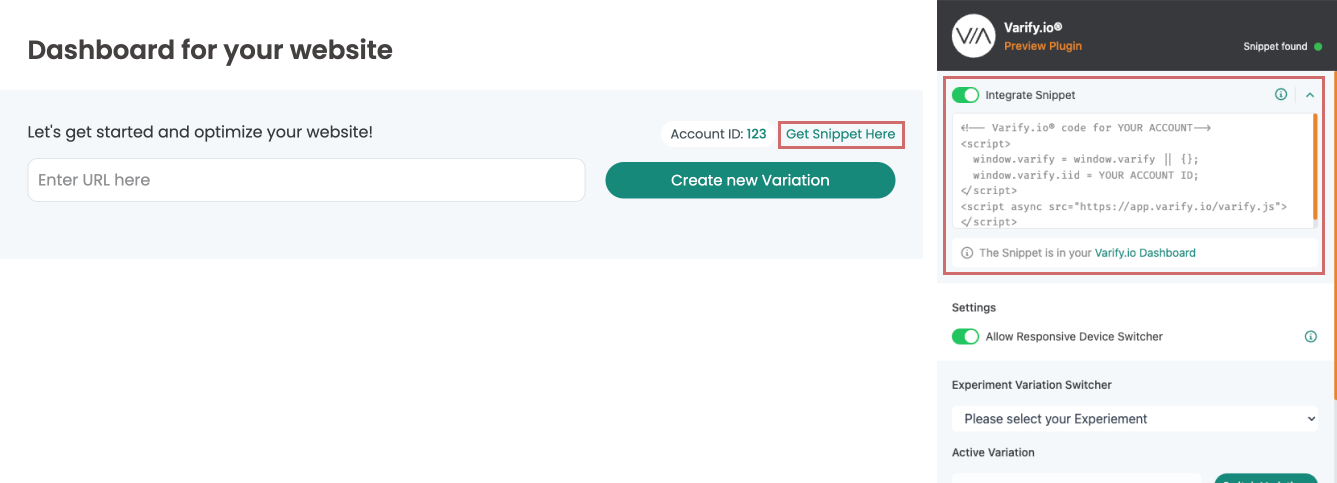
You can download the Google Chrome extension in order to try out Varify.io. The extension will integrate the Varify.io snippet on your website exclusively for you in your browser. This means that only you edit and view variations in your browser.
In order to implement your personalized snippet on your website without having to touch the code, follow the steps below:
- Download the Varify® Chrome Extension
- Activate the plugin in your browser
- Copy your Varify® code snippet from your dashboard (Get Snippet Here) and paste it into the "Your Snippet Code..." field in the extension -. Ready!
A more detailed explanation of installation and activation, as well as other functions, can be found here: Varify® Chrome browser extension

First steps
Tracking & Evaluation
- Tracking with Varify.io
- GA4 reporting in Varify.io
- Segment and filter reports
- Audience-based evaluation in GA4
- Segment-based evaluation in GA 4
- Matomo - Results analysis
- etracker evaluation
- Calculate significance
- User-defined click events
- Evaluate custom events in explorative reports
- GA4 - Cross-Domain Tracking
Web analytics integrations
Further integrations
Create experiment
Expert functions
Visual editor
- Campaign Booster: Arrow Up
- Campaign Booster: Exit Intent Layer
- Campaign Booster: Information Bar
- Campaign Booster: Notification
- Campaign Booster: USP Bar
- Add Link Target
- Browse Mode
- Custom Selector Picker
- Edit Content
- Edit Text
- Move elements
- Hide Element
- Keyword Insertion
- Redirect & Split URL Testing
- Remove Element
- Replace Image
- Responsive Device Switcher
- Style & Layout Changes