Quality assurance (QA)
Table of contents
In short
QA before going live helps you to detect errors early on, ensures a clean user experience and protects your data from distortions. Varify offers you several QA options for this - QA mode is recommended.
QA with the QA mode (recommended)
As soon as you have created your experiment and defined the page and audience targeting, you can start QA mode and check whether your experiment is running as planned. This way you can make sure that everything is working correctly before it goes live without your users noticing.
QA mode is particularly suitable if you want to check the following:
Experiments on individual pages and across several pages
whether your experiment targeting is working as expected
whether there are conflicts with other games
To start QA mode, click on the green down arrow next to Start Experiment and then select Start QA Mode.

In QA mode, your experiment will not yet be tracked and will not be shown to normal users. Only people who click on the „Force this variation“ link will see a variation. You can also share the link so that others can also test the experiment.

You will now see the Varify „QA Mode“ modal on your website. You can use this to switch between the variants in your experiment.
You can also control other active experiments and switch through the variants there too. This allows you to recognize more quickly whether there are unwanted interactions between two or more experiments.
You can see whether your experiment is working on the current page in the „Targeted“ column:
Green tick: The targeting criteria match, the experiment is active on this page.
Red X: The targeting criteria do not match here, the experiment is not displayed on this page.
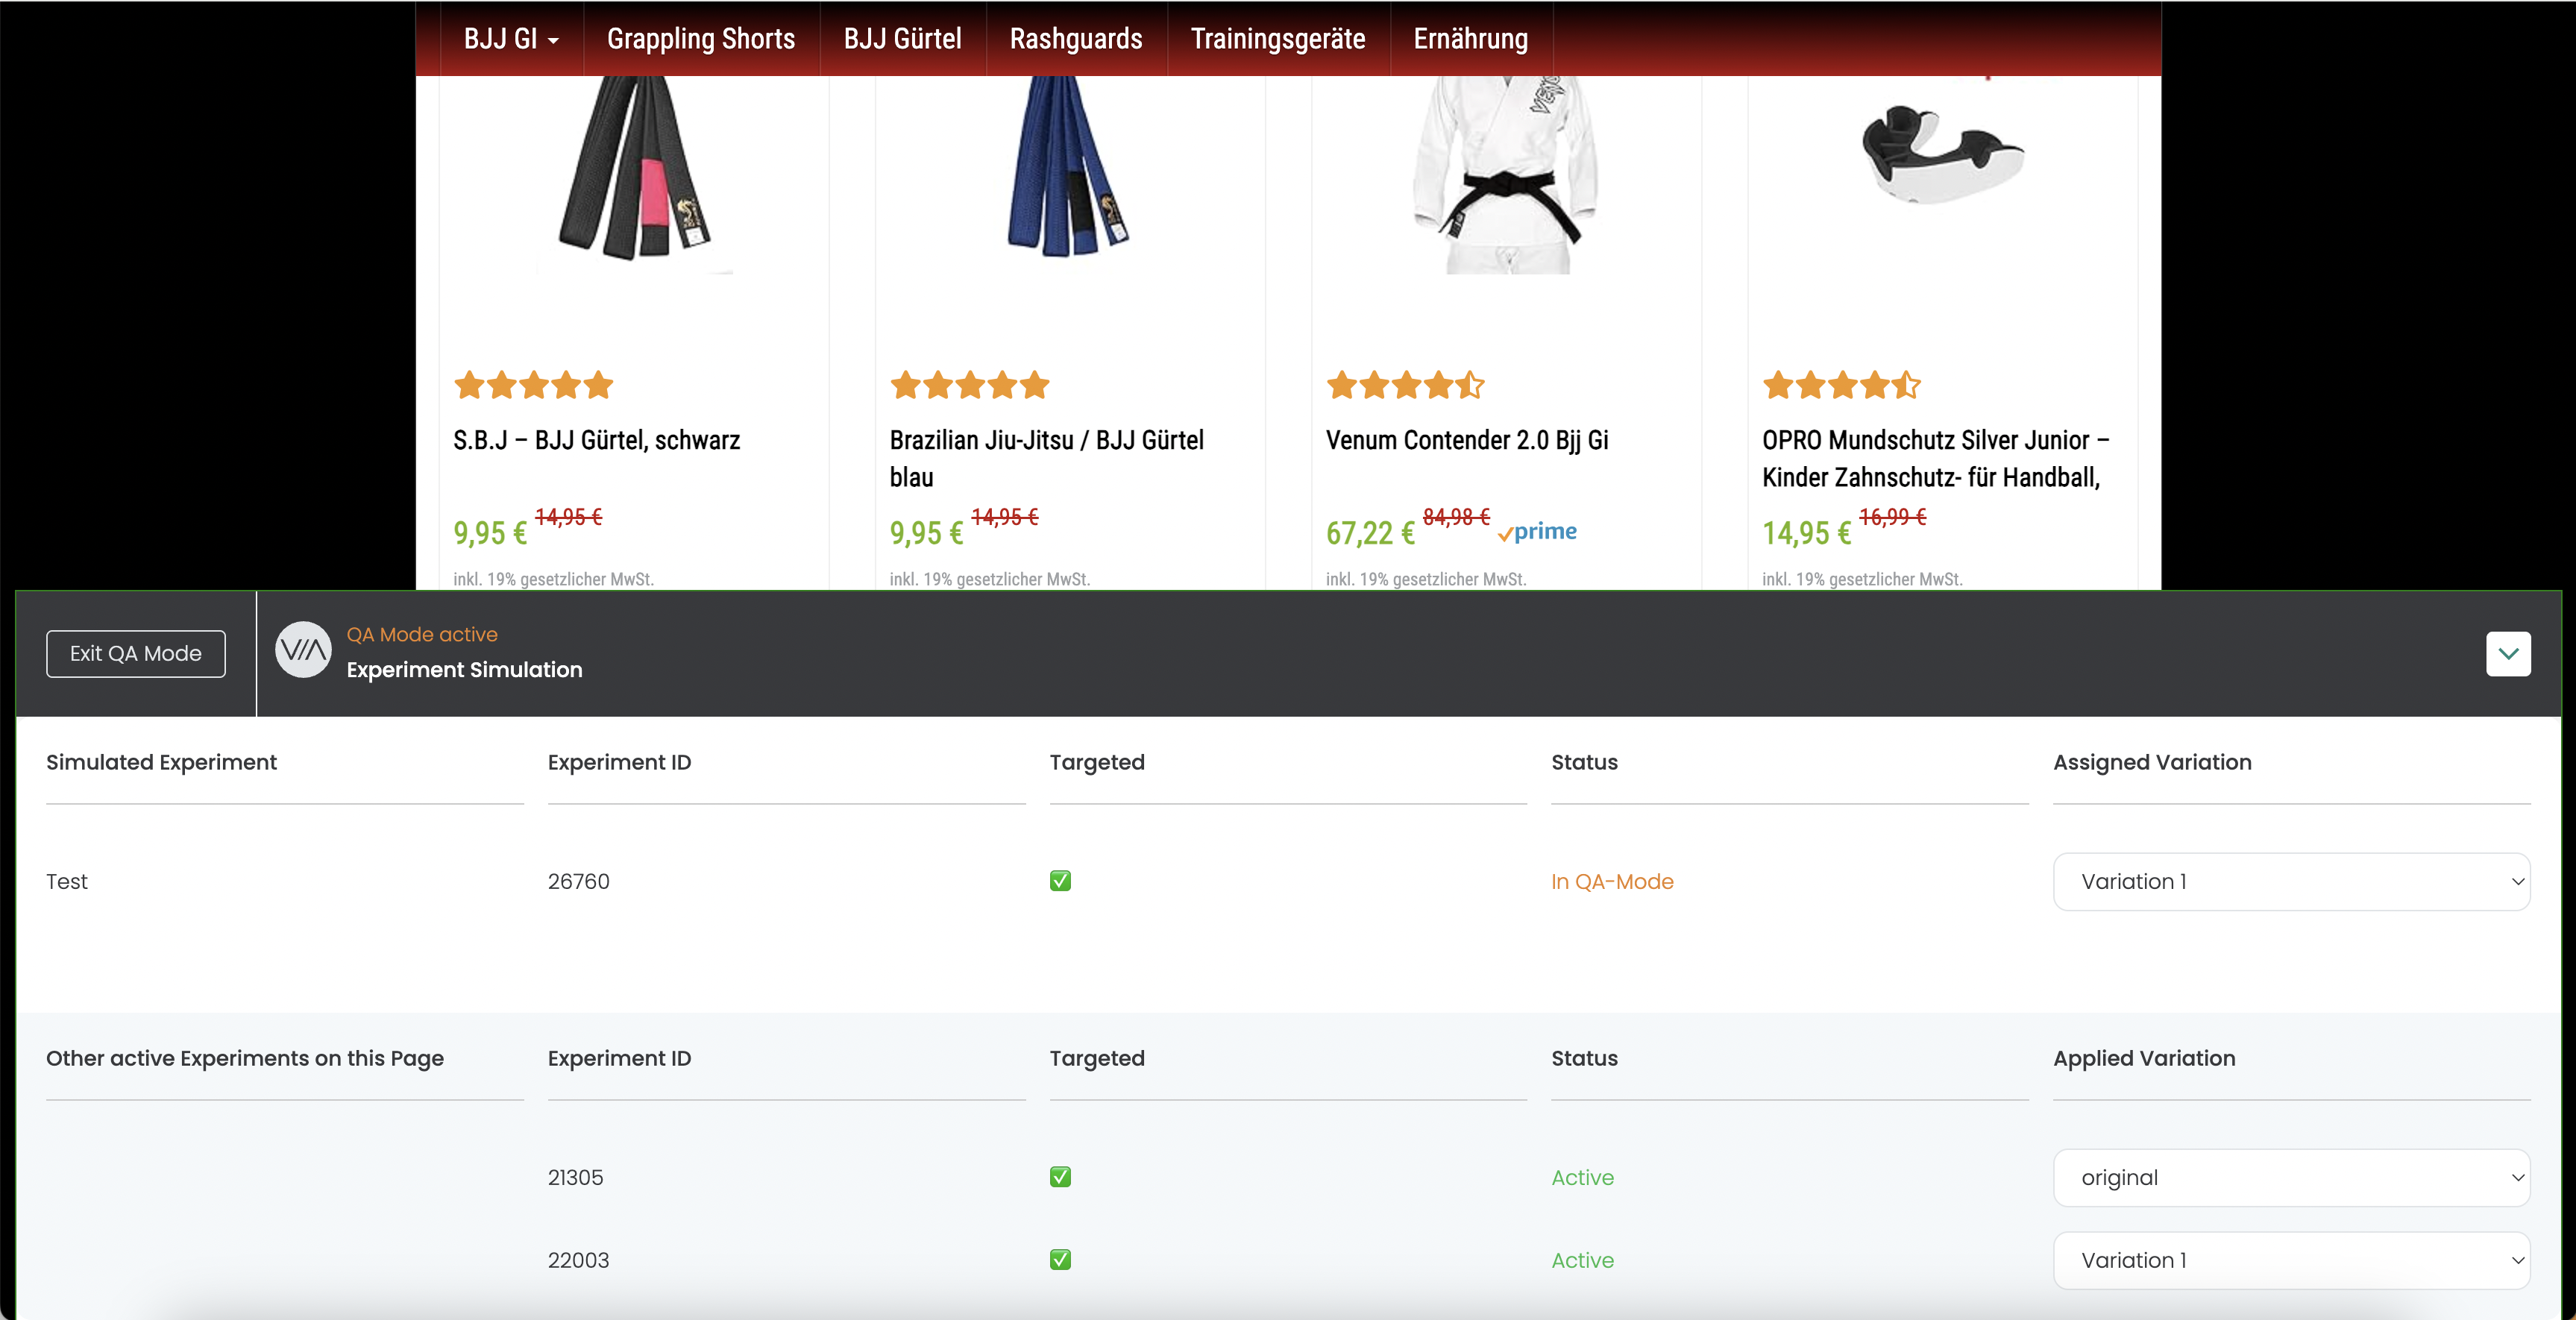
Once you have tested your experiment, you can exit QA mode directly in the modal on your website by clicking on „Exit QA Mode“.
In the Varify dashboard, you can also deactivate QA mode for all QA users. You can then start your experiment.
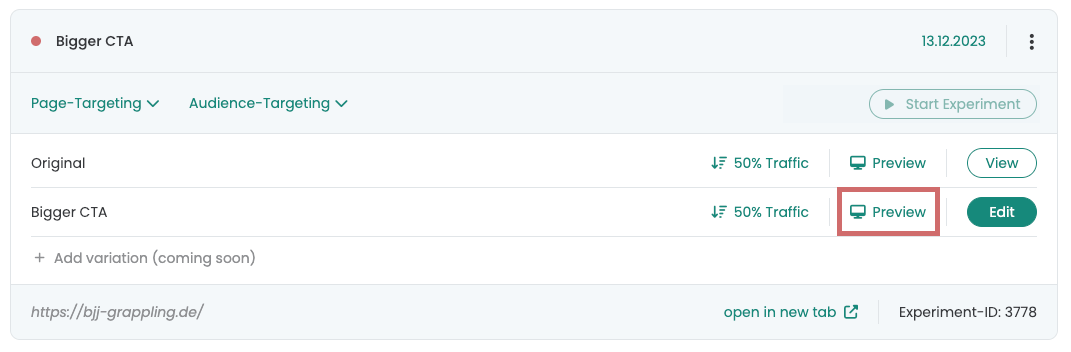
QA with the help of the preview link - individual pages
As soon as you have created a variant, it appears as an experiment in the dashboard. You will find the „Preview“ button on the variant. If you click on it, a new tab will open with this variant.
Varify automatically appends a parameter to the URL, for example: ?varify-preview=“Experimentname”. You can also append the parameter to other URLs to view the variant on different pages.
The parameter ensures that the experiment is always displayed. Other playouts are not displayed.
This QA method is particularly suitable if you want to view a variant quickly or share it with others. It is best suited for single pages on which no other experiment is active.
Notice: For a more thorough QA, we still recommend the QA mode: The preview link ignores the targeting conditions. This means you cannot test the targeting with this method.
QA via the Varify Chrome Extension
With the Varify Chrome Extension, you can force variants via the URL parameter „varify-force“. To do this, use this format: varify-force={experimentId}-{variationId}.
With the Chrome extension, this is even easier: you select the experiment and variant in a dropdown and save yourself the trouble of manually building the parameter.
This method is well suited to testing an experiment on different pages and also checking the targeting. We still recommend the QA mode because you can see the variants more clearly and switch between them more quickly.
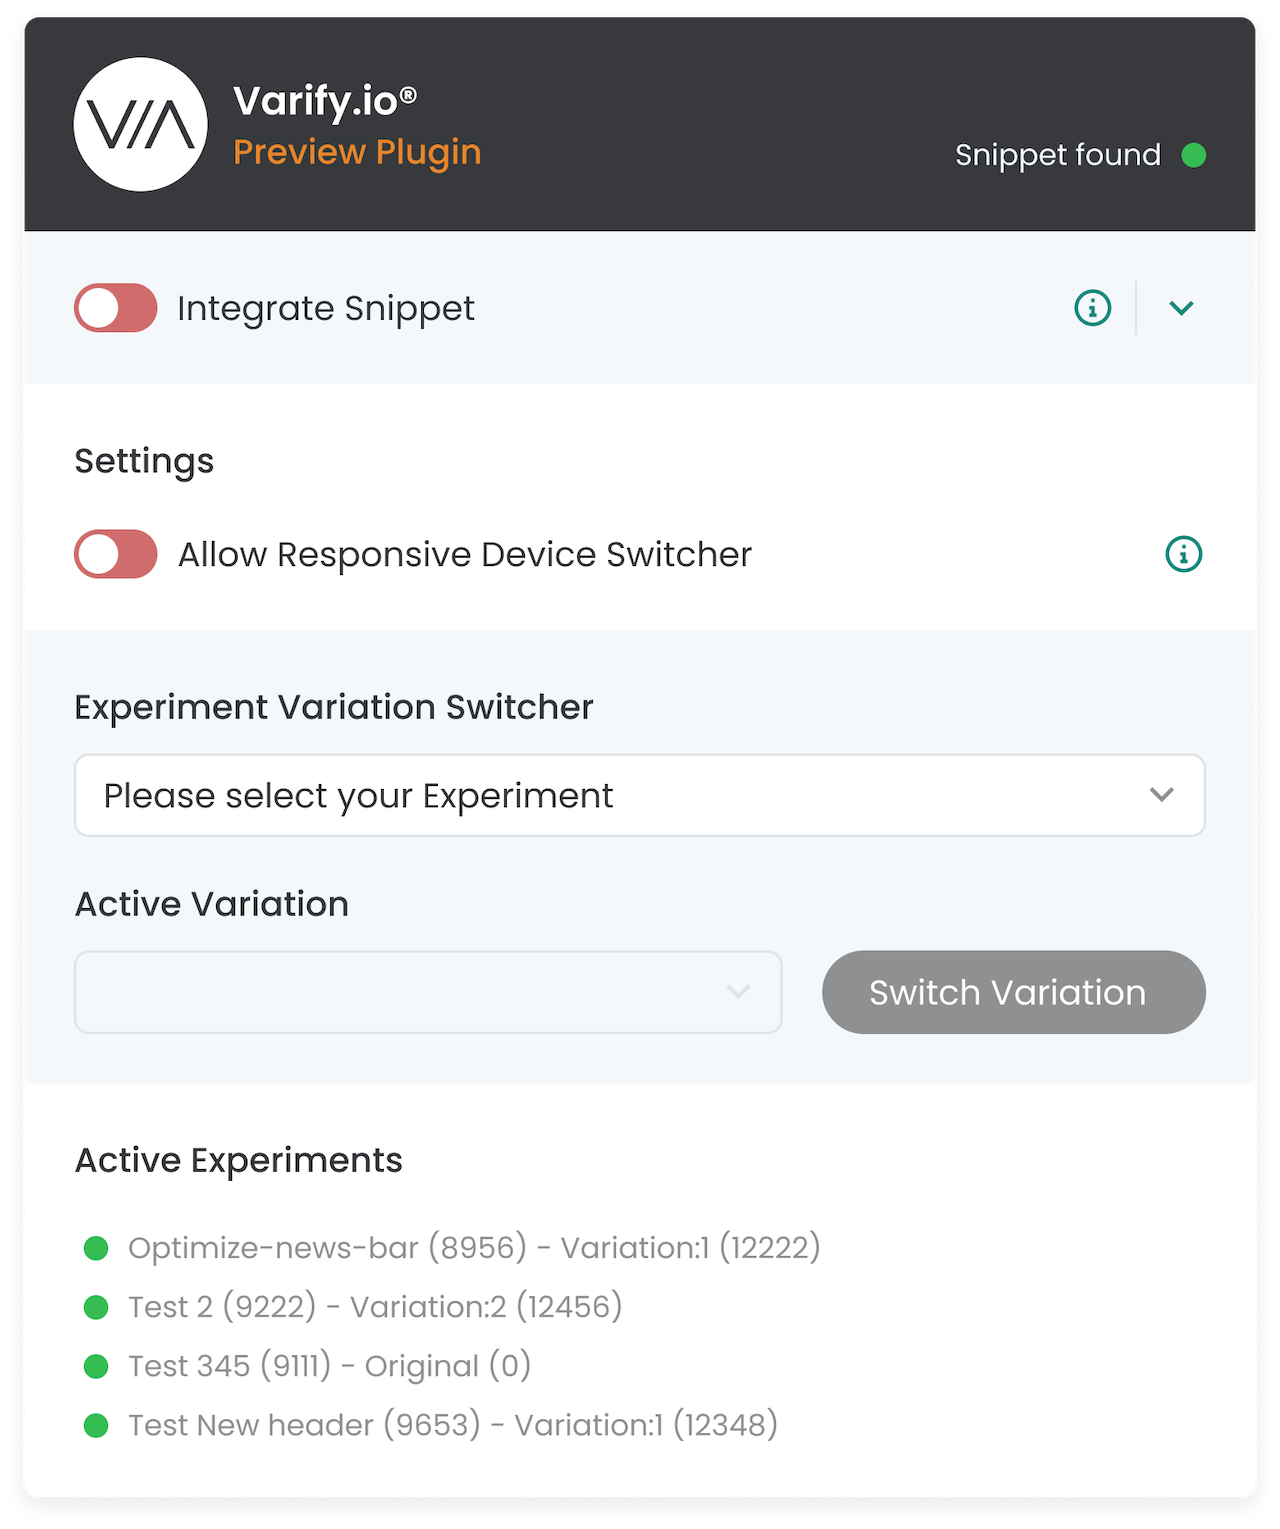
How to use the Chrome Extension:
Set the traffic distribution of your experiment to 100% Original. This way, the experiment will not be visible to normal users (everyone will see the original version).
Open a page on which you want your experiment to work. Make sure that you fulfill the targeting conditions.
Click on the Chrome Extension and select the active experiment in the „Experiment Variation Switcher“ (you are initially in the original version).
Select the variant you want to test and click on „Switch variation“.
The force parameter sets you to the selected variant. You remain there until you actively switch again. This allows you to test the experiment at your leisure.
Notice: Note: During the QA of the experiment, tracking is triggered in different variants. You should therefore pause and duplicate the experiment again after your QA. Then start the new duplicated experiment with a 50:50 traffic distribution in order to have cleansed data.
Example with the Varify Chrome Extension:
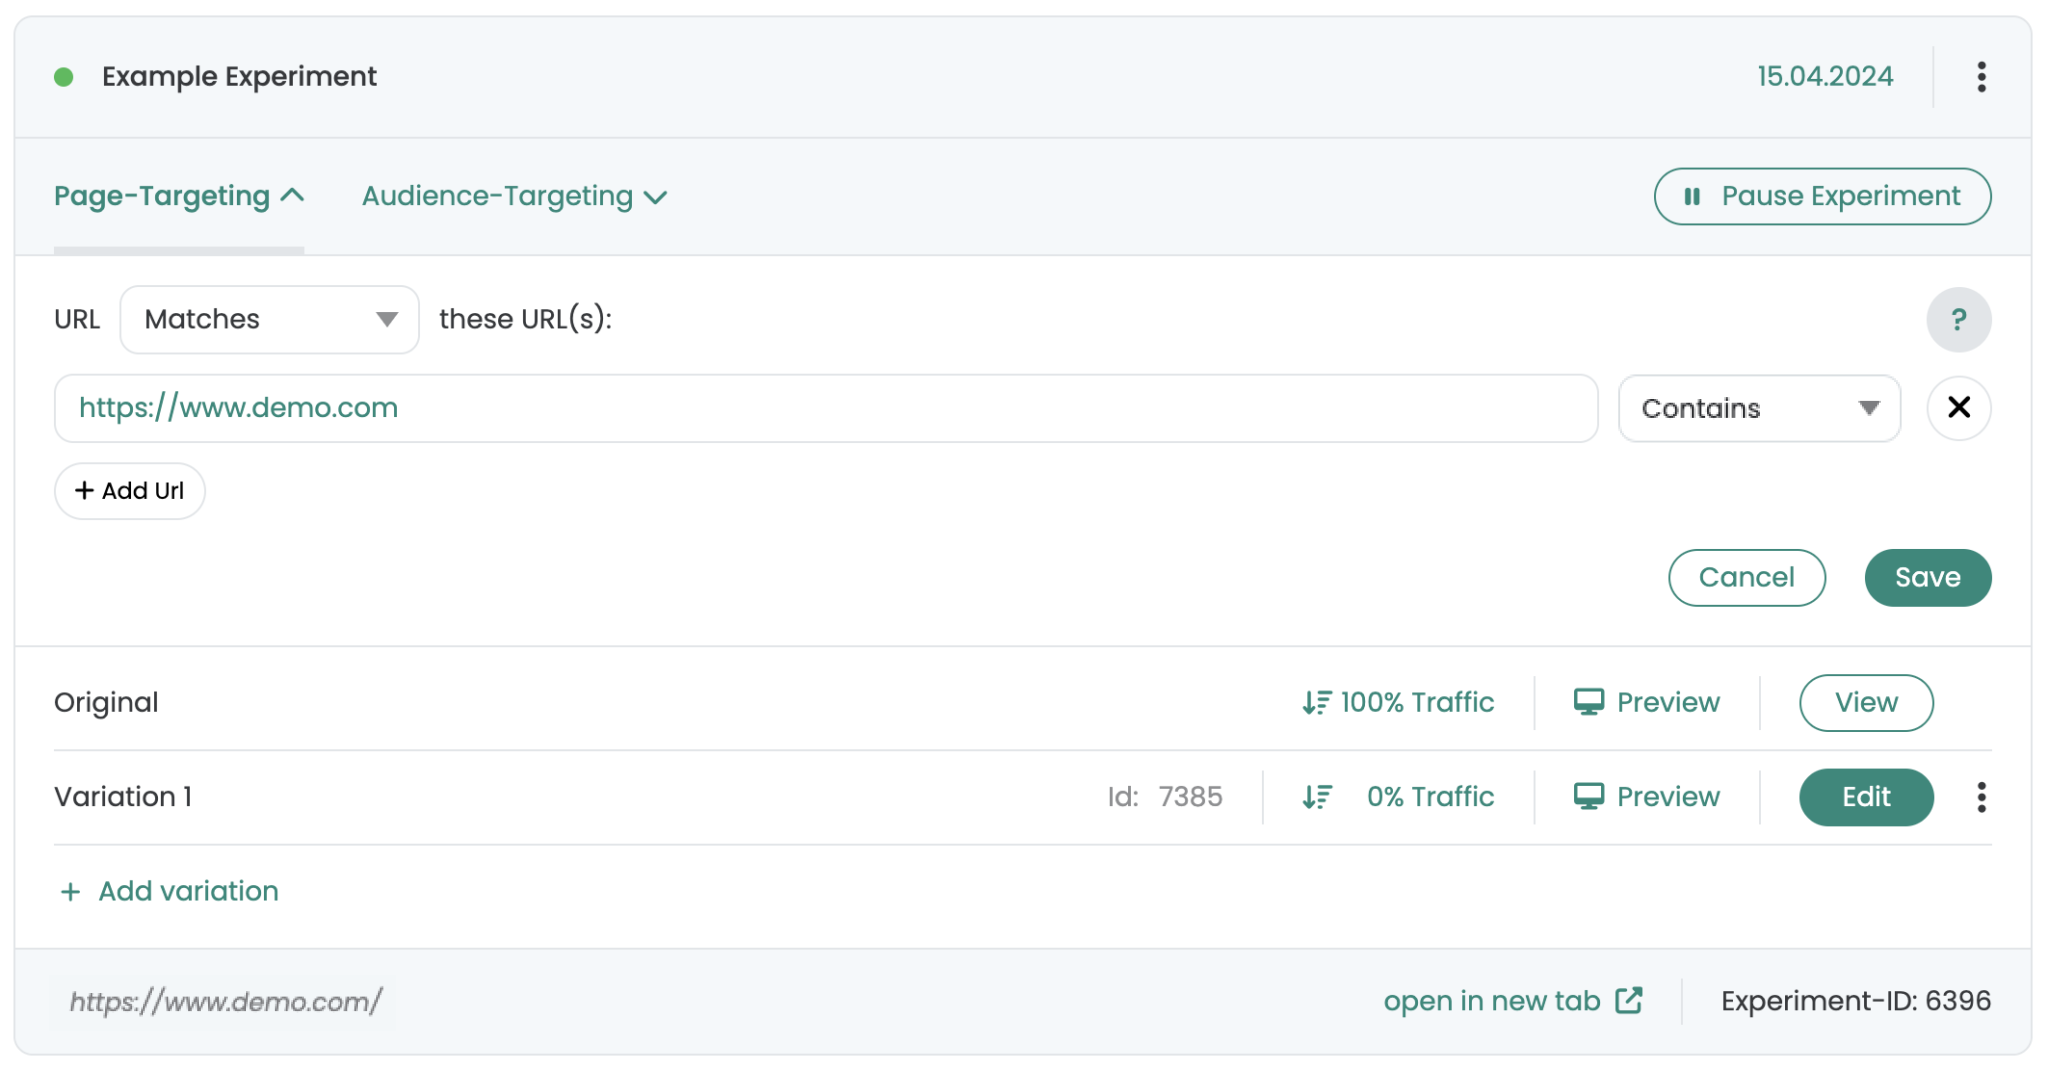
In the picture you can see an experiment with the name „Example Experiment“. It is active on „https://www.demo.com“ and the traffic distribution is set to 100% Original. This means: Without any action, you will always see the original variant.
This is how you force a variant with the extension:
Open „https://www.demo.com“ in the browser.
Click on the Varify Chrome Extension.
In the „Experiment Variation Switcher“ area, select „Example Experiment“. You are now in the original variation.
Select the variant you want to test and click on „Switch variation“.
What happens in the background:
The extension automatically appends the „varify-force“ parameter to the URL, for example:
https://www.demo.com/?varify-force=6396-7385
This will place you directly in this variant, although the traffic distribution is set to 100% Original.
This allows you to switch to another variant or back to the original:
Simply select the original version of the experiment in the extension and click on „Switch variation“ again. The URL will be adjusted accordingly.
Alternatively, you can simply set 0 for the original variant for the variant ID in the parameter, for example:
https://www.demo.com/?varify-force=6396-0