Matomo - Integration via Matomo Tag Manager
Table of contents
In short
In this guide, we will show you how to set up the Matomo Tag Manager so that Matomo can collect and analyze the data from Varify.io. To do this, it is necessary to integrate the Matomo Tag Manager into your website.
Important: Matomo can currently only analyze one experiment at a time. This means that only one of your experiments may be active. All other experiments must either be paused or not yet started, otherwise the data cannot be analyzed correctly.
We are already working on a way to analyze several experiments at the same time.
Set analytics connection
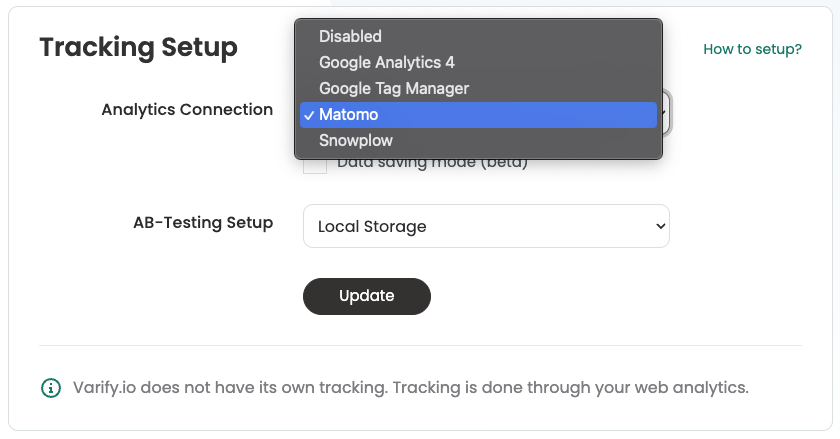
Before you start in your Google Tag Manager, you should first define the appropriate settings for your integration in the dashboard under A/B Testing Options -> "Go to Tracking Setup".
Select "Matomo" under "Analytics Connection" and confirm with "Update"

Setting up the Varify.io <> Matomo integration
1. create a DataLayer variable
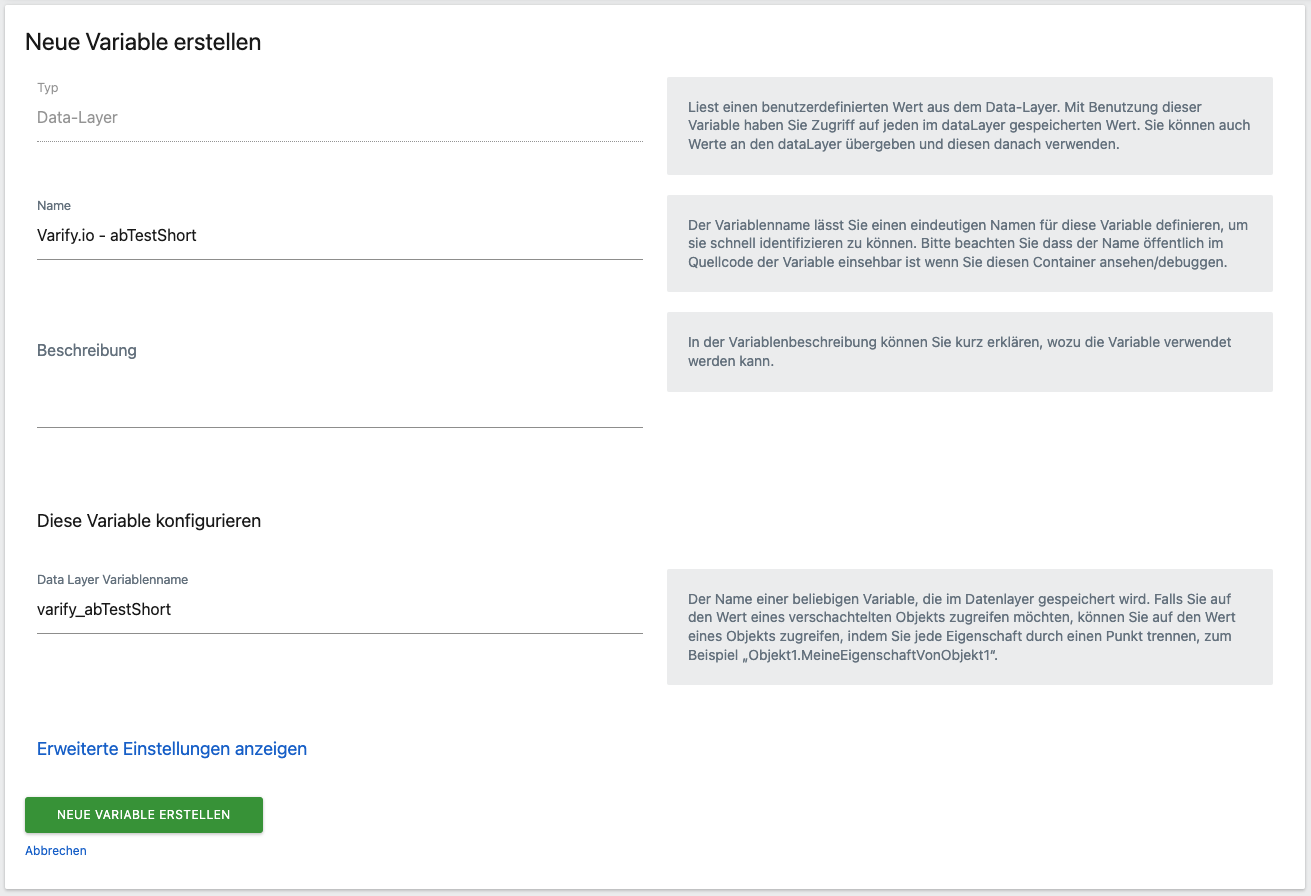
First, a DataLayer variable is created. This will later contain the information of the experiment.
- Navigate to the "Variables" section and create a new variable by clicking on the green "Create new variable" button.
- Select the "Data layer" option.
- Name the variable as "Varify.io - abTestShort".
- Under "Data layer variable name", enter the value "varify_abTestShort" (please write exactly like this).
- Save the data layer variable by clicking on "Create new variable".
2. Create a trigger
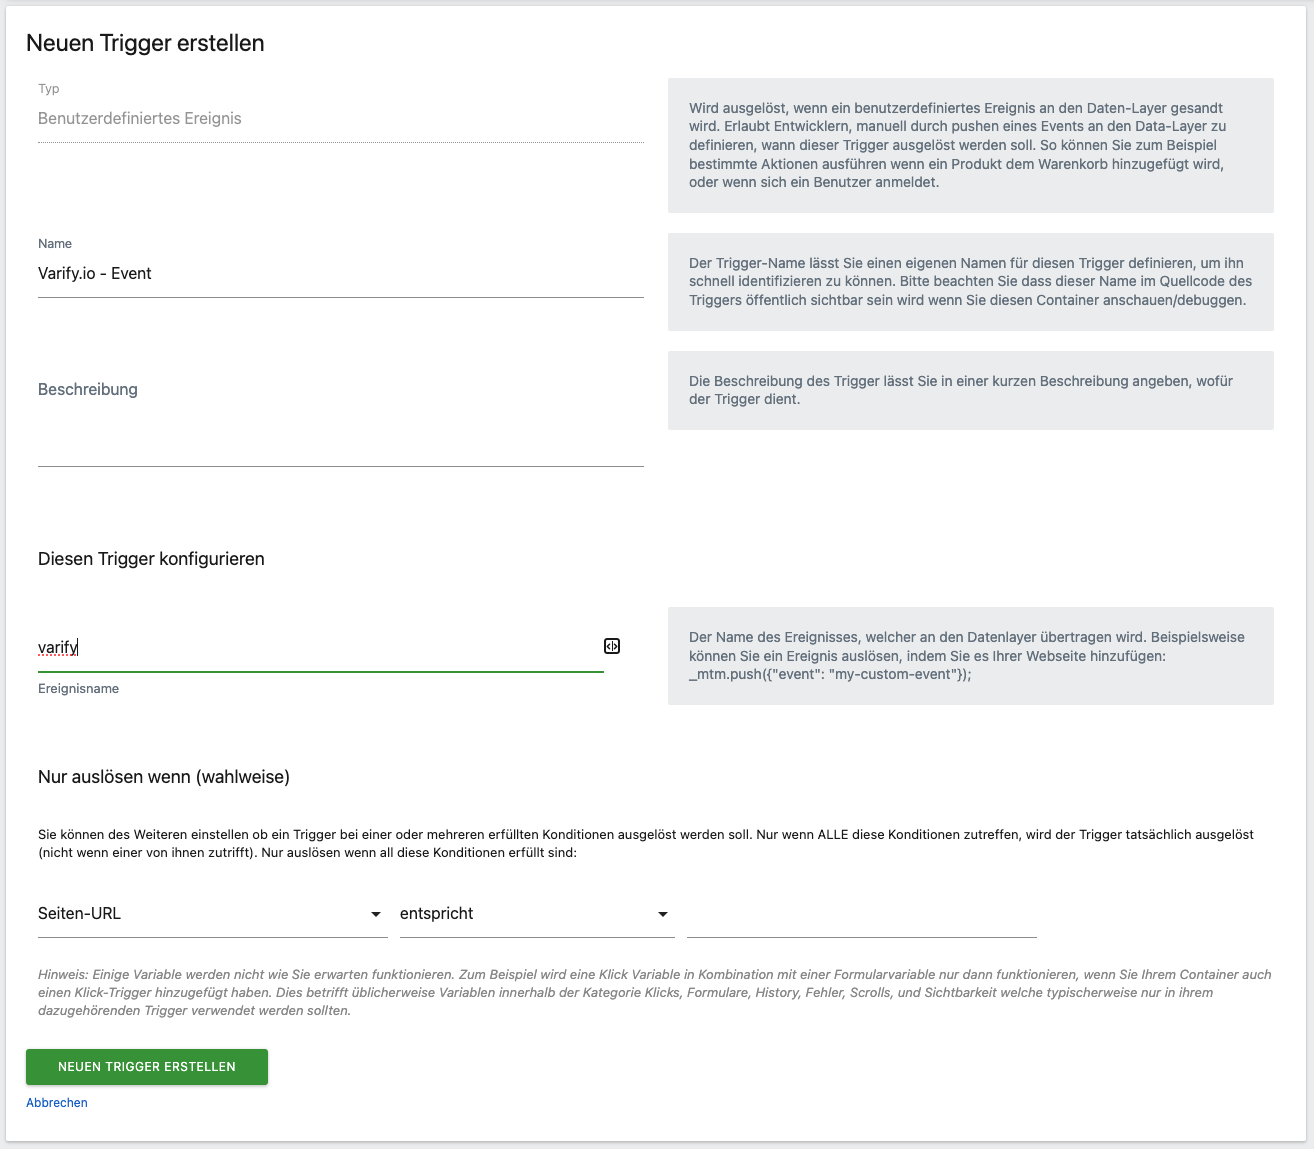
The next step is to create a trigger. This ensures that the tag is triggered when an experiment is played on a page.
- Navigate to the "Triggers" section and create a new trigger by clicking on the green "Create new trigger" button.
- Select the "Custom event" option at the bottom of the "Other" section.
- Name this trigger "Varify.io - Event".
- In the "Event name" field, enter "varify" (please write exactly like this).
- Save the trigger by clicking on "Create new trigger".
3. create an MTM tag
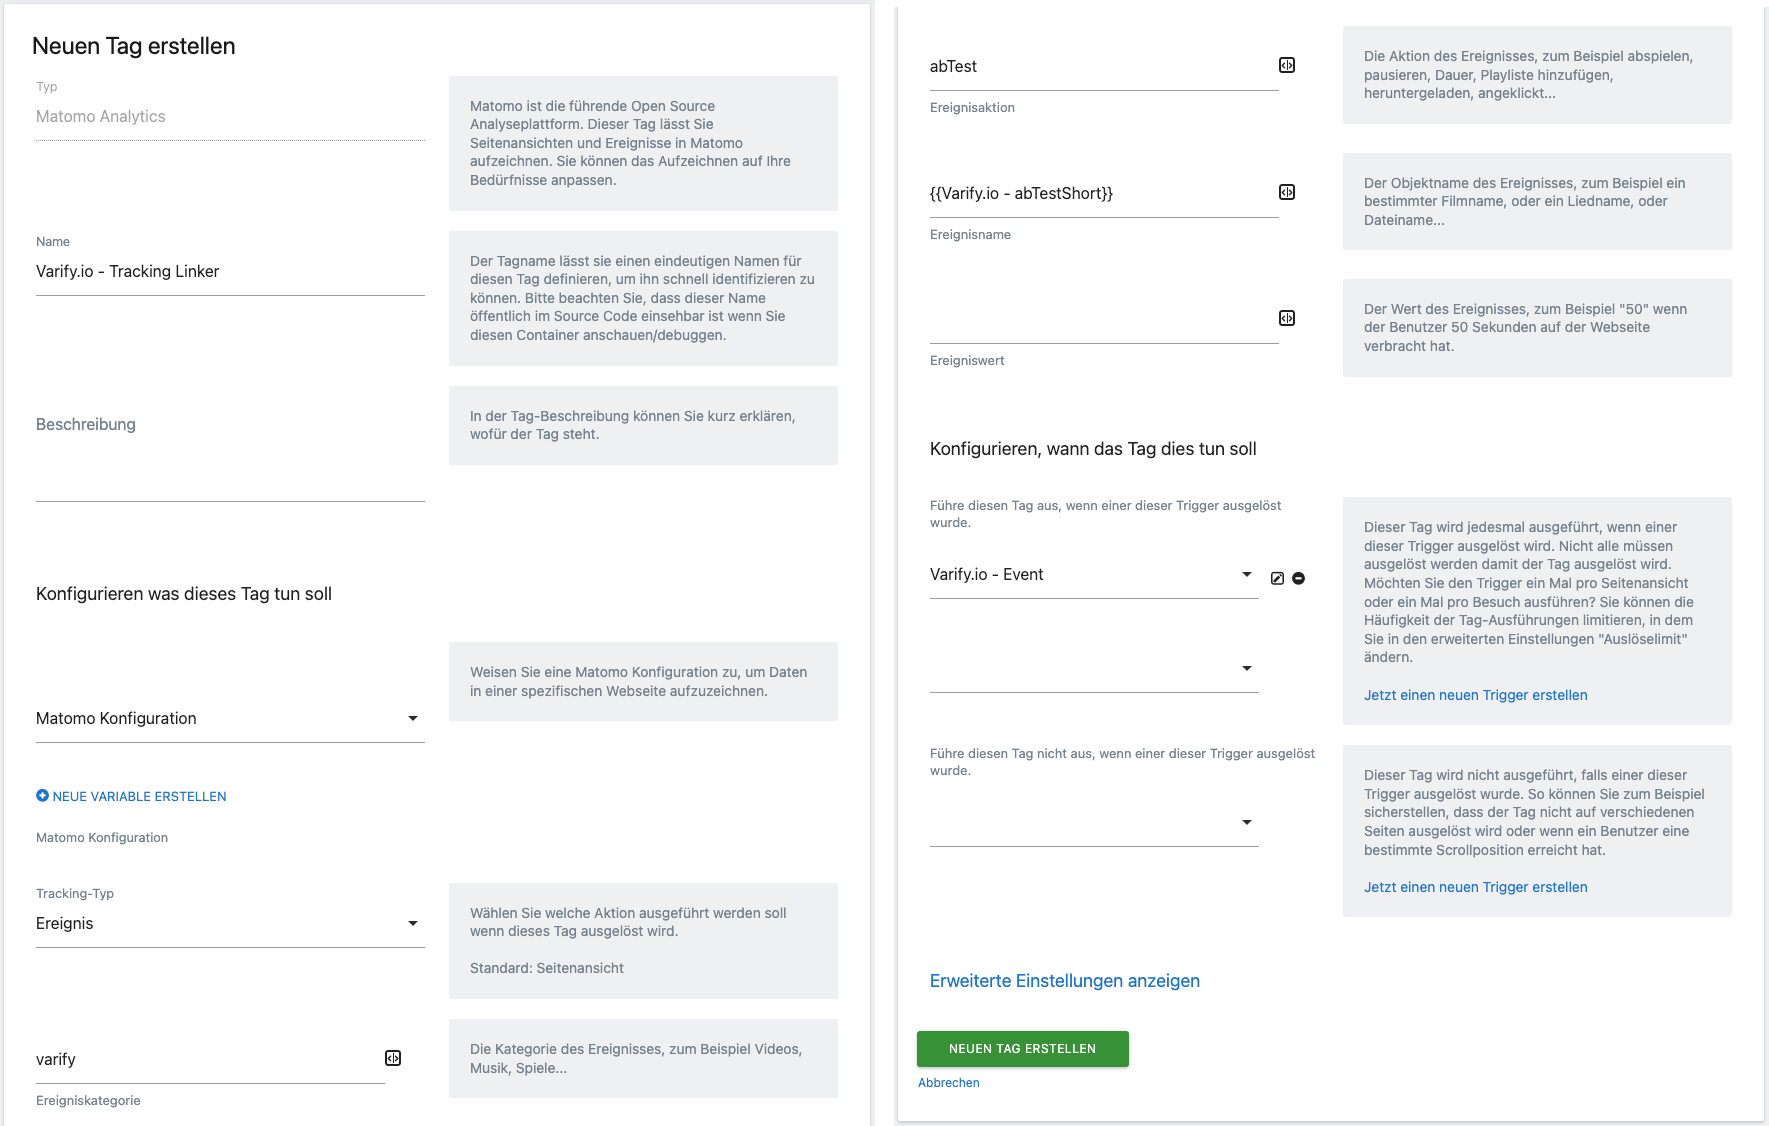
Finally, a Matomo Analytics tag is created. When this is triggered, it sends an event to Matomo together with the variable value of the previously created DataLayer variable.
- Go to the "Tags" section and create a new tag by clicking on the green "Create new tag" button.
- Select the option "Matomo Analytics".
- Name this tag "Varify.io - Tracking Linker".
- In the "Configure what this tag should do" section, you must select your Matomo configuration in the dropdown. If this does not yet exist, click on "+ Create new variable" below. A window will appear where you can create this Matomo configuration variable. Scroll down and click on the green "Create new variable" button.
- Then select the "Event" tracking type.
- Enter "varify" for the event category.
- For event action, enter "abTest".
- For event name enter "{{Varify.io - abTestShort}}" (you can also click on the icon on the right and select the variable).
- In the "Configure when the tag should do this" section, select the "Varify.io - Event" trigger via the dropdown.
- Save the tag by clicking on "Create new tag".
4. publish the customization on the Matomo Tag Manager
Once you have created everything, you can go live with the version you have just created under the "Publish" tab. As soon as an experiment has been started, a corresponding event with the corresponding parameters should be sent to Matomo.
Check your tracking integration
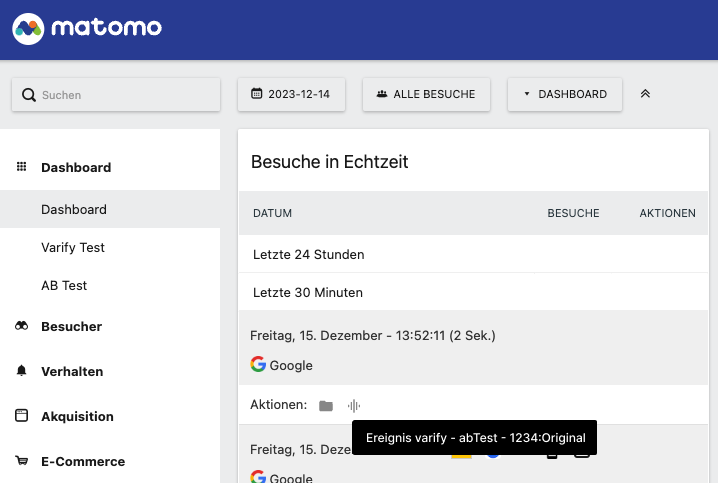
To check that the integration is correct, we recommend using a A/A test to be carried out. If everything is set up correctly, you should see the following in your dashboard, as shown in the screenshot below:
- The live view shows triggered events for users.
- When the event is passed over, "varify - abTest - 1234:1234" or "1234:Original" is displayed (1234 stands for the experiment ID).
Evaluation of the experiments in Matomo
Now that you have correctly linked Matomo and Varify.io, you can analyze your experiments. To do this, you need to create corresponding segments. You can find detailed instructions on how to do this here: Matomo - Results analysis