A/B Testing: Create experiment
Table of contents
In short
With Varify.io® you can create and start your experiments in no time at all. First create a new variant and save it. You can then make various settings for your experiment in the dashboard. Finally, start the experiment by defining a page targeting and pressing the start button.
Step-by-Step Tutorial
Creating, starting and stopping experiments
Create variant with the Varify.io® Editor
To create an experiment, enter a valid URL of your website at the top of the dashboard, for example the URL of the page you want to change. Then click on "Create new variation".

The Varify.io® editor will now open. This offers you a variety of functions to create your variant for the experiment:
- Visual editor
- Adding your own JavaScript and CSS
- Defining a redirect URL (split URL test)
- Campaign Booster (ready-made optimizations)
Once you have made all the changes, save the variant via "Finished" and give the experiment a name.
Configure experiment
Your experiment is now displayed at the top of the dashboard. However, it has not (yet) been started. You can recognize this by the red dot next to the name of the experiment at the top left. You also cannot click on the start button yet. This will only be activated once valid page targeting has been set.
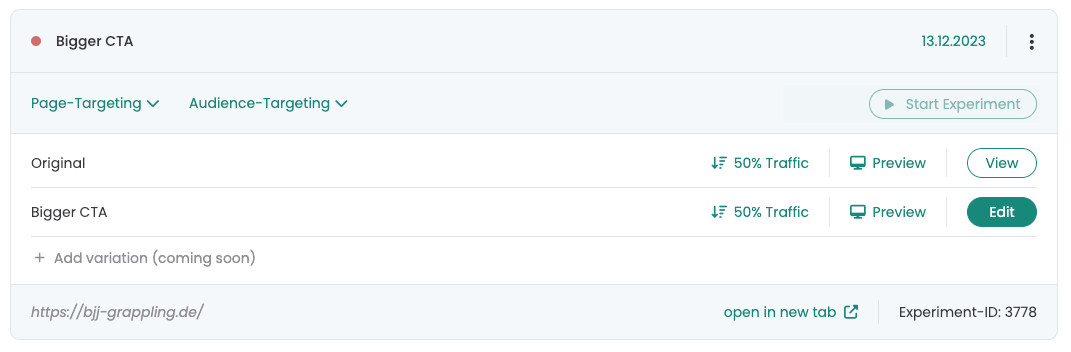
Before you start the experiment, you can do the following things here:
- Start and pause the experiment.
- Set the traffic distribution between original and variant. This is always set to 50:50 by default.
- Add further changes to the variant using the "Edit" button.
- Take a look at a preview of the variant.
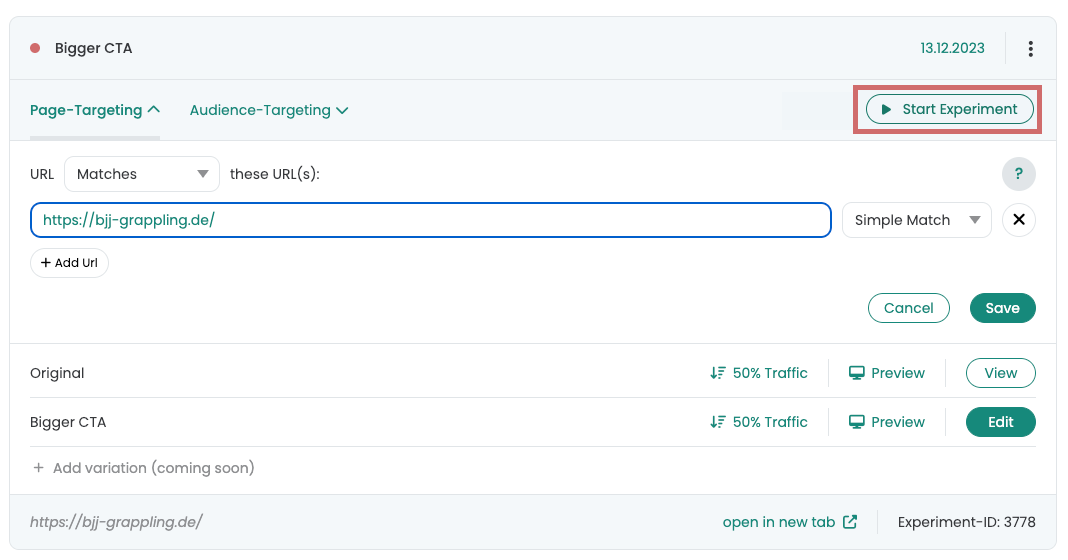
- Define a page targeting for the experiment.
- Optional: Set a Audience targeting for the experiment.
Start experiment
As soon as you have entered and saved a valid URL or condition under "Page targeting", the start button can be clicked. You can find out what options you have for setting page targeting here: Parameter & URL Targeting.
The red dot to the left of the experiment name now lights up green and indicates that the experiment has been started.
Further options
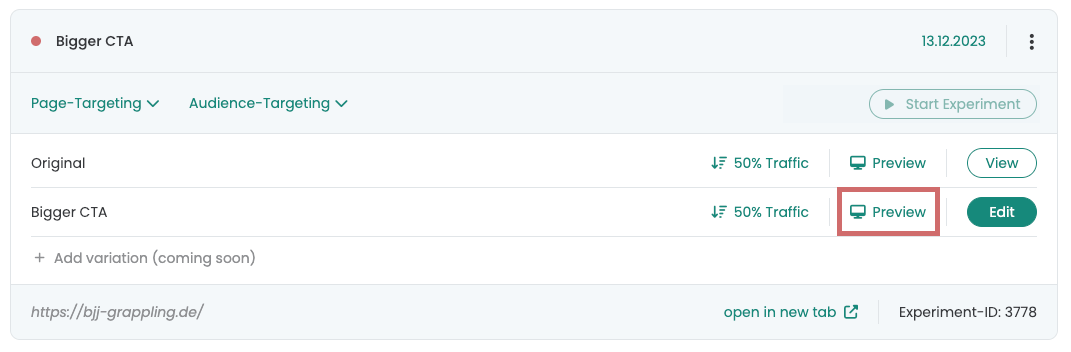
Quality assurance
Once you have created a variant, you can display it using the "Preview" button. The URL is given a parameter with ?varify-preview="Experiment name" is attached. You can pass this URL together with the parameter on to colleagues to test the variant.
Please note that this method does not always work, especially for variants that are displayed on different pages or if the website itself appends parameters to the URL, for example through filters.
For more information and detailed instructions, see "A/B testing - quality assurance" detailed instructions.
Debugging / Error analysis
This section describes how to control whether your browser is assigned to the Original group or the Variant group in an experiment. The following steps have been performed with the Google Chrome browser. There are no instructions for other browsers.
Open the web page where the A/B test will take place. Right-click on the page at a location of your choice and click on Investigate.

It opens the Chrome Developer Tools. Switch from the tab Elements to the tab Application. If you should find under Tracking Setup Session Storage, select the web page on which the A/B test is running under the Session Storage section. In the screenshot the test is running on the web page varify.io. After that you will see your corresponding Varify experiment. In the Value column you will find the term variationId. You are in the variant if the ID of the experiment is behind variationId. In this case you are assigned to the variant. If instead of the number the word is null, you were assigned to the Original group.

Under Tracking Setup Local Storage then select the Local Storage section under Application and also select the website on which the A/B test is running. The group assignment is done in the same way as for Session Storage.

You also have the option to delete the entry in the Session Storage or in the Local Storage. After a reload of the page, the group assignment takes place again.