A/B Testing - Quality Assurance
Table of contents
In short
Quality assurance (QA) of A/B tests before they go live is essential to detect potential bugs early on. This not only enhances the user experience, but also prevents data corruption that could result from technical errors.
How to perform your QA
QA with the help of the preview link - individual pages
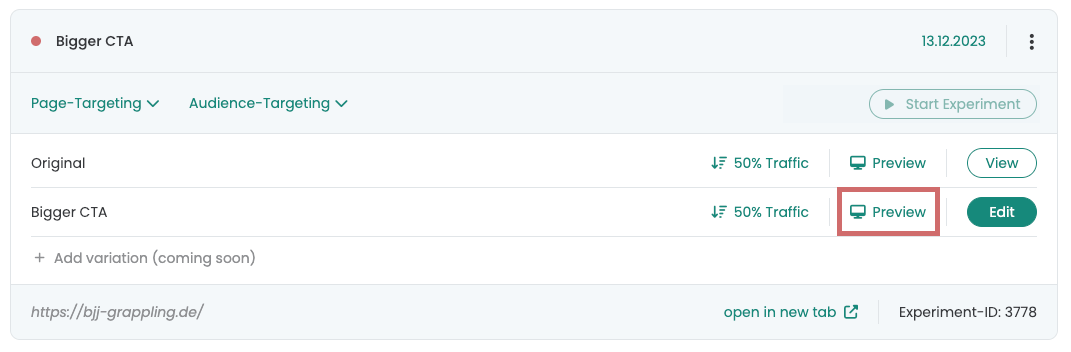
As soon as you have created a variant, it appears as an experiment in the dashboard. There is a "Preview" button on the variant itself. If you click on this, a new tab opens with the variant.
A parameter has been appended to the URL: ?varify-preview="Experiment name". You can append this parameter to other URLs to display the variant on different pages.
Example
You have created a variant on a product detail page. You now open this directly via the "Preview" button. Now you want to run the experiment on several product detail pages. To check that the experiment is also carried out on another product detail page, you can set the parameter ?varify-preview="Experiment name" copy and attach to other product detail pages
parameter - in this example: ?varify-preview=optimize-news-bar-en and append it to the URL of your other product detail pages where you want to test the variant.
-> https://www.demoshop.de/produkt1?varify-preview=optimize-news-bar-en
-> https://www.demoshop.de/produkt2?varify-preview=optimize-news-bar-en
-> https://www.demoshop.de/produkt3?varify-preview=optimize-news-bar-en
QA via the varify-force parameter - page-wide
You can use the "varify-force" URL parameter to force the setting of a variant. To do this, simply use varify-force={experimentId}-{variationId}
This is how you proceed:
1. set your experiment to the traffic distribution 100% Original.
2. set your URL in Page Targeting to Contains
3. start the experiment (your users will not see the variant due to the 100% original playout)
4. append the URL parameter varify-force={experimentId}-{variationId} to a URL where your experiment should be displayed.
3. you have now permanently changed the group of your experiment.
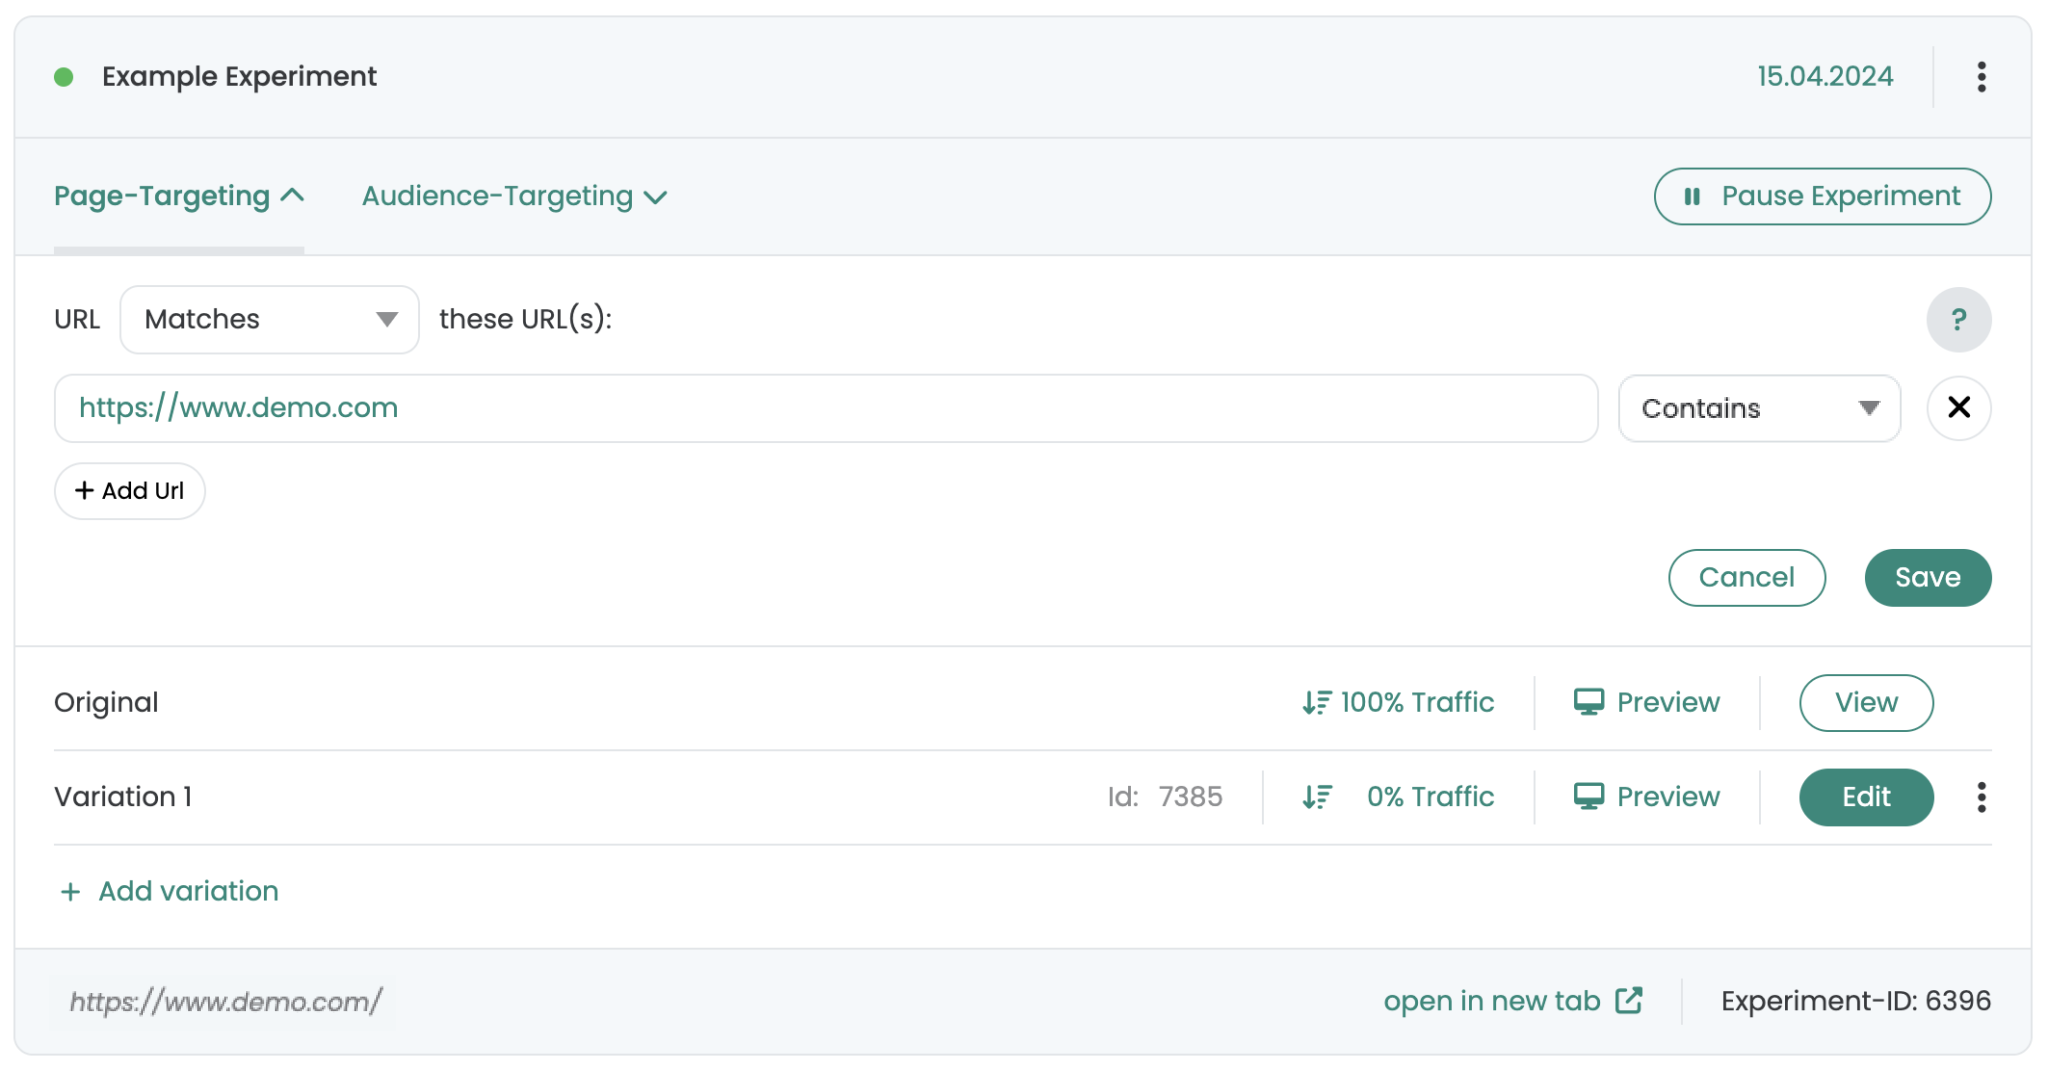
Example: In the picture you can see an experiment with the name "Example Experiment". The experiment is active on the URL: "https://www.demo.com" is active. 100% of the test participants are assigned to the original variant. To display the variant, open the URL and append the corresponding URL parameter to the URL to force the variant to be displayed.
-> https://www.demo.com/?varify-force=6396-7385
To display a different variant, enter the variant ID of the other variation instead of the variant ID of variation 1. To switch to the original, enter the number "0" instead of the variant ID. In our example, this would be -> https://www.demo.com/?varify-force=6396-0
Notice: Ideally, only use the function before the test start. During the experiment, you would trigger tracking in different variants. Adjust your traffic distribution and page targeting again before you start the experiment for your users.
QA via audience targeting - page-wide
Step-by-step tutorial
QA without using a testing parameter
Quality assurance (QA) using the Varify testing parameter offers a quick and easy way to display and test a created variant. However, if tests take place on different pages, or in a store, and various other parameters are attached to a URL, e.g. through filters, it can quickly become cumbersome to perform QA with the parameter settings and the testing parameter.
The solution: Start an experiment so that it is only played with a specific session storage entry. This way, you can test without parameters and your users won't see the test yet.
This is how you proceed:
1. set your experiment from Parameter to "A/B test" um.
2. copy the following code into the audience targeting of your experiment and click on "Save".
					const STORAGE_KEY = 'varify-test';
const STORAGE_VALUE = 'true';

return sessionStorage.getItem(STORAGE_KEY) === STORAGE_VALUE;
3. set the traffic distribution of your experiment to 100%
4. start the experiment via the "Start Experiment" button. Don't worry, your users will not be able to see the experiment due to the audience targeting that has been set.
Now you need to create a session storage entry in your browser, which will ensure that the experiment is played to you.
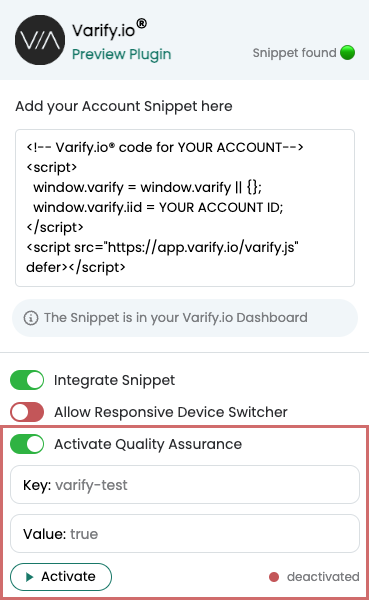
You can either do this manually, or you can use our Varify.io Chrome extension.
Once you have installed and activated the extension, you can easily activate a session storage by clicking the "Activate Quality Assurance" button. Then click on "Activate" to set the session storage. A green or red dot will then show you whether the session storage is activated or not.
Please note that the session storage will be removed as soon as you click on "Deactivate", turn off the switch or end your session.
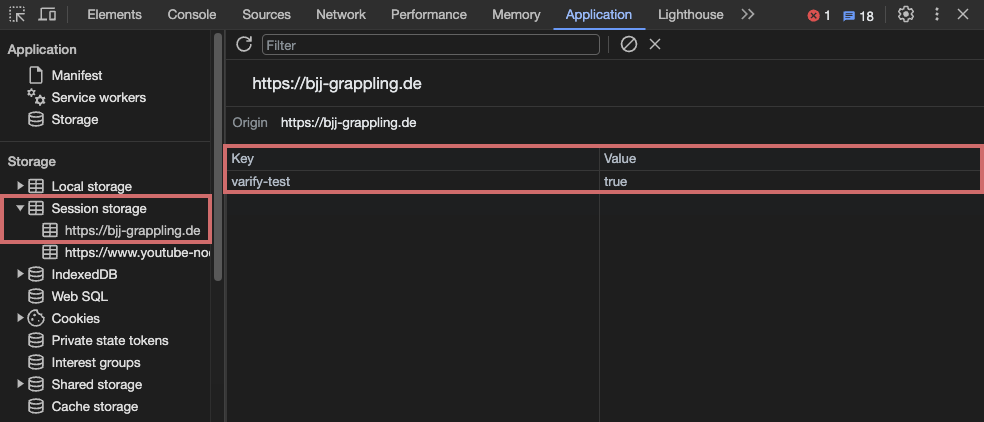
1. open the developer console of your browser (this example is intended for the Chrome browser, in other browsers the session storage may be set differently).
2. go to the "Application" tab.
3. click on "Session Storage" and below it on the URL of your website (you may have to expand the list by clicking on the small triangle symbol).
4. click in the "Key" column below the last Session Storage entry to enter "varify-test". Confirm with Enter.
5. repeat the process in the "Value" column and enter "true" here. Confirm again with Enter.
6. reload the page afterwards.
Now you can see the variant and test it extensively, as the experiment is played out to you based on the audience targeting set in combination with the session storage entry. Please note that the session storage is deleted when the session ends, so you will have to create the session storage again for a new session.
If your variant works as desired, you can make it live for your users. Don't forget to reset the distribution to 50% and remove audience targeting.
QA using page targeting - individual pages
Step-by-step tutorial
QA with audience targeting
For QA using page targeting, start the experiment and append "?varify-testing=true" as a parameter to the URLs automatically. Simply add the URLs to be tested to the page targeting area and append the QA parameter "?varify-testing=true" to them. Set the targeting type for each URL to "Contains".
After you have done this, change the Traffic distribution for the variation on 100% and start the A/B test. Don't worry, because the variant is only displayed if the URL is called up together with the QA parameter.
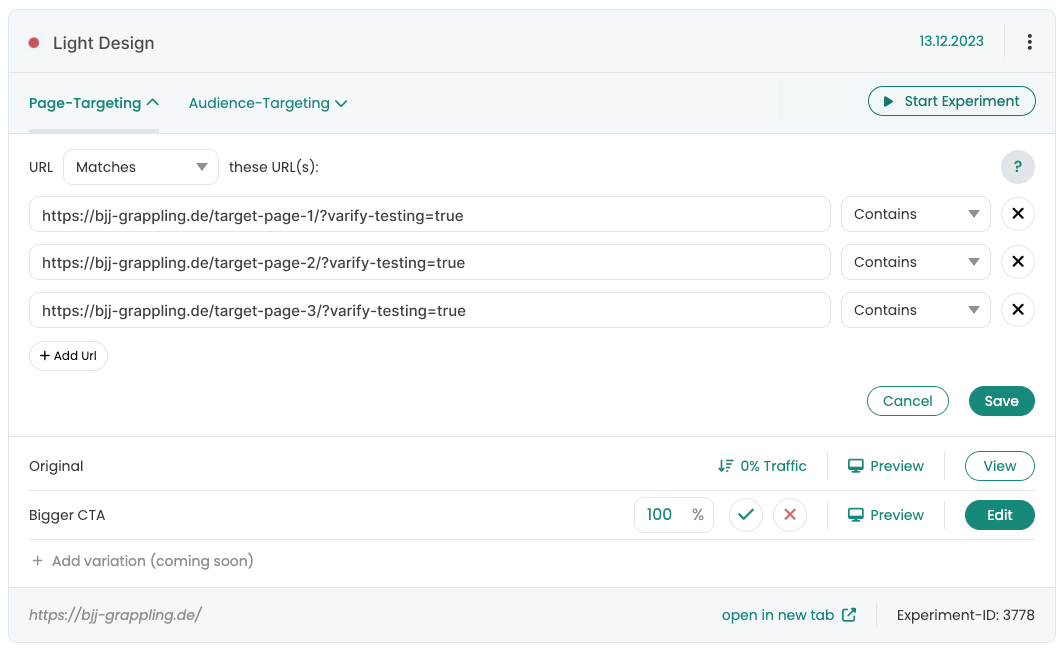
Depending on your audience targeting settings, you can now test your experiment directly in the browser by simply calling up the URL with the QA parameter. If you want to test additional pages, you can simply add them in the page targeting area. Once you have carried out the QA, you should remember to set the traffic distribution back to the desired ratio, e.g. 50:50.