Troubleshooting
Table of contents
In short
If there are problems related to loading the editor, saving variations or tracking variations, this page lists possible errors and describes how to solve them.
Editor does not load
If you access your website via the Varify.io dashboard, and the Varify.io editor does not load, it’s usually down to an incorrect implementation of the snippet or a Content-Security-Policy (CSP).
Is the script installed correctly?
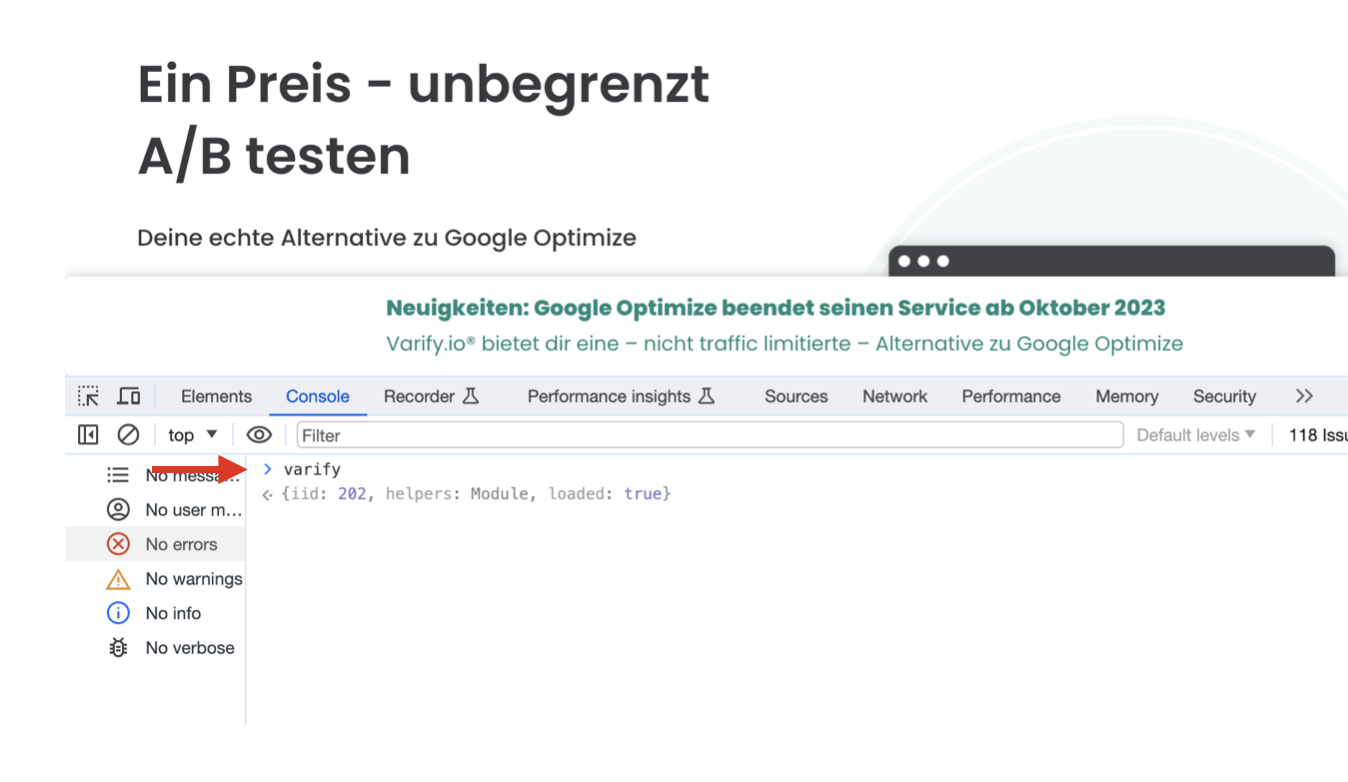
The easiest way to check if the snippet is implemented correctly is to open the browser console:
1. click with the right mouse button on an empty area of your web page
Select "Inspect" or "Inspect element".
Select the "Console" tab, type the text varify and press Enter.
If you see your account ID in the "iid" field and the value "loaded: true" is displayed, the script has been implemented correctly.
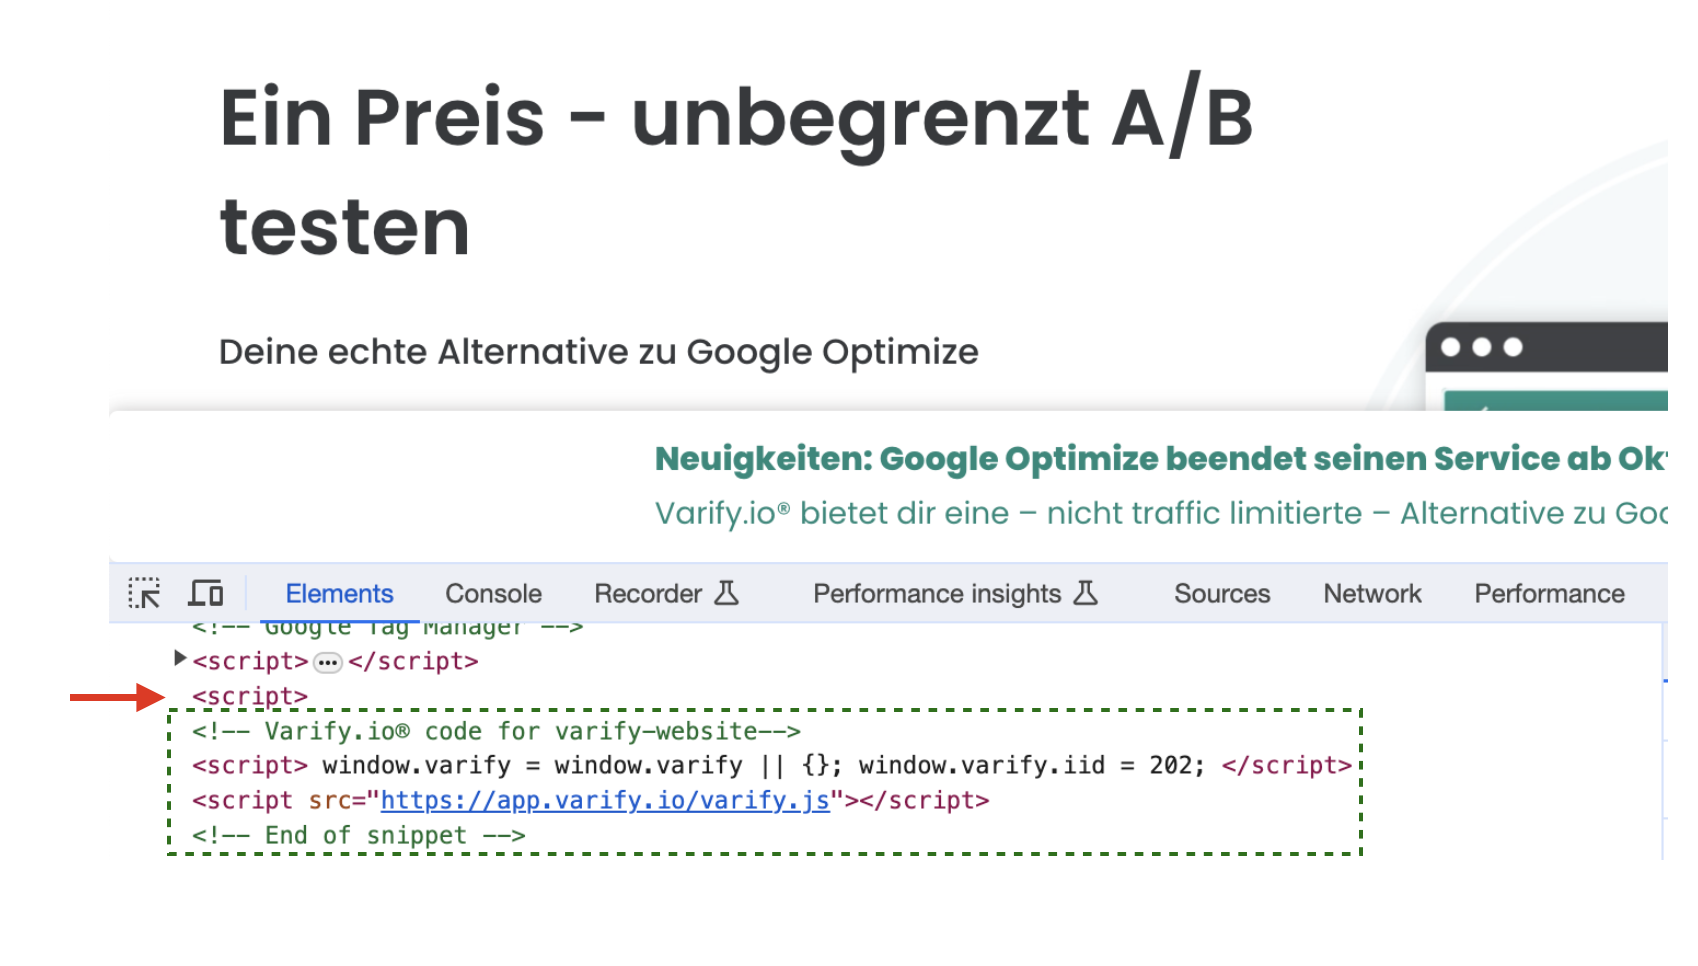
In the following example you can see a common error. In front of the included Varify.io script is another open tag. This has the consequence that the Varify.io script cannot be loaded correctly.
Content Security Policy (CSP)
Web sites can implement a content security policy (CSP) by using the HTTP response header Content Security Policy use or a -day with the http-equip Value "Content Security Policy. specify
ℹ️ Instead of blindly trusting everything a server delivers, the CSP defines the Content-Security-Policy HTTP header, which defines an access control list of sources with trusted content. It also instructs the browser to execute or display resources only from these sources.
Instead of blindly trusting everything a server delivers, the CSP defines the Content-Security-Policy HTTP header, which allows you to create an access control list of sources with trusted content. It also instructs the browser to execute or display resources only from these sources.
How to recognize CSP errors
You need to update your CSP to use Varify.io if:
a) you see an error like this in your browser console:
This page uses security features that are incompatible with the varify.io editor.
b) you see an error like this in Google Developer Tools:
Refused to execute editor.varify.io because it violates the following Content Security Policy directive...
c) You see an error like this:
Content Security Policy of your site blocks the use of 'eval' in JavaScript.
How to fix CSP errors
If your website uses a (CSP), the following values must be entered there:
- https://app.varify.io and
- https://editor.varify.io
In addition, the script-src must contain the directive "unsafe-eval" to be added.
In order to use the responsive device switcher, you must also provide your domain in both the frame-ancestors and frame-src directives.
Example
“`
Content-Security-Policy: frame-ancestors {YOUR_DOMAIN}; frame-src {YOUR_DOMAIN}; script-src 'unsafe-eval' https://app.varify.io https://editor.varify.io;
“`
Notice:
The unsafe-eval value must be set to allow custom javascript to be delivered by the variation.
Variations are not saved
You can make changes with the visual editor, but you can't save variations? Then it could be because the Varify.io script has not been implemented correctly.
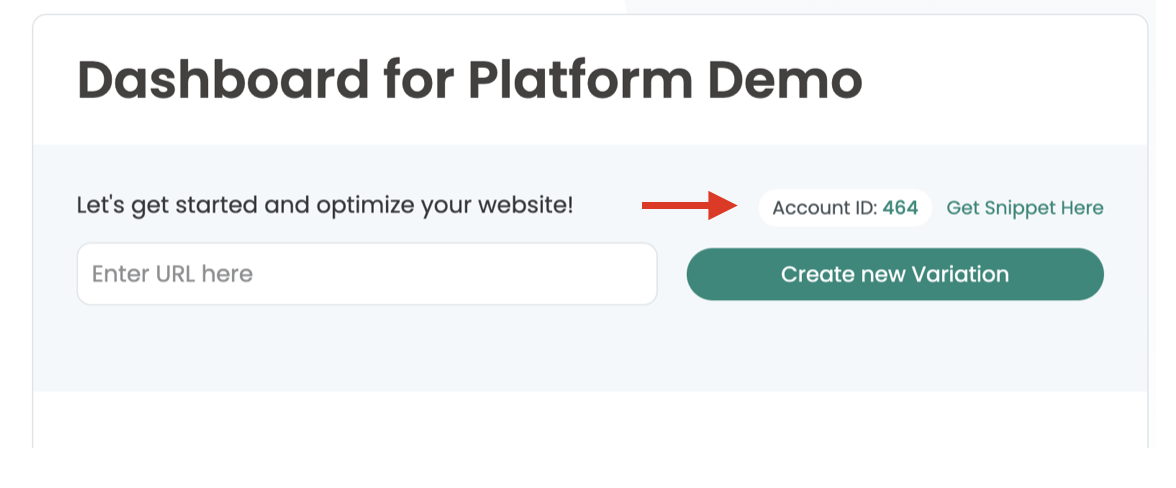
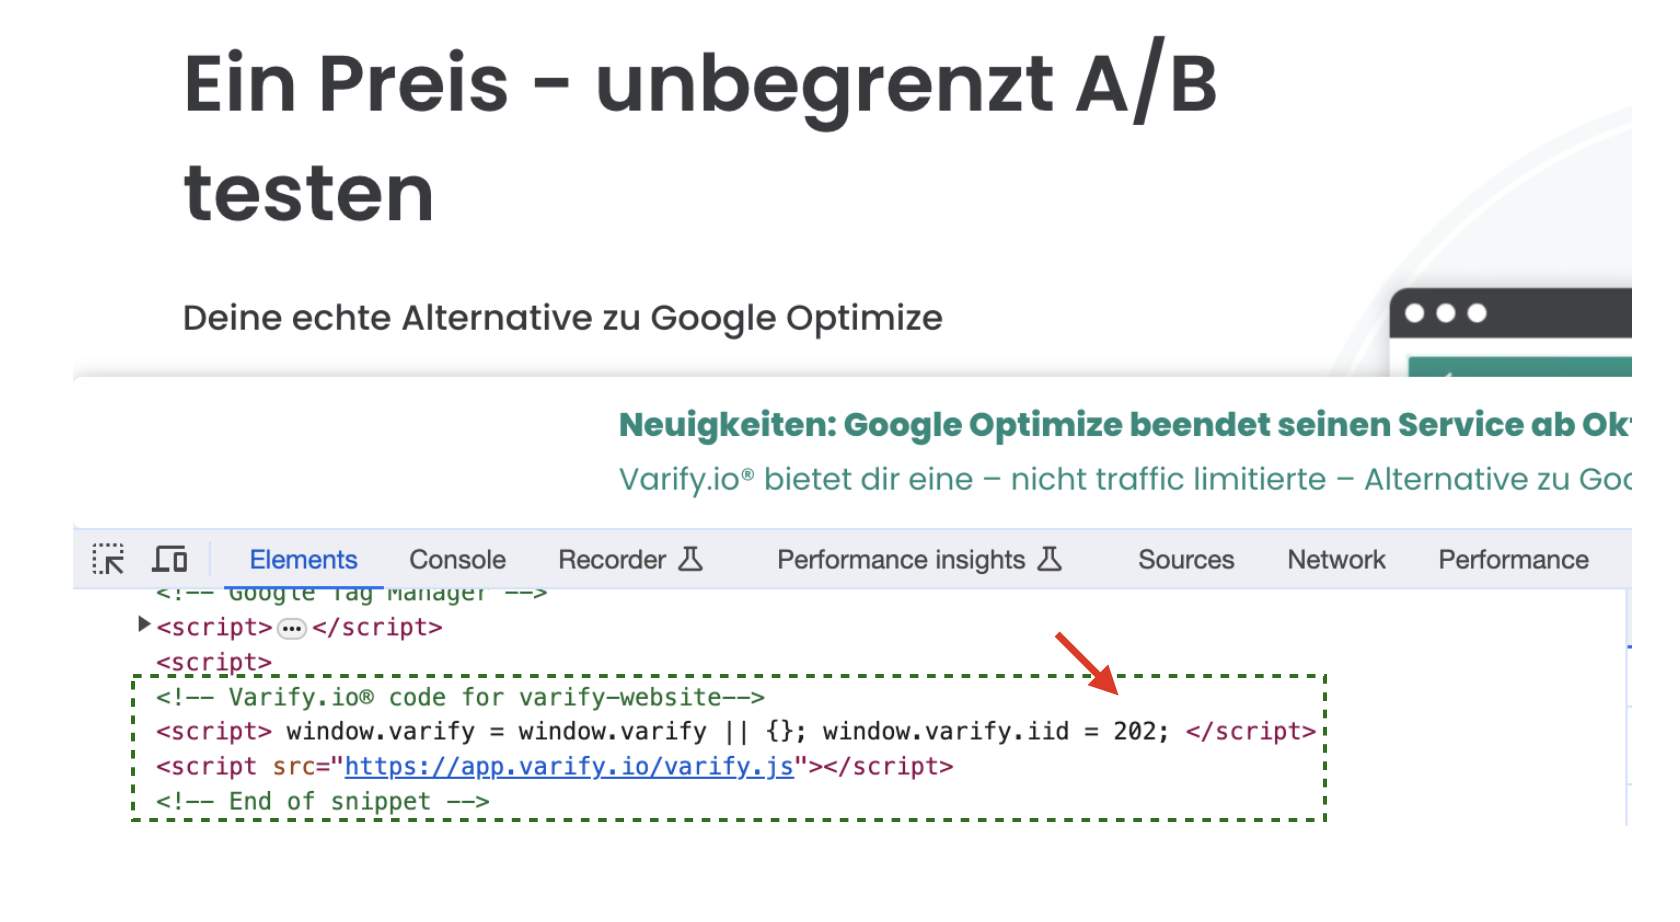
Wrong Account ID
Check if the account ID in your snippet matches the your account ID in the Varify.io dashboard.
Varify.io script is not integrated correctly
See here
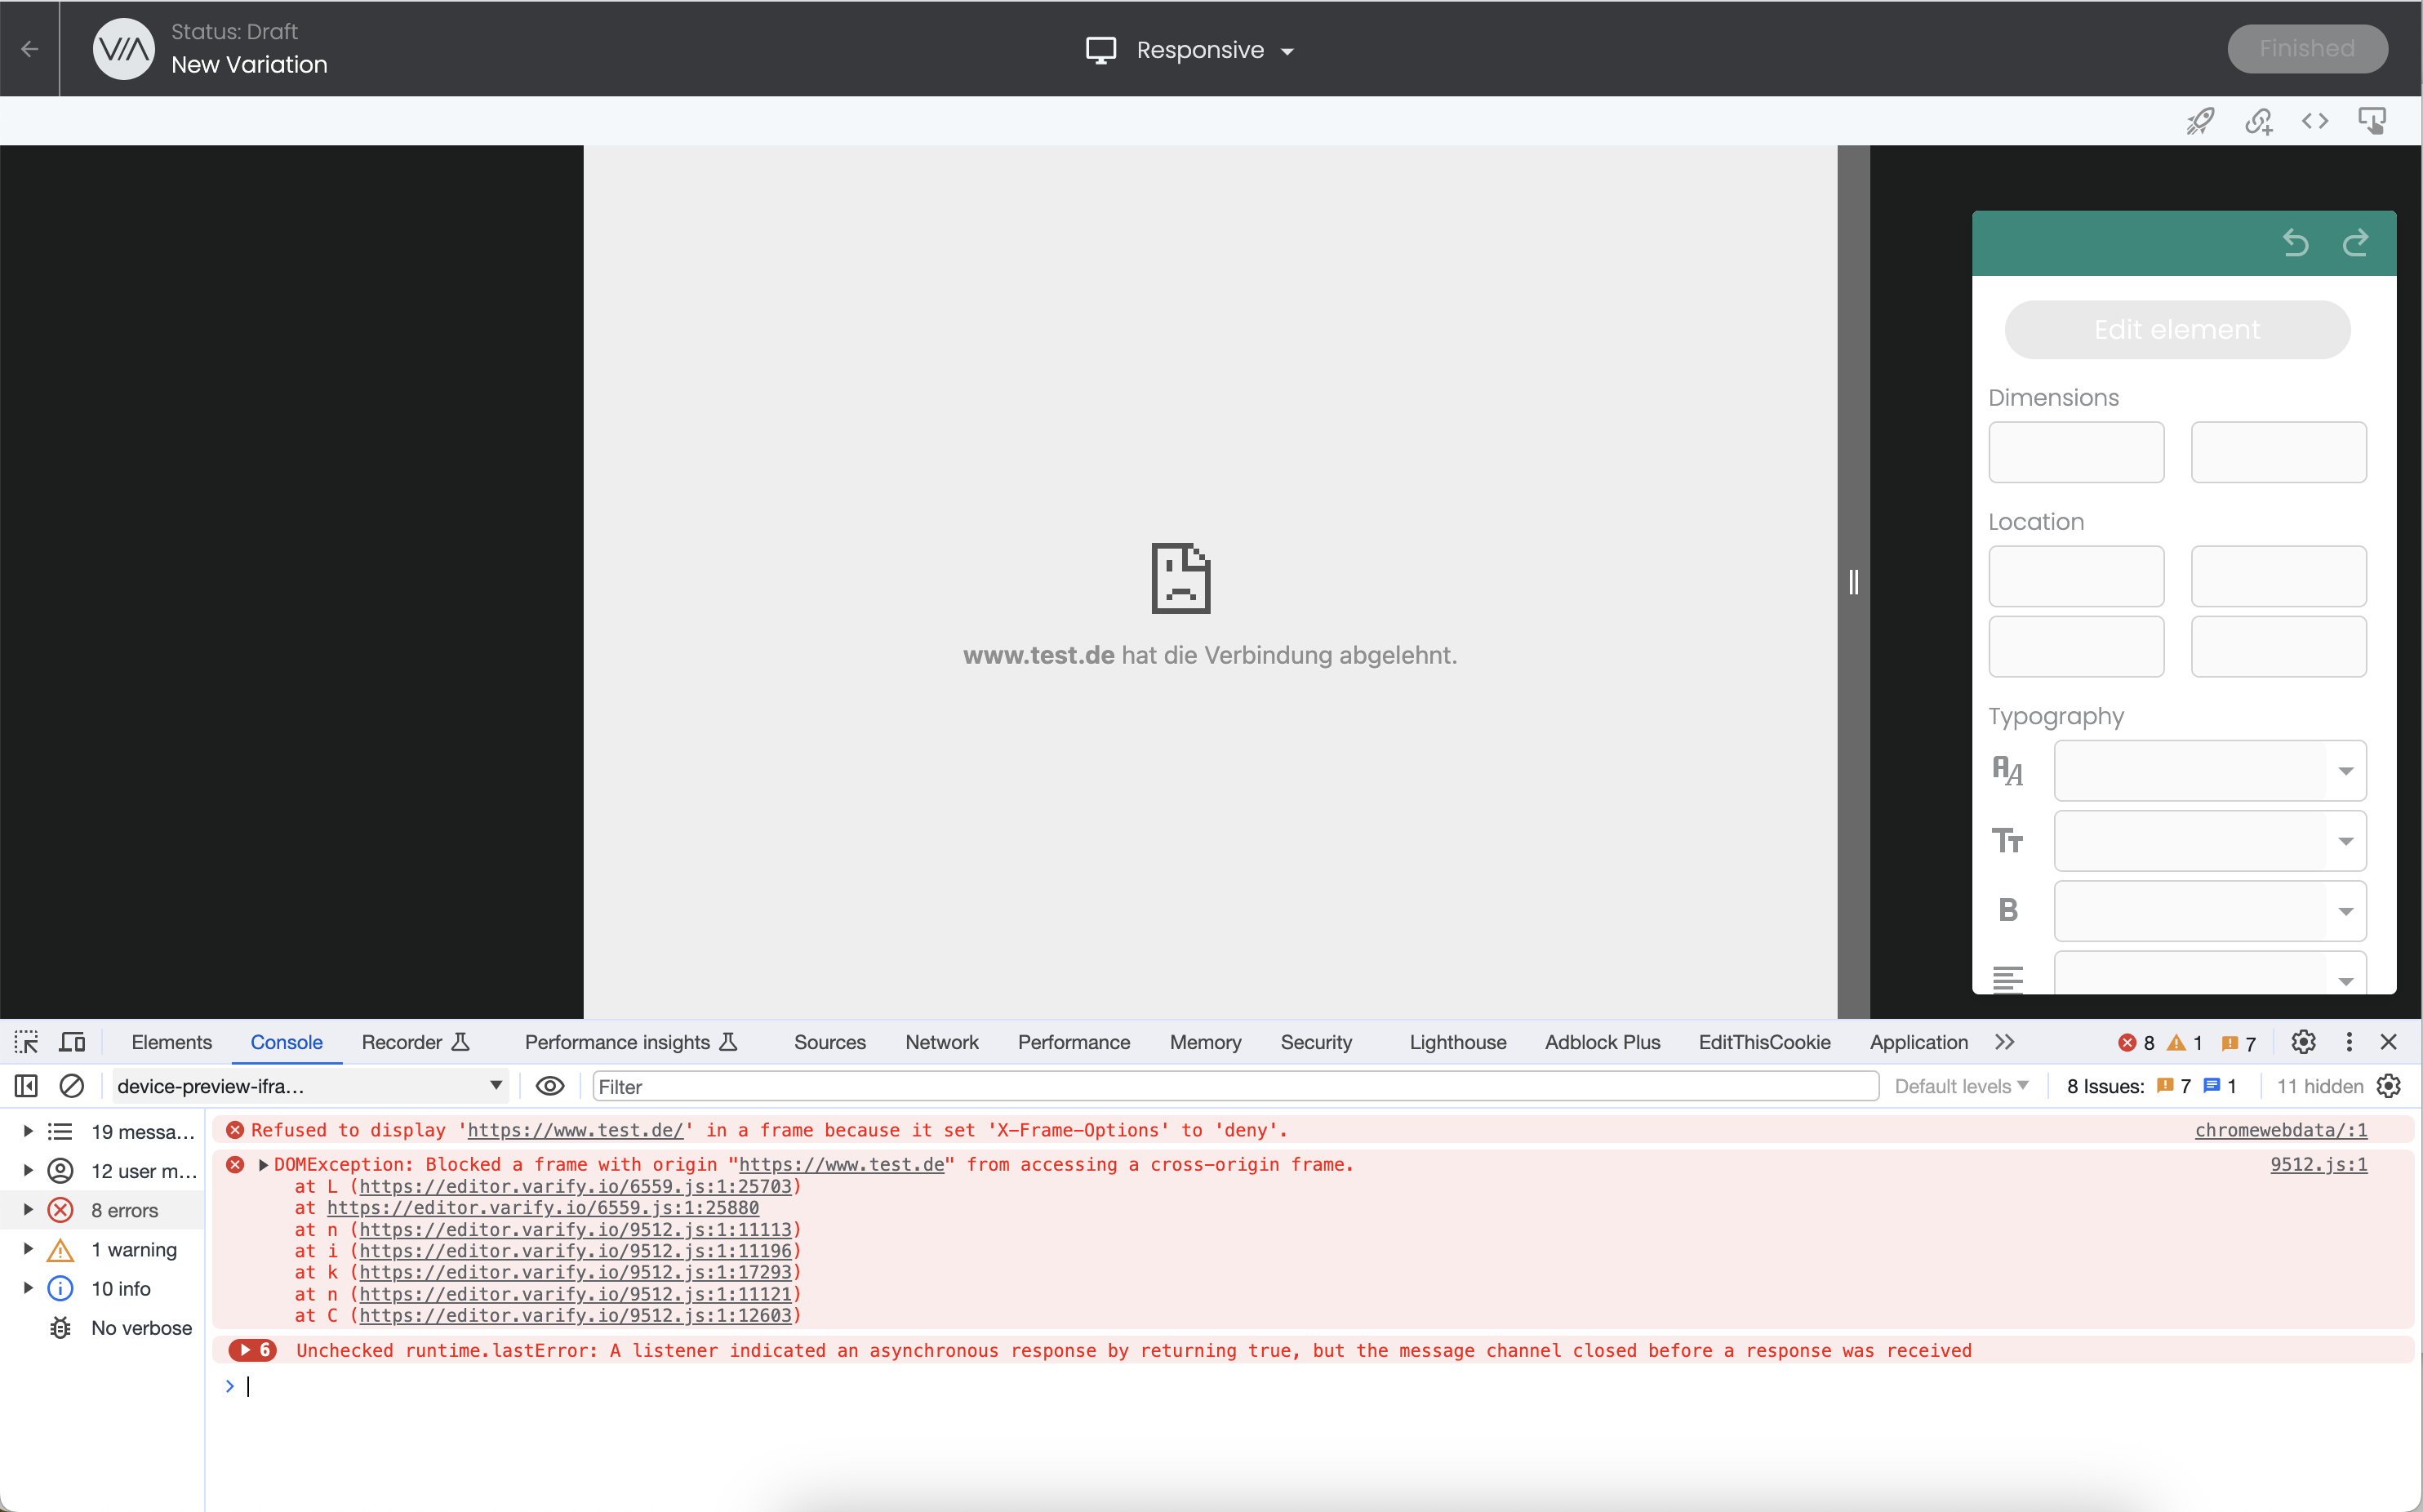
The Responsive Device Switcher does not display the web page
If you would like to display and edit your website responsively, but your website fails to load in the responsive device mode, it could be due to framing restrictions.
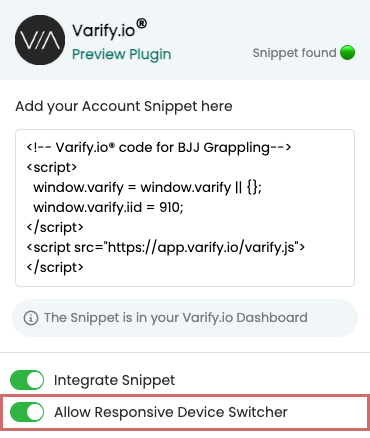
Solution: Use of the Varify.io® Chrome Extension
So that you can still display and customize your variants for mobile devices, you have the option of bypassing this framing restriction with the Varify.io® Chrome Extension.
1. download the Varify® Chrome Extension
2. activate it in your browser and store your Varify® code snippet
3. activate the "Allow Responsive Device Switcher" switch
4. reload the page - Ready!
The Responsive Device Switcher should now work.
A more detailed explanation of installation and activation, as well as other functions, can be found here: Varify® Chrome browser extension
Customization of the X-Frame options on your own website
If you see an error message like in the screenshot above, a framing restriction is not allowing you to load the page in the responsive device switcher.
The normal desktop view of the visual editor is not affected by framing restrictions.
If your page is delivered with the X-Frame Options response header with the value "deny" you will not be able to use responsive editing.
A reasonable solution in this case would be to restrict to X-frame options: “sameorigin" .
X-Frame-Options: "sameorigin" allows your pages to be embedded in a frame from your domain, but does not allow them to be embedded from other websites.
Tracking: No or missing data in GA4
Custom definition is missing or incorrectly named
Before you can receive data in GA4, it is necessary that a "Custom Definitions" has been created in Google Analytics 4. It is important that you follow the instructions GA4 Direct integration or GTM Integration follow.
GA4 Integration:
In GA4 integration, the user-defined definition must be linked to the event parameter "varify_abTestShort" be created.
GTM Integration:
For GTM integration, the user-defined definition for the event parameter "varify_abTest" be created.
It is important that the spelling is correct. Please pay attention to upper and lower case.
The event parameter can also be selected directly in the dropdown. However, it will only appear if you have previously selected:
- have started a first experiment (feel free to set a A/A Test on)
- There are test participants in the experiment, so data is also sent to GA4
- The first test data run in only after approx. 24 hours
Varify.io - Test events in the real-time report
To check whether the Varify.io events arrive in Google Analytics 4 (GA4), you can use the real-time report. There are minor differences depending on whether you have connected your tracking via the direct integration or the Google Tag Manager.
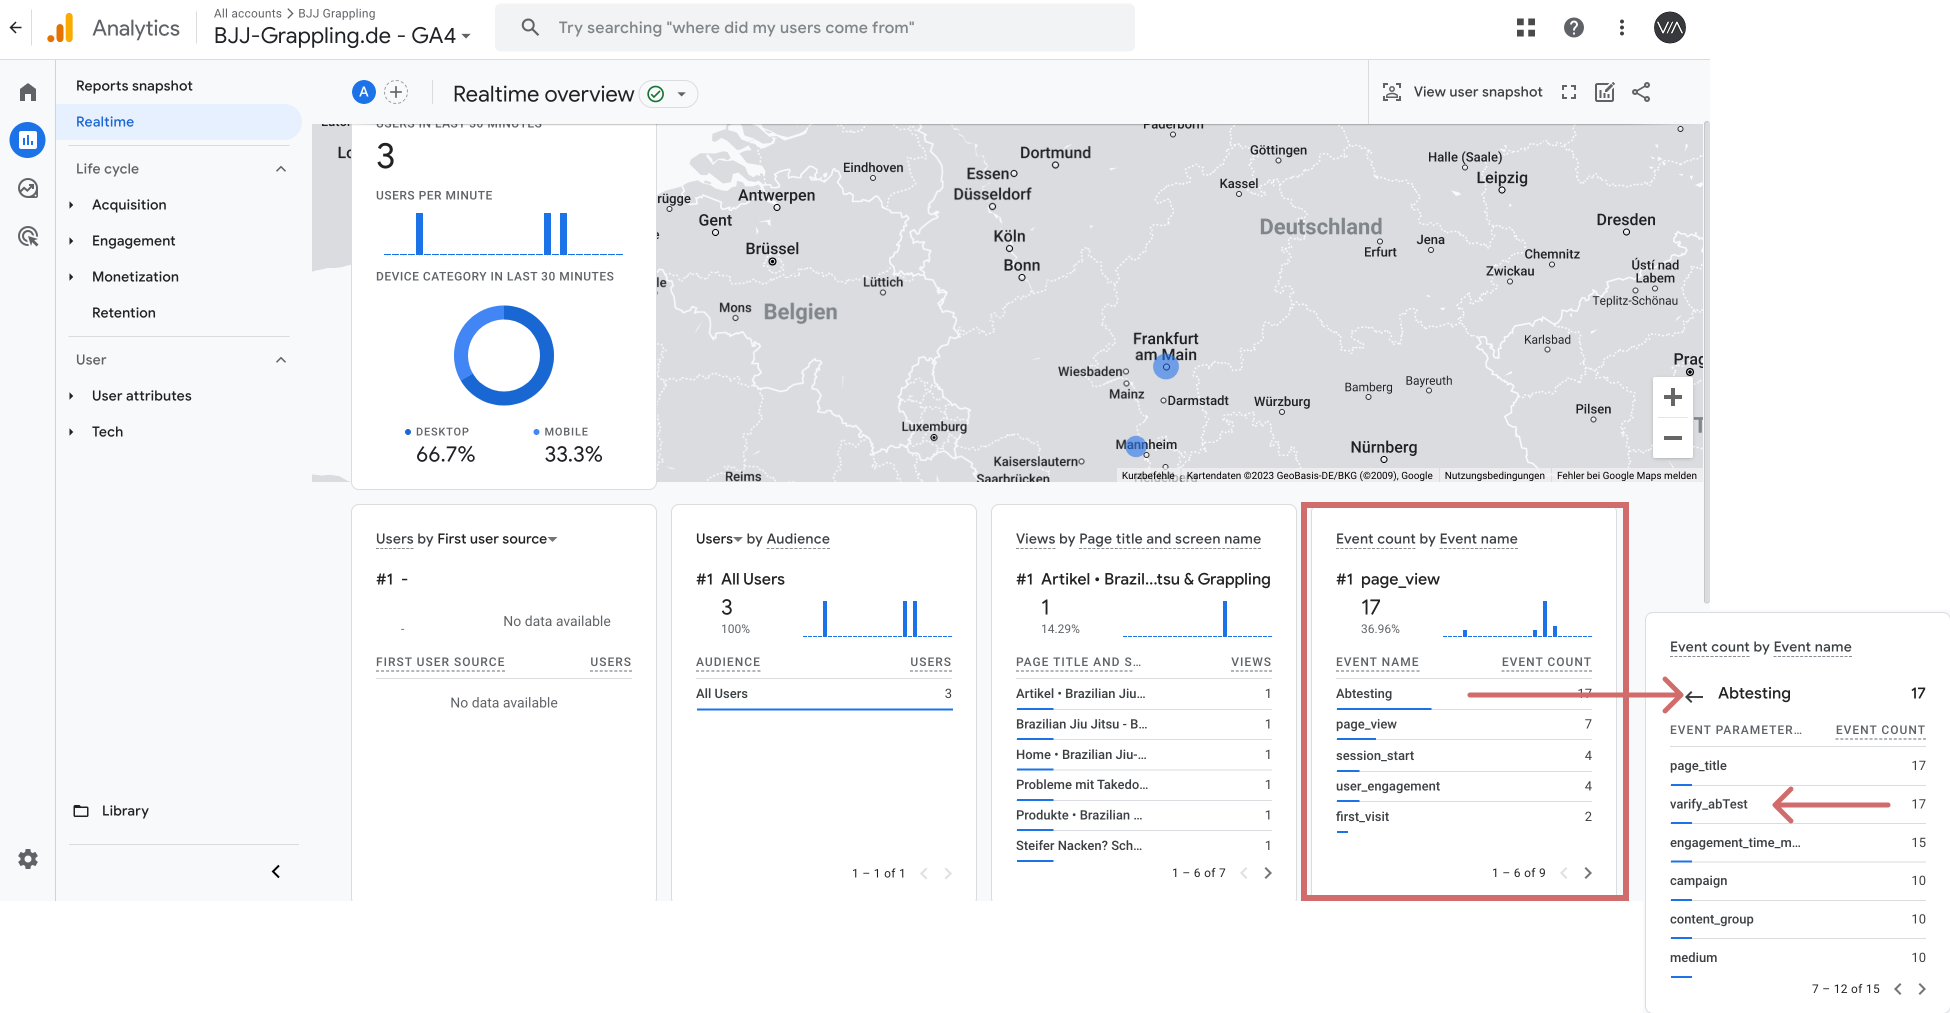
GA4 Direct integration
1. Navigate to "Reports" and click on "Realtime".
2. Trigger a Varify.io event. For example, by calling up a page on which an A/A test is running.
You can now see directly in the real-time report whether the expected events are being recorded. In the "Event Count by Event Name" tile, after a few seconds the corresponding event "varify" will appear. You can then click on it to check the event parameter. Here you should now see "varify_abTestShort" be visible.

Google Tag Manager Integration
1. navigate to "Reports" and click on "Realtime".
2. trigger a Varify.io event. For example, by calling up a page on which an A/A test is running
You can now see directly in the real-time report whether the expected events are being recorded. In the "Event Count by Event Name" tile, after a few seconds the corresponding event "Abtesting" will appear. You can then click on it to check the event parameter. Here you should now see "varify_abTest" be visible.
Page flickering - Flickering effect
This effect occurs because the A/B testing tool first loads the original version and then places the variation on top of it. During this transition process, there may be temporary changes in the design, layout or content of the page that are visible to the user. This leads to unwanted "flickering" or "flickering" on the user's screen.
The flickering effect can be frustrating and have a negative impact on the user experience.
To counteract this, an anti-flicker script can be used, which prevents the flicker effect for your users. You can find detailed instructions here: Anti-flicker script.