Redirect & Split URL Testing
Table of contents
In short
With the Redirect function you can redirect incoming users to a specific page. If you use this function in an A/B test, you can perform a "split URL test". For example, you can test your current page against a new version of the page that is accessible via a different URL.
Step-by-Step Tutorial
Create a split URL test with Varify.io
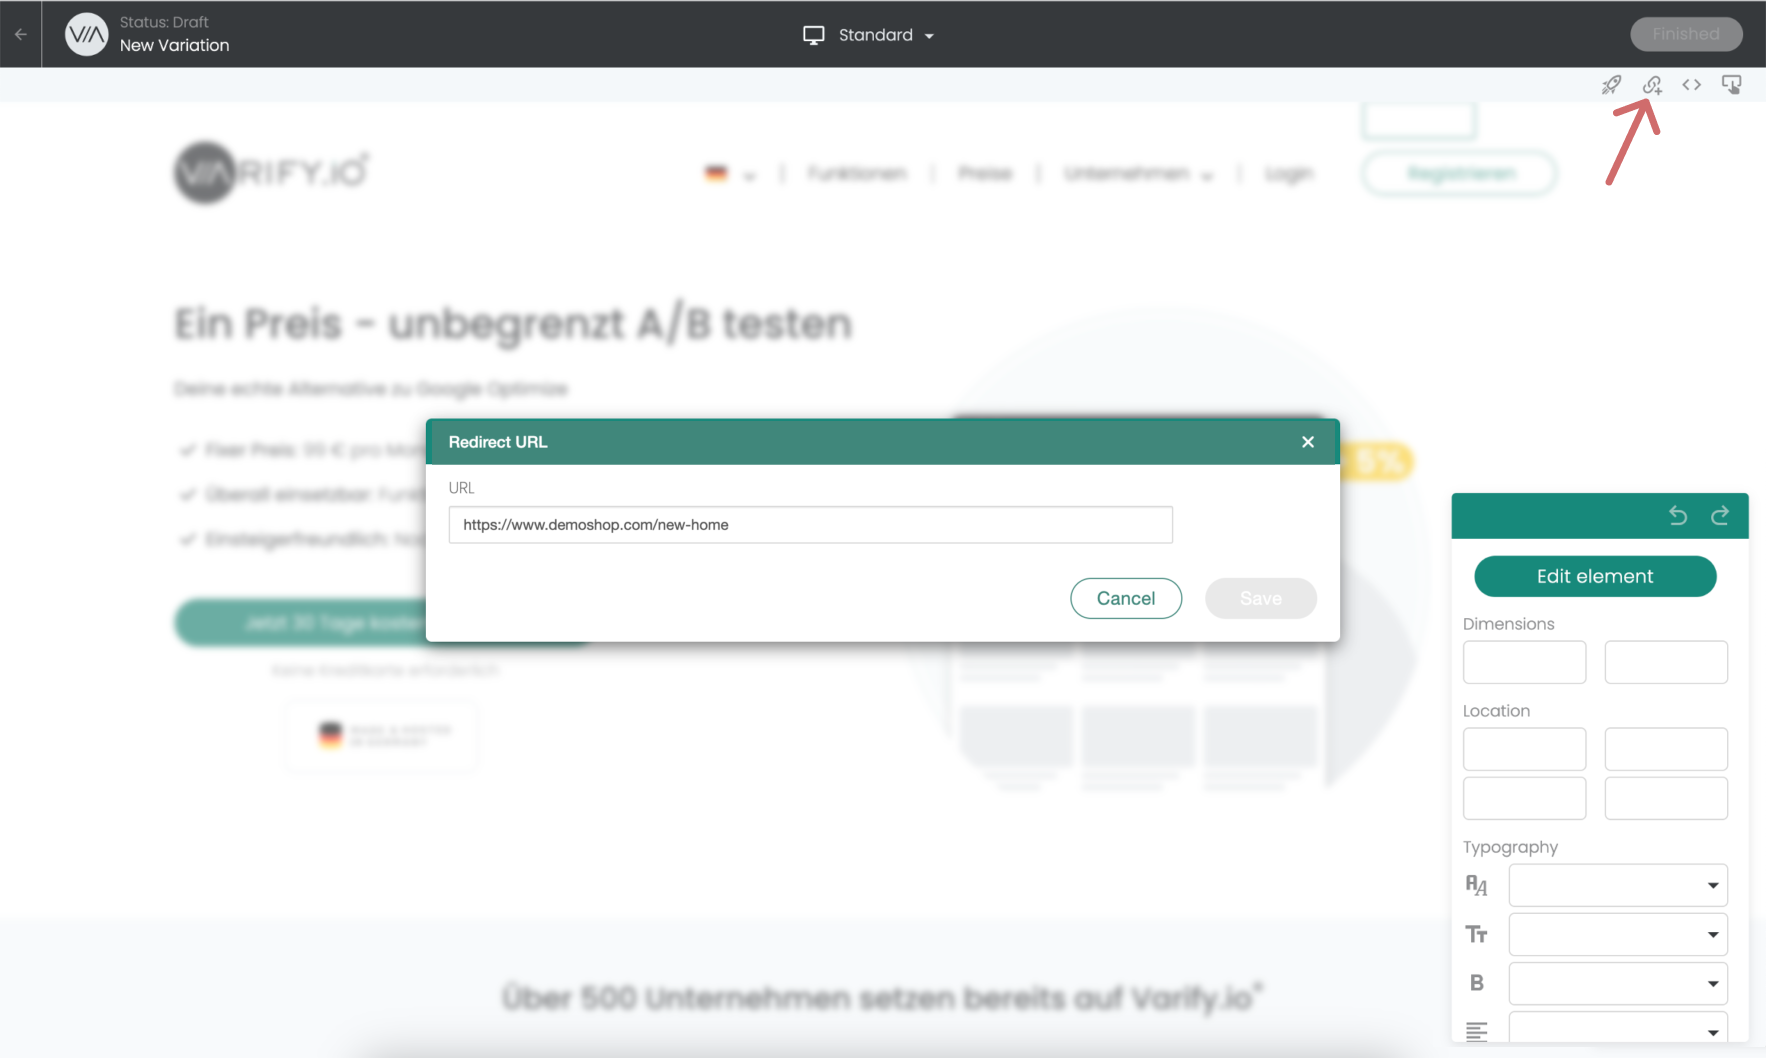
Create Redirect URL in Editor
Create a new variant and click on the "Redirect URL" icon. Then enter the URL to which incoming users should be redirected in the URL input field.
Important Notice:
When entering the URL, be sure to enter the full, absolute URL.
-> “https://www.demoshop.com/new-home" and not "demoshop.com/new-home".
Contact us if you have any questions: https://varify.io/kontakt/
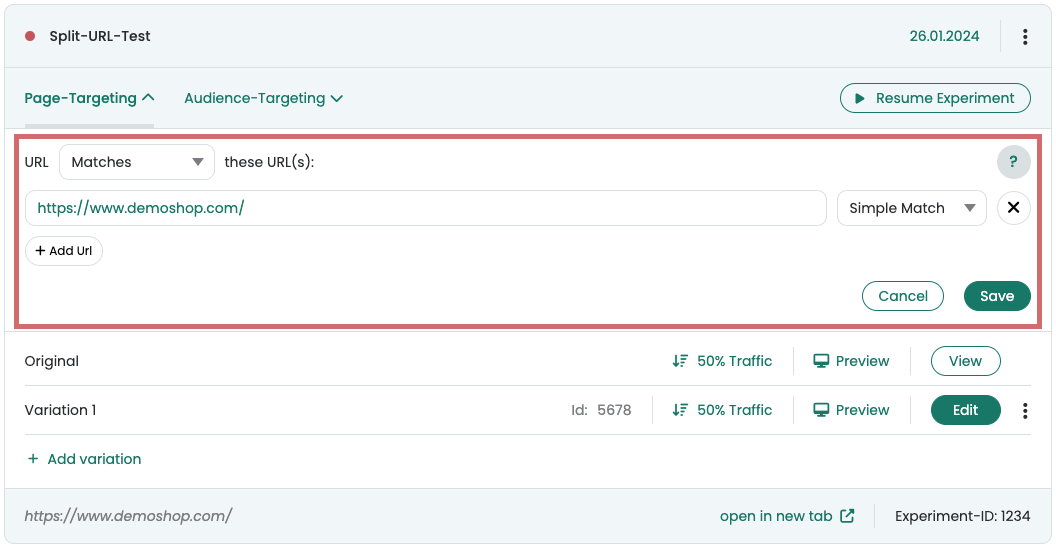
Set up page targeting
After you have created and saved the redirect URL in the visual editor, you can define the settings for the split test in the Varify.io dashboard.
- In Page Targeting, enter the URL on which your experiment should take place. This is the URL from which you want to redirect to the redirect URL. -> Do NOT enter the redirect URL!
- Set the matching type to "Simple Match"
- Set the desired traffic distribution for your variant
- Start the redirect experiment
Example: The screenshot shows the setting that 50% users who come to https://www.demoshop.com/ are now redirected to the URL that was previously entered in the created variant under Redirect URL.
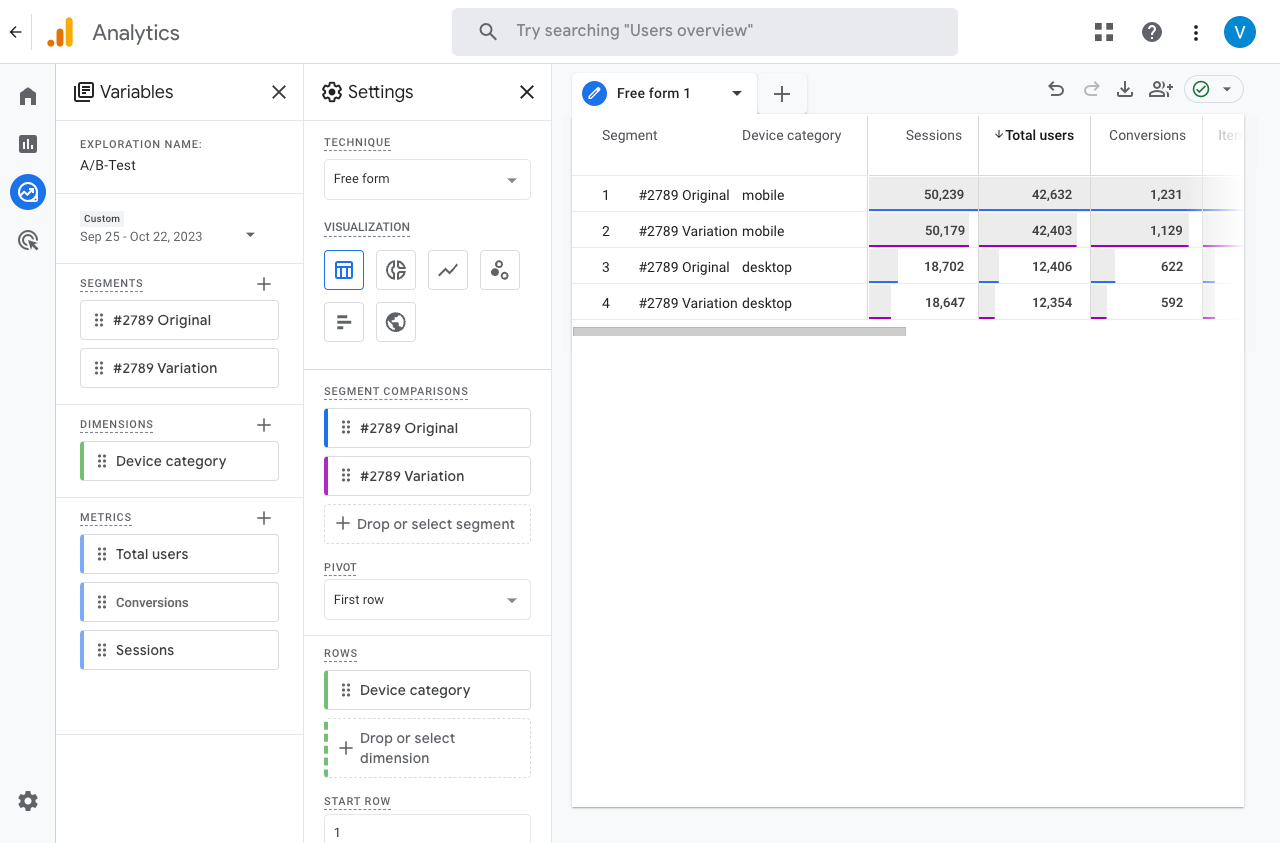
Evaluation of the split URL test
Like any other experiment, a split URL test can be easily evaluated in Google Analytics 4. You can find the corresponding instructions here: Evaluation of results in GA4
- Create a new exploratory report
- Create a segment for the original variant, i.e. the variant in which users are not redirected. (Experiment ID:Original)
- Then create a segment for the forwarded users. In other words, those who are in the variant. (Experiment ID:Variant ID)