Universal Analytics reports in GA4
Table of contents
In short
With just a few clicks, you can get the Universal Analytics standard reports back in GA4. To do this, create new reports using our generator. Then add these reports to your GA4 via a collection.
Step-by-Step Tutorial
Create Universal Analytics reports
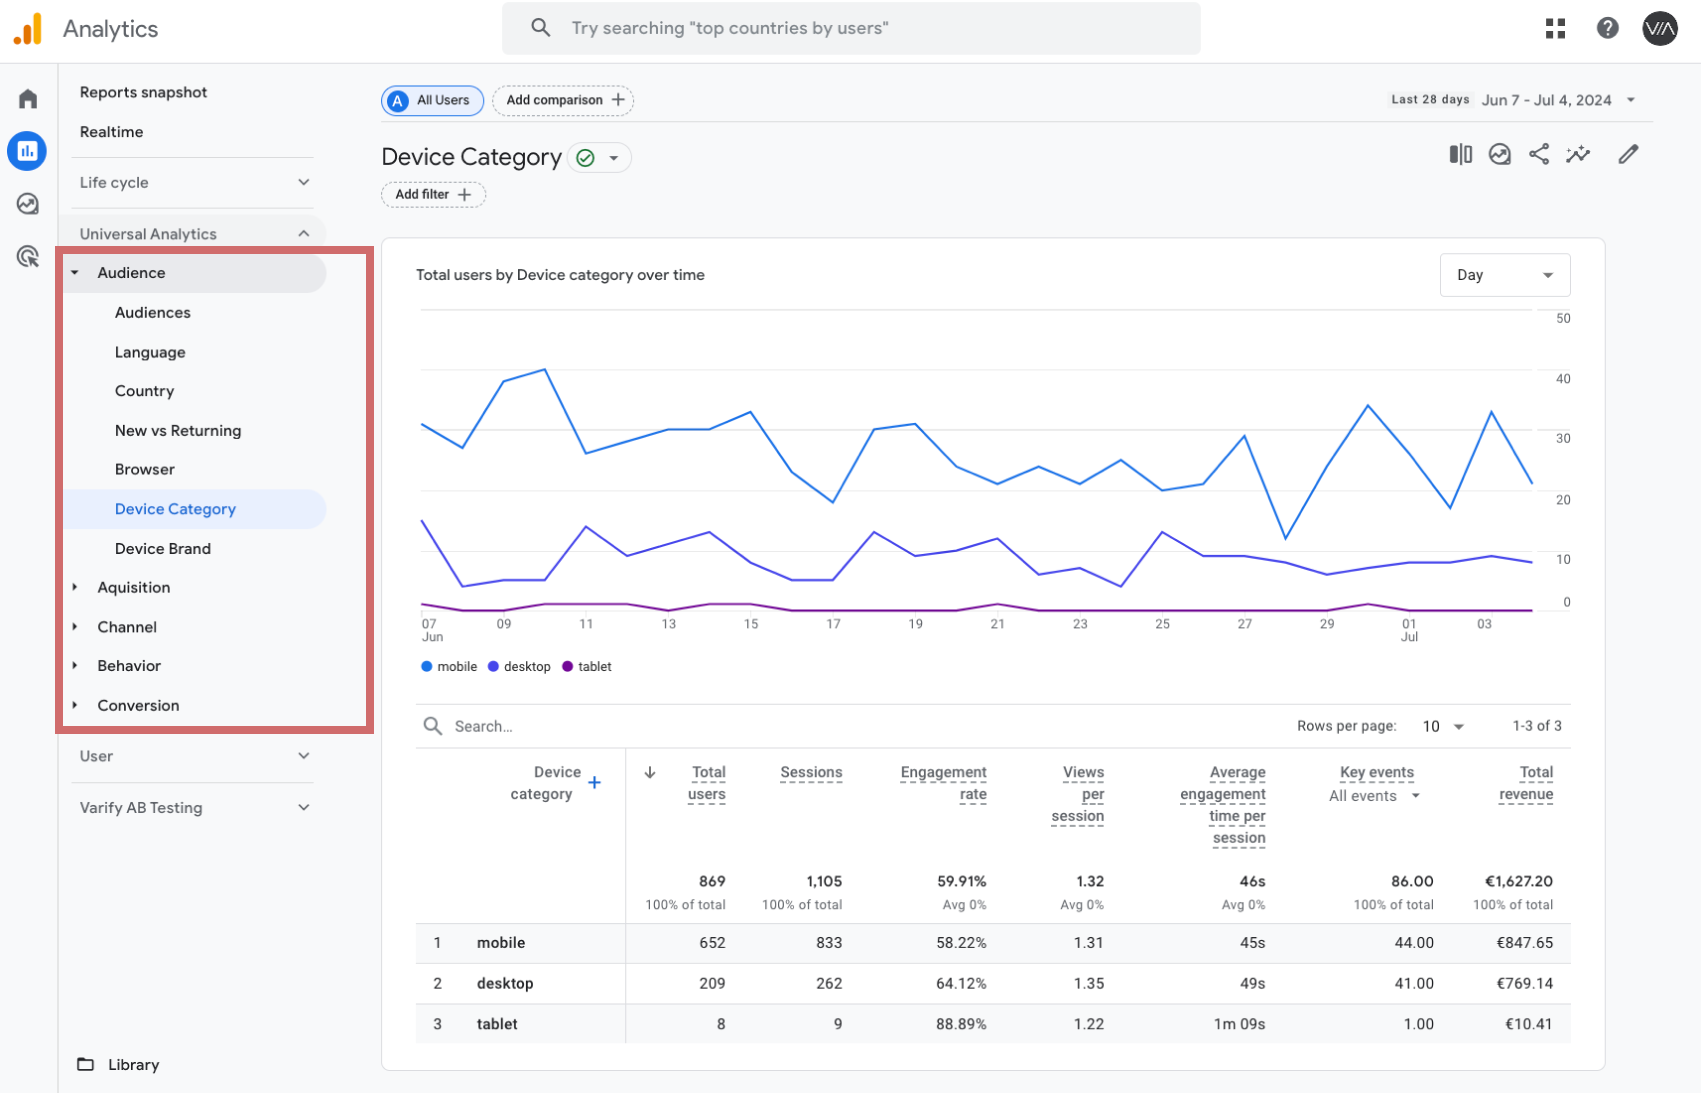
Create Universal Analytics reports in GA4
Are you missing important standard reports that were still provided by default in Universal Analytics? Then we may have a good solution for you. With just a few clicks, you can easily create the "old" Universal Analytics standard reports, as shown in the screenshot.
1. create reports via UA Report Generator
To get the "old" UA reports back, you can simply use our generator to create the reports with one click.
Now enter your Authuser and Property ID here:
Info
Authuser:If you are signed in with different Google Accounts you need to select the right Authuser-ID of your GA4 property. You will find it in the URL of your GA4 Dashboard (?authuser=X).
Property ID:
This is the ID of the GA4 Proprty where you want to add the reports. You can find it in the URL of your GA4 dashboard (p12345678)
We do not save any inputs you make in this generator. ✖ close
This is how you start:
- Enter the corresponding Authuser ID from your GA4 URL in the "Authuser" field
- Enter your GA4 property ID including the "p" in the "Property ID" field. You can find both in your GA4 URL.
- Click on "Create UA standard reports", select your desired report and save it. Done!
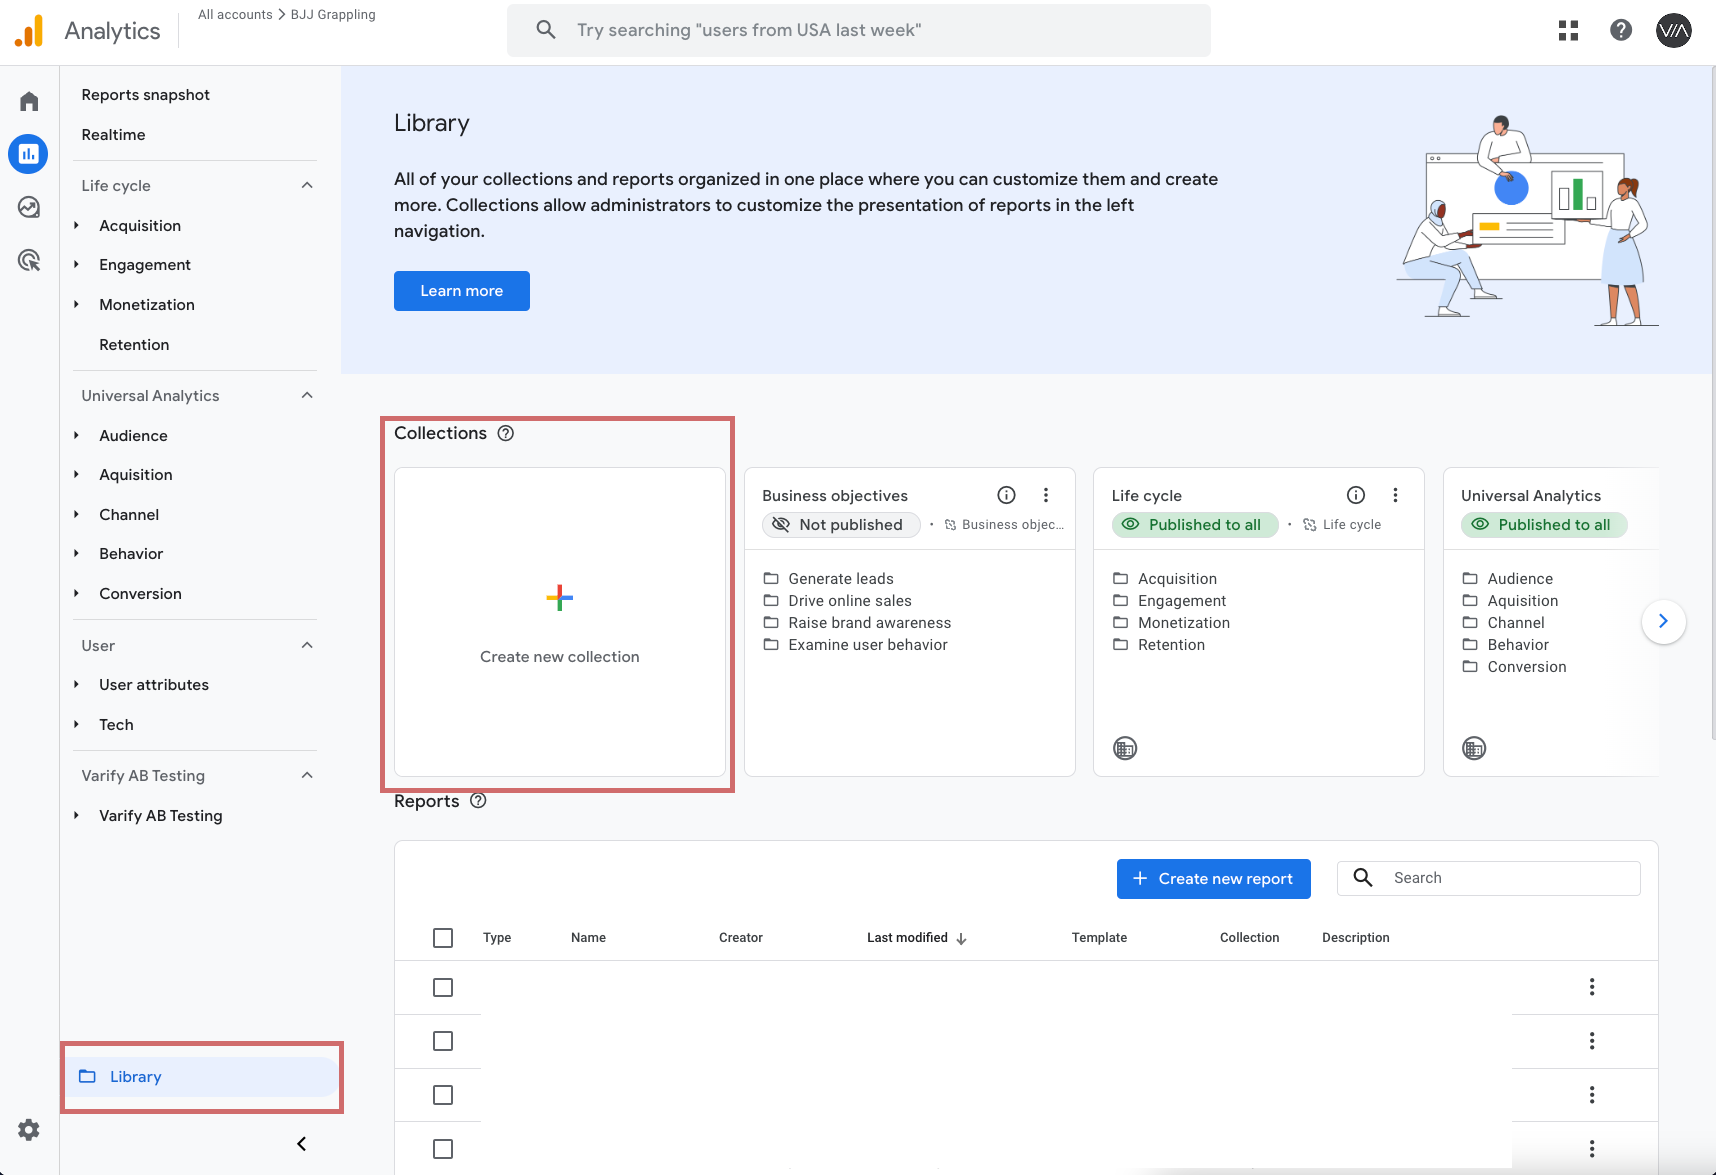
2. Compile reports in a collection
Once you have created and saved the reports, you can add them to your GA4 dashboard as a separate collection in the report library. Proceed as follows:
- Go to your report library
- Click on "Create new collection" and create an empty collection
- Name the collection "Universal Analytics"
- Create a new section heading "Audience"
- Drag your created reports from the "Audience" tab under the subheading
- Create a separate subheading for each tab and drag in the corresponding reports
- Save the collection
- Now publish the collection in the library (click on the three dots next to the collection and select "Publish")
First steps
Tracking & web analytics integrations
- Tracking with Varify
- Manual Google Tag Manager tracking integration
- Automatic GA4 tracking integration
- Shopify Custom Pixel Integration via Google Tag Manager
- Shopify Tracking
- BigQuery
- PostHog evaluations
- Matomo - Integration via Matomo Tag Manager
- etracker integration
- Piwik Pro Integration
- Consent - Tracking via Consent
- Advanced Settings
Create experiment
Targeting
Reporting & evaluation
- Reporting in Varify.io
- BigQuery
- Segment and filter reports
- Share report
- Audience-based evaluation in GA4
- Segment-based evaluation in GA 4
- PostHog Tracking
- Exporting the experiment results from Varify
- Matomo - Results analysis
- etracker evaluation
- Calculate significance
- User-defined click events
- Evaluate custom events in explorative reports
- GA4 - Cross-Domain Tracking
Visual editor
- Campaign Booster: Arrow Up
- Campaign Booster: Exit Intent Layer
- Campaign Booster: Information Bar
- Campaign Booster: Notification
- Campaign Booster: USP Bar
- Add Link Target
- Browse Mode
- Custom Selector Picker
- Edit Content
- Edit Text
- Move elements
- Hide Element
- Keyword Insertion
- Redirect & Split URL Testing
- Remove Element
- Replace Image
- Responsive Device Switcher
- Style & Layout Changes