Creation and evaluation of user-defined click events
Table of contents
In short
Varify.io® does not collect any data itself. Nevertheless, you can track click events on specific elements within your Varify experiments. In this section, we explain step by step how you can do this with Google Analytics 4.
Click tracking on a specific element
The element only exists in your variant
To measure clicks on newly created elements in your variant, you must first define a unique selector for each element. IDs are particularly suitable for this.
A unique selector is for example: #my-btn
To adapt the JavaScript code for tracking clicks on your new element, you should first use the placeholder #my-btn in line 3 of the code with the actual selector of your element. You can use the "Add JS" function to do this. Follow these instructions:
Open the JavaScript editor in Varify: Open the window in the editor to insert JavaScript. You will find the code symbol at the top right.
Insert code: Paste the JavaScript code provided into the editor.
Replace selector: Find the placeholder in line 3
#my-btn. Replace#my-btnwith the actual selector of your new element. This could be an ID (for example1TP6New-button-id) or a class (for example.new-button-class).Save changes: Save the changes after replacing the selector.
					window.varify.helpers.onDomLoaded(() => {
    // Replace the CSS selector
    var cssSelector = "#my-btn";

    // Select only the first element with the .btn-primary class
    var element = document.querySelector(cssSelector);

    if (element) {
        element.addEventListener("click", VarifyTrack);
    }
});

function VarifyTrack() {
    if (typeof gtag === "function") {
        gtag('event', 'VarifyClick', {
            'VarifyClickCount': '1',
        });
        console.log("Event sent.");
    } else {
        console.log("gtag is not defined. Please check the GA integration.");
    }
}

The element already exists (in original and variant)
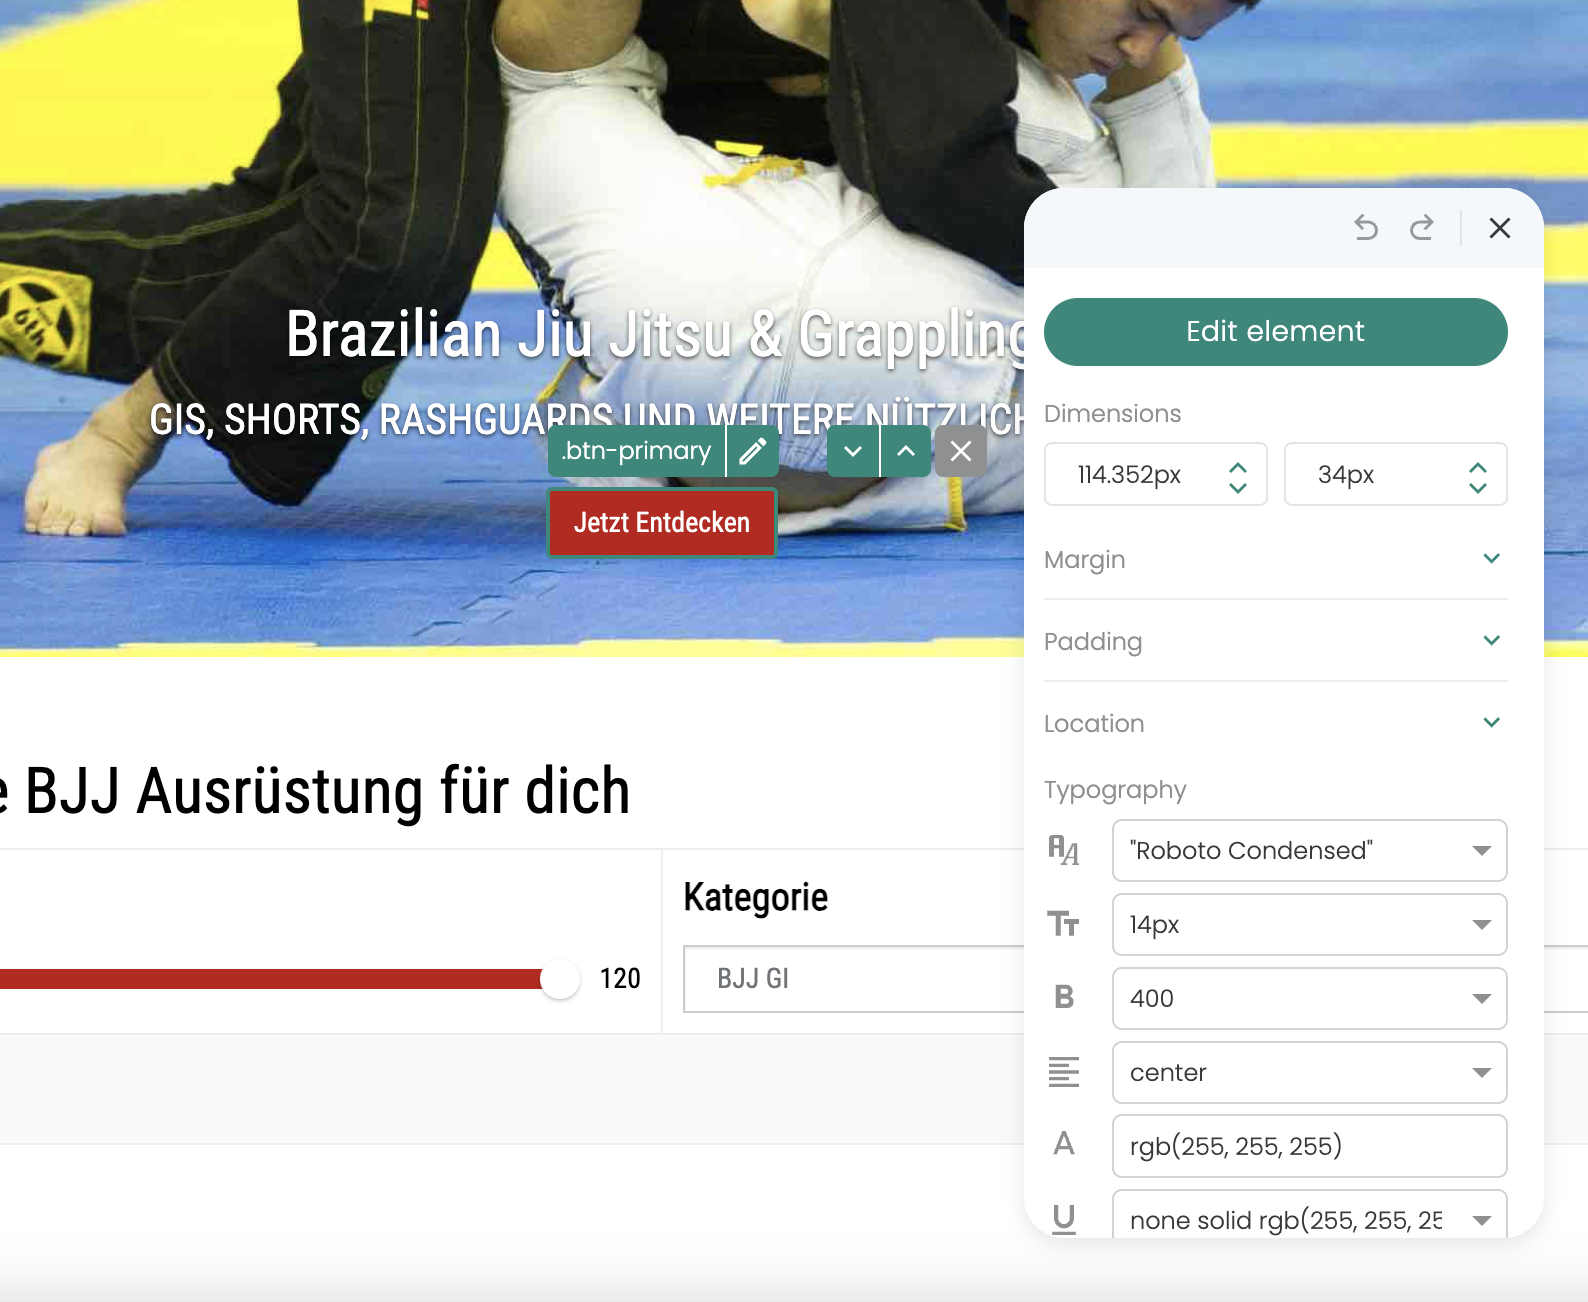
To measure clicks on elements that already exist on your website, it is important that you define a unique selector for each element. An effective way to determine such a selector is to use the visual editor of Varify.io.
The following is an example of a unique selector .btn-primary.

To track click events of already existing elements that occur both in the original and in the variant of your experiment, you can set up a special tracking experiment. Here is a customized guide:
Create new experiment: Create an experiment that is intended exclusively for tracking elements.
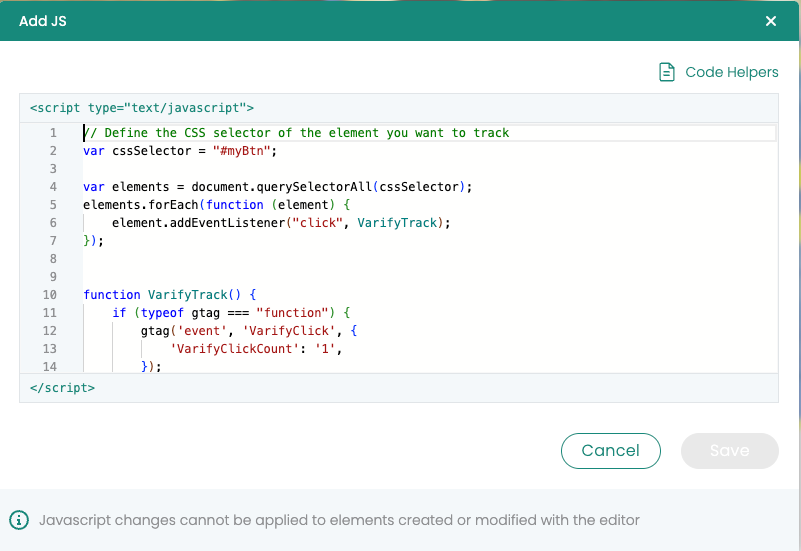
Add JavaScript code: Use the "Add JS" function to add the required JavaScript code to your variant. In line 3 of the code, replace the placeholder
.btn-primarywith the correct CSS selector of your element.Set page targeting: Set the page targeting for the experiment so that it is set to the homepage with a "Contains" matching type. This ensures that all pages of your website are included, so that the experiment is active on the entire site.
Adjust traffic distribution: The traffic distribution should be set to 100% for the variant to ensure that all users receive the tracking script.
Track click events: The clicks on the specified element are sent as an event to Google Analytics 4 (GA4) to be analyzed there.
					window.varify.helpers.onDomLoaded(() => {
    // Define the CSS selector of the element you want to track
    var cssSelector = ".btn-primary";

    var elements = document.querySelectorAll(cssSelector);
    elements.forEach(function(element) {
        element.addEventListener("click", VarifyTrack);
    });
});

function VarifyTrack() {
    if (typeof gtag === "function") {
        gtag('event', 'VarifyClick', {
            'VarifyClickCount': '1',
        });
        console.log("Event sent.");
    } else {
        console.log("gtag is not defined. Please check the GA integration.");
    }
}
Evaluation of user-defined click events in GA4
Evaluation in Varify In-tool Reports
Note: As soon as the first click events are recorded in Google Analytics 4 (GA4), it can take up to 24 hours before they are visible in the reports.
To create a destination based on the click event, perform the following steps:
- Go to the experiment results: Navigate to the results of any experiment.
- Add GA4 target: Click on "Add GA4 Goal" to create a new goal.
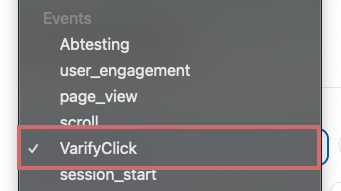
- Configure Goal: Select the corresponding click event to link the goal to it.

Evaluation in GA4 Segment Reports
In order to effectively evaluate the click events created from your A/B tests, it is advisable to create corresponding custom metrics in Google Analytics 4 (GA4). You can then import and select these custom metrics in the exploratory data analysis of GA4.
Here are the steps on how to proceed:
Create custom metrics: Create custom metrics in GA4 for the specific click events you want to track.
Use explorative data analysis: Import these custom metrics into the exploratory data analysis within GA4 to gain deeper insights into the performance of your A/B tests.
Select metrics: Select the custom metrics you have created from the available metrics in your exploratory reports.
We have created a separate article for more detailed instructions: Evaluate custom events in explorative reports.
Working with custom metrics is particularly recommended if you use exploratory reports to evaluate your A/B tests in GA4. This enables a more precise analysis and better adaptability to your specific analysis needs.
First steps
Tracking & Evaluation
- Tracking with Varify.io
- GA4 reporting in Varify.io
- Segment and filter reports
- Audience-based evaluation in GA4
- Segment-based evaluation in GA 4
- Matomo - Results analysis
- etracker evaluation
- Calculate significance
- User-defined click events
- Evaluate custom events in explorative reports
- GA4 - Cross-Domain Tracking
Web analytics integrations
Further integrations
Create experiment
Expert functions
Visual editor
- Campaign Booster: Arrow Up
- Campaign Booster: Exit Intent Layer
- Campaign Booster: Information Bar
- Campaign Booster: Notification
- Campaign Booster: USP Bar
- Add Link Target
- Browse Mode
- Custom Selector Picker
- Edit Content
- Edit Text
- Move elements
- Hide Element
- Keyword Insertion
- Redirect & Split URL Testing
- Remove Element
- Replace Image
- Responsive Device Switcher
- Style & Layout Changes