Send data to your web analytics tool only after user consent
Table of contents
In short
Regardless of how you send your data to your web analytics tool, the experiment playout and variant assignment take place separately. This has the advantage that you can, for example, integrate the Varify snippet without consent, whereby experiments are played out directly. You can trigger the tracking of variants separately via consent. By triggering tracking, users are permanently assigned to an experiment and variant (local storage) and data is sent to your web analytics tool.
Whether you can load the Varify snippet without consent is up to you and your data protection team to decide. Here to find out more.
How to send your data to your web analytics tool via consent
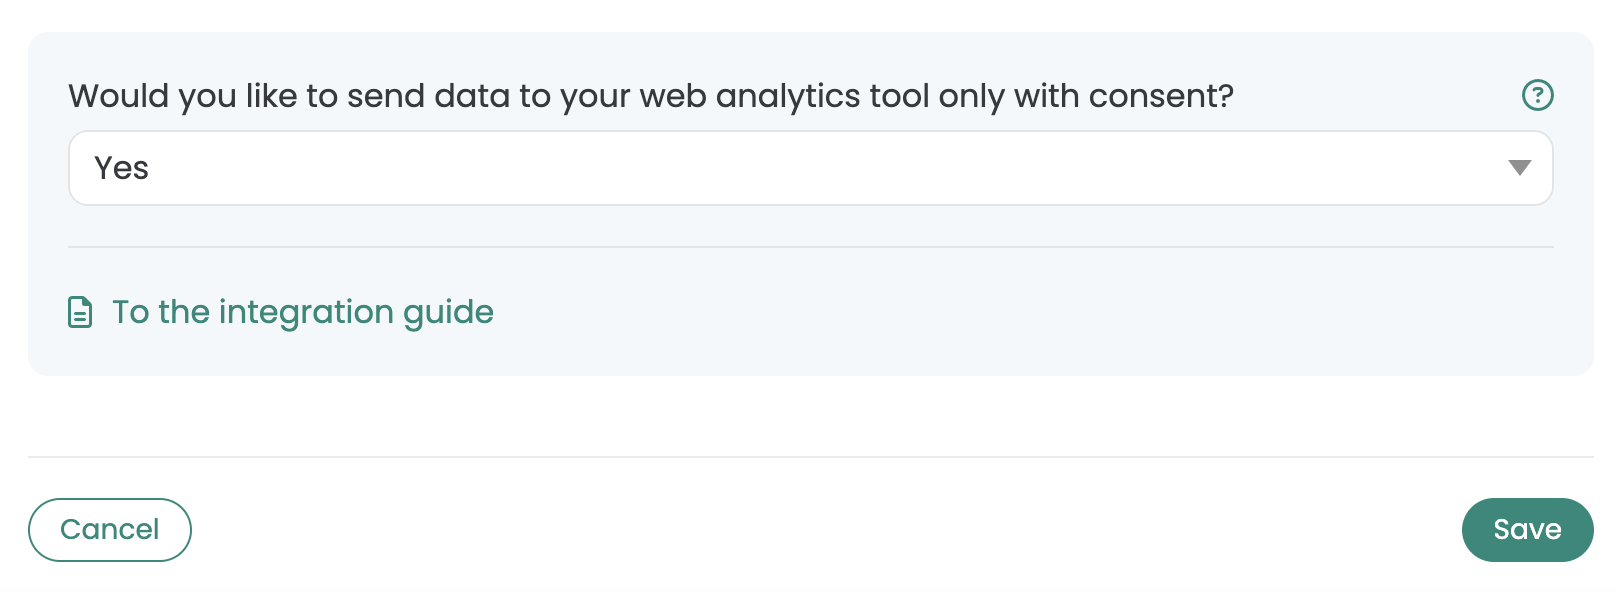
Set the "Yes" setting in the tracking setup for the question "Would you like to send data to your web analytics tool only with consent?"
Depending on your Consent Tool and the way you load scripts and vendors via Consent, there are different ways to execute the Varify Tracking Script depending on the Consent.
Important: Make sure that the Varify Activate Tracking Script is loaded with every page view after Google Tag.
1st option: Integration via Google Tag Manager (Google Consent Mode V1)
Follow these instructions if you load Google Analytics 4 exclusively via Consent and not used the Consent Mode V2 - here to find out more about Consent Mode V2.
With Consent Mode V1, events - such as the page view - are only sent to Google Analytics if the user gives their consent. This is how you proceed when setting up with the GTM.
1. create a new custom HTML tag in GTM
1. go to Tags in the Google Tag Manager and click on New. Now create a new custom HTML tag here.
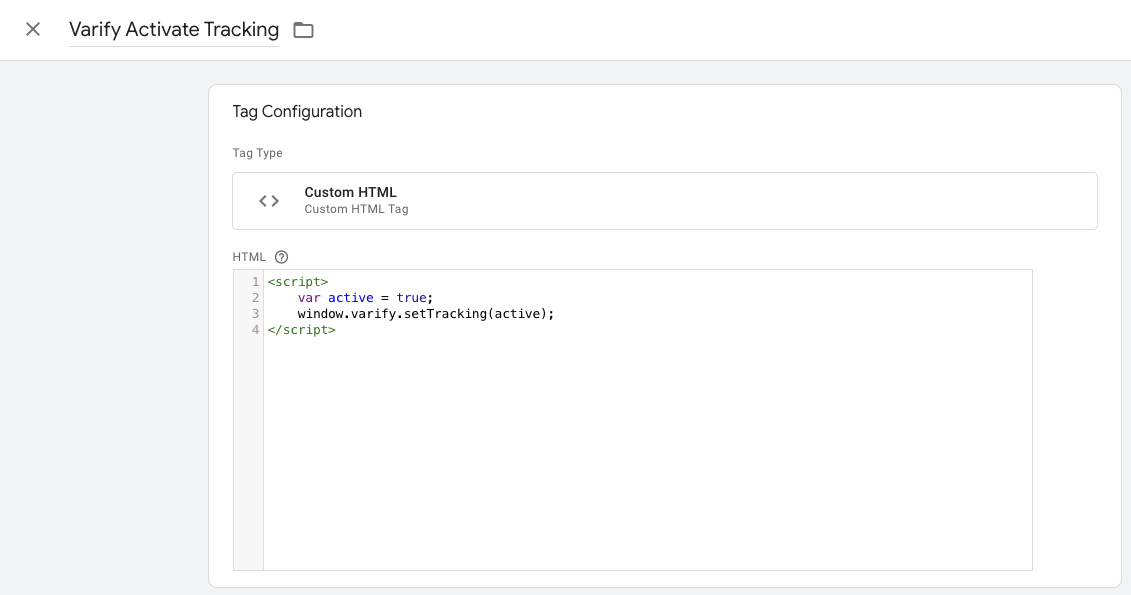
2. name the tag: "Varify Activate Tracking"
3. paste the Activate Tracking Code into the HTML field:
					<script>
    var active = true;
    window.varify.setTracking(active);
</script>
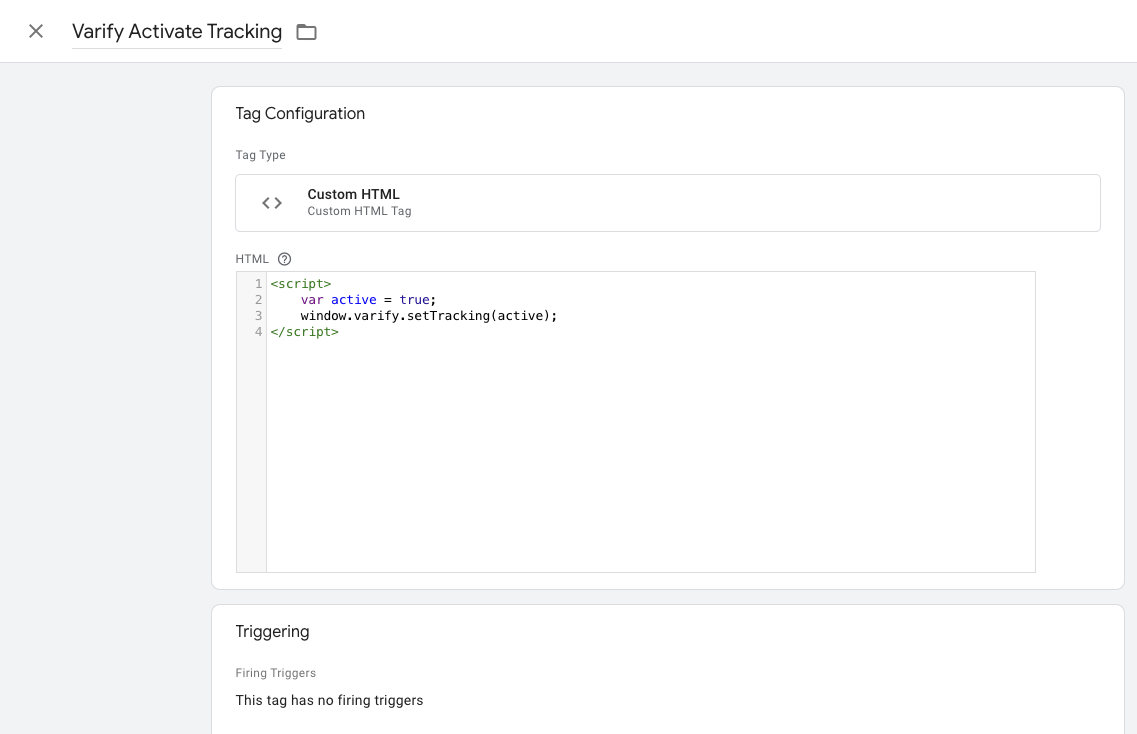
4. save the tag. Confirm that the day without trigger is to be saved.
2. customize Google Tag configuration tag
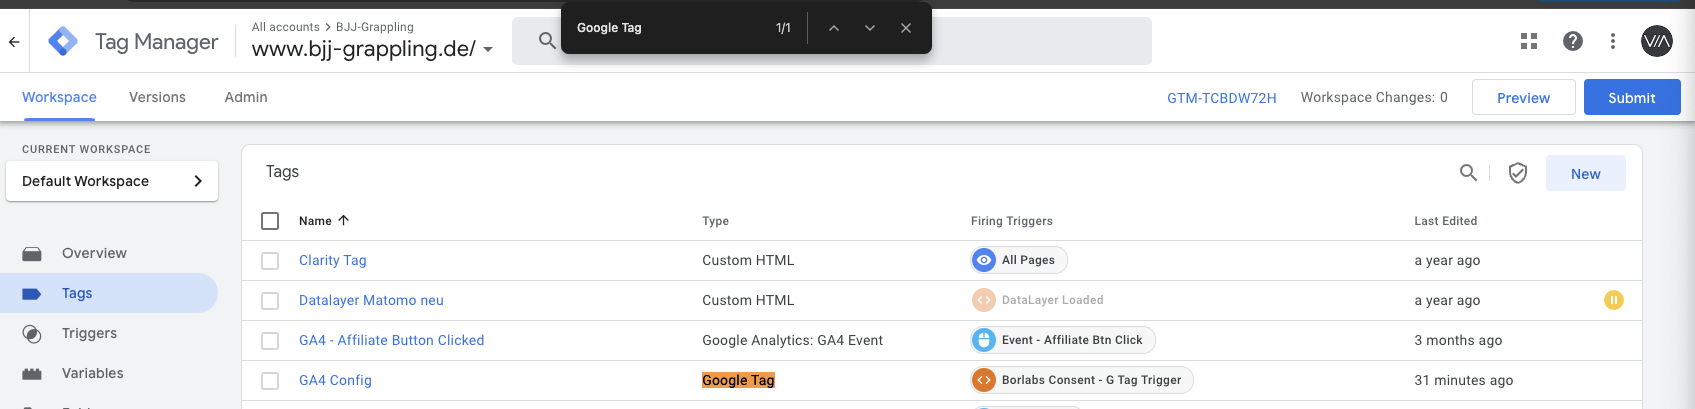
1. now go to your GA4 configuration tag and open it. Note: The easiest way to find it is to navigate to your tags and search for "Google Tag" with Ctrl+F
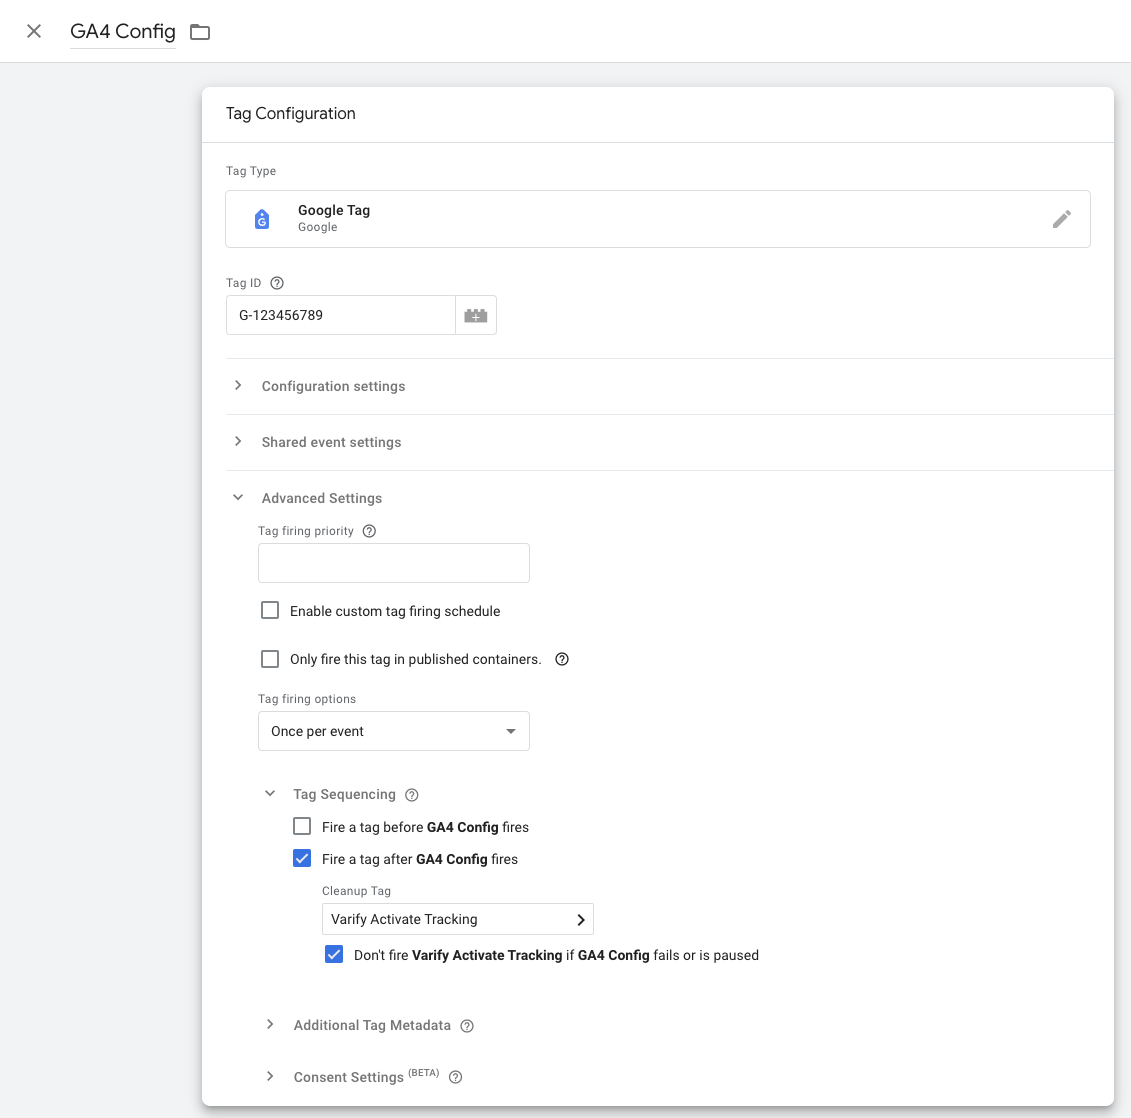
2. click in the Tag Configuration area and select Advanced Settings and Tag Sequencing.
3. now click on "Fire a tag after GA4 Config (The GA4 config tag) fires"
4. select the Varify Active Tracking Tag you have just created.
5. click on the tick below "Don't fire Varify Activate Tracking if GA4 Config fails or is paused"
6. save the tag customization
3. publish GTM Container
The Activate Tracking Script is only loaded when the Google Tag is initialized. As the Google Tag is only initialized on user consent, the Activate Tracking Script is also only executed on consent.
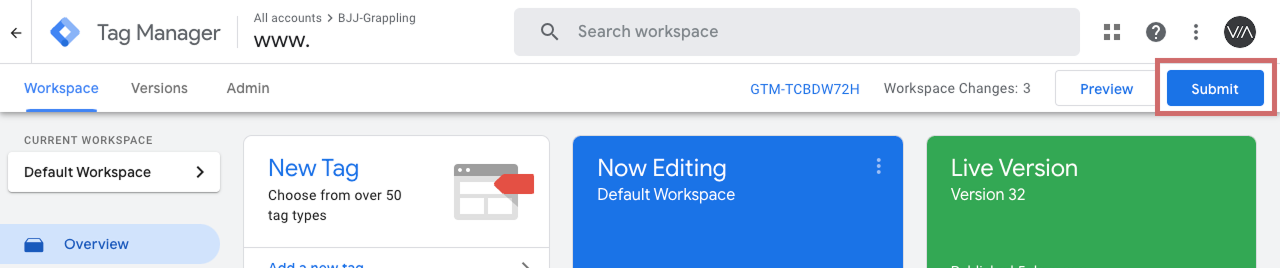
To ensure that your adjustments in Google Tag Manager also work on your website, it is important to publish the changes.
To do this, go to "Overview" in the Tag Manager on the left. Here you can see an overview of all the elements you have just created.
To publish, click on the blue "Publish" button at the top right and confirm. The tag is now live and sends the data to your Google Analytics.
2. Option: Integration via Google Tag Manager (Google Consent Mode V2)
Follow these instructions if you use Google Analytics 4 with Consent Mode V2.
With Consent Mode V2, in contrast to Consent Move V1, anonymous events such as the page view are already sent to Google Analytics without user consent. Personal data such as the "User" metric is only transmitted after user consent.
1. create a new custom HTML tag in GTM
1. go to Tags in the Google Tag Manager and click on New. Now create a new custom HTML tag here.
2. name the tag: "Varify Activate Tracking"
3. paste the Activate Tracking Code into the HTML field:
					<script>
    var active = true;
    window.varify.setTracking(active);
</script>
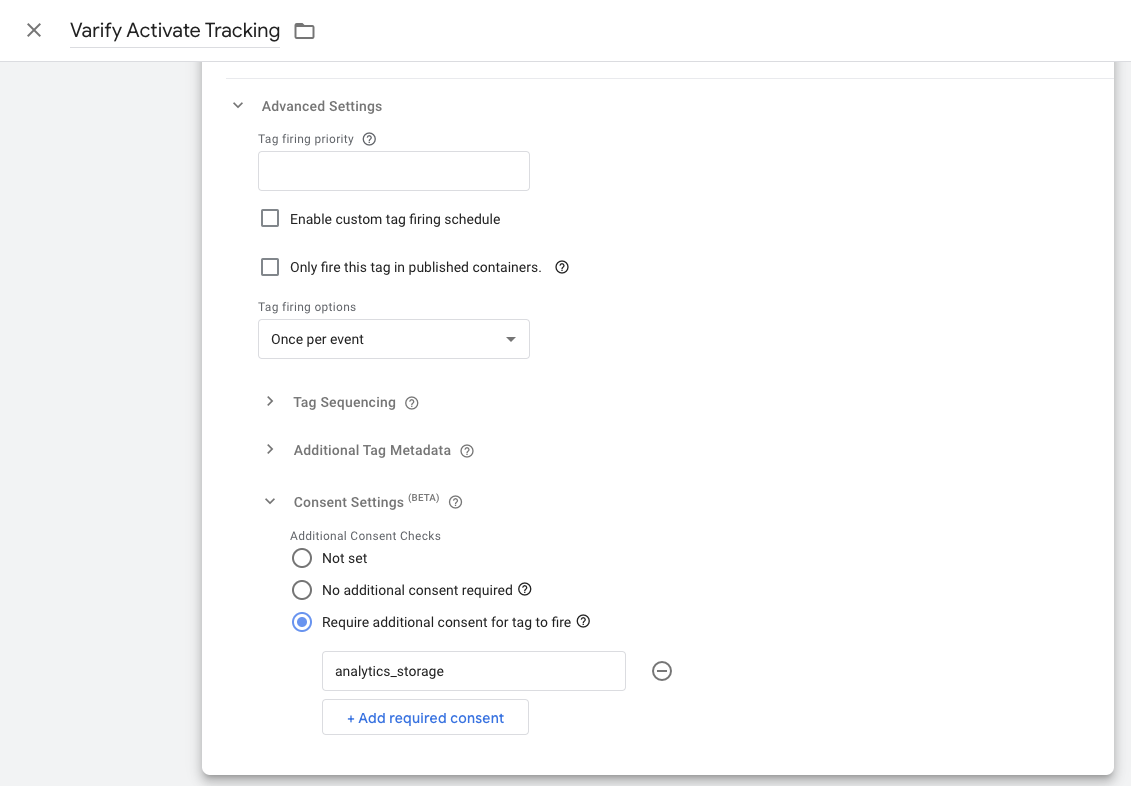
5. then scroll down and open the setting for user consent. Then select the radio button "Additional consent required to trigger the tag" and enter the corresponding consent purpose on which Google Analytics 4 is integrated. This is usually "analytics_storage".
5. set a Consent Update Event as a trigger, which is triggered for each page called up.
6. save the tag. Confirm that the day without trigger is to be saved.
3. publish GTM Container
The Activate Tracking Script is only loaded when the Google Tag is initialized. As the Google Tag is only initialized on user consent, the Activate Tracking Script is also only executed on consent.
To ensure that your adjustments in Google Tag Manager also work on your website, it is important to publish the changes.
To do this, go to "Overview" in the Tag Manager on the left. Here you can see an overview of all the elements you have just created.
To publish, click on the blue "Publish" button at the top right and confirm. The tag is now live and sends the data to your Google Analytics.
3rd option: Integration via Consent Tool or other solutions
In addition to integration via Google Tag Manager, you can also activate tracking with other solutions after user consent. It is important that the Varify Tracking Activation Tag is only triggered after the Google Tag.
The following script must be executed for each page view.
					<script>
    var active = true;
    window.varify.setTracking(active);
</script>