Varify - Consent Mode
Table of contents
In short
With Varify Consent Mode, you have full control over when the permanent assignment of variants via Local Storage and the Varify tracking events are sent to your web analytics tool.
Use of the Consent Mode
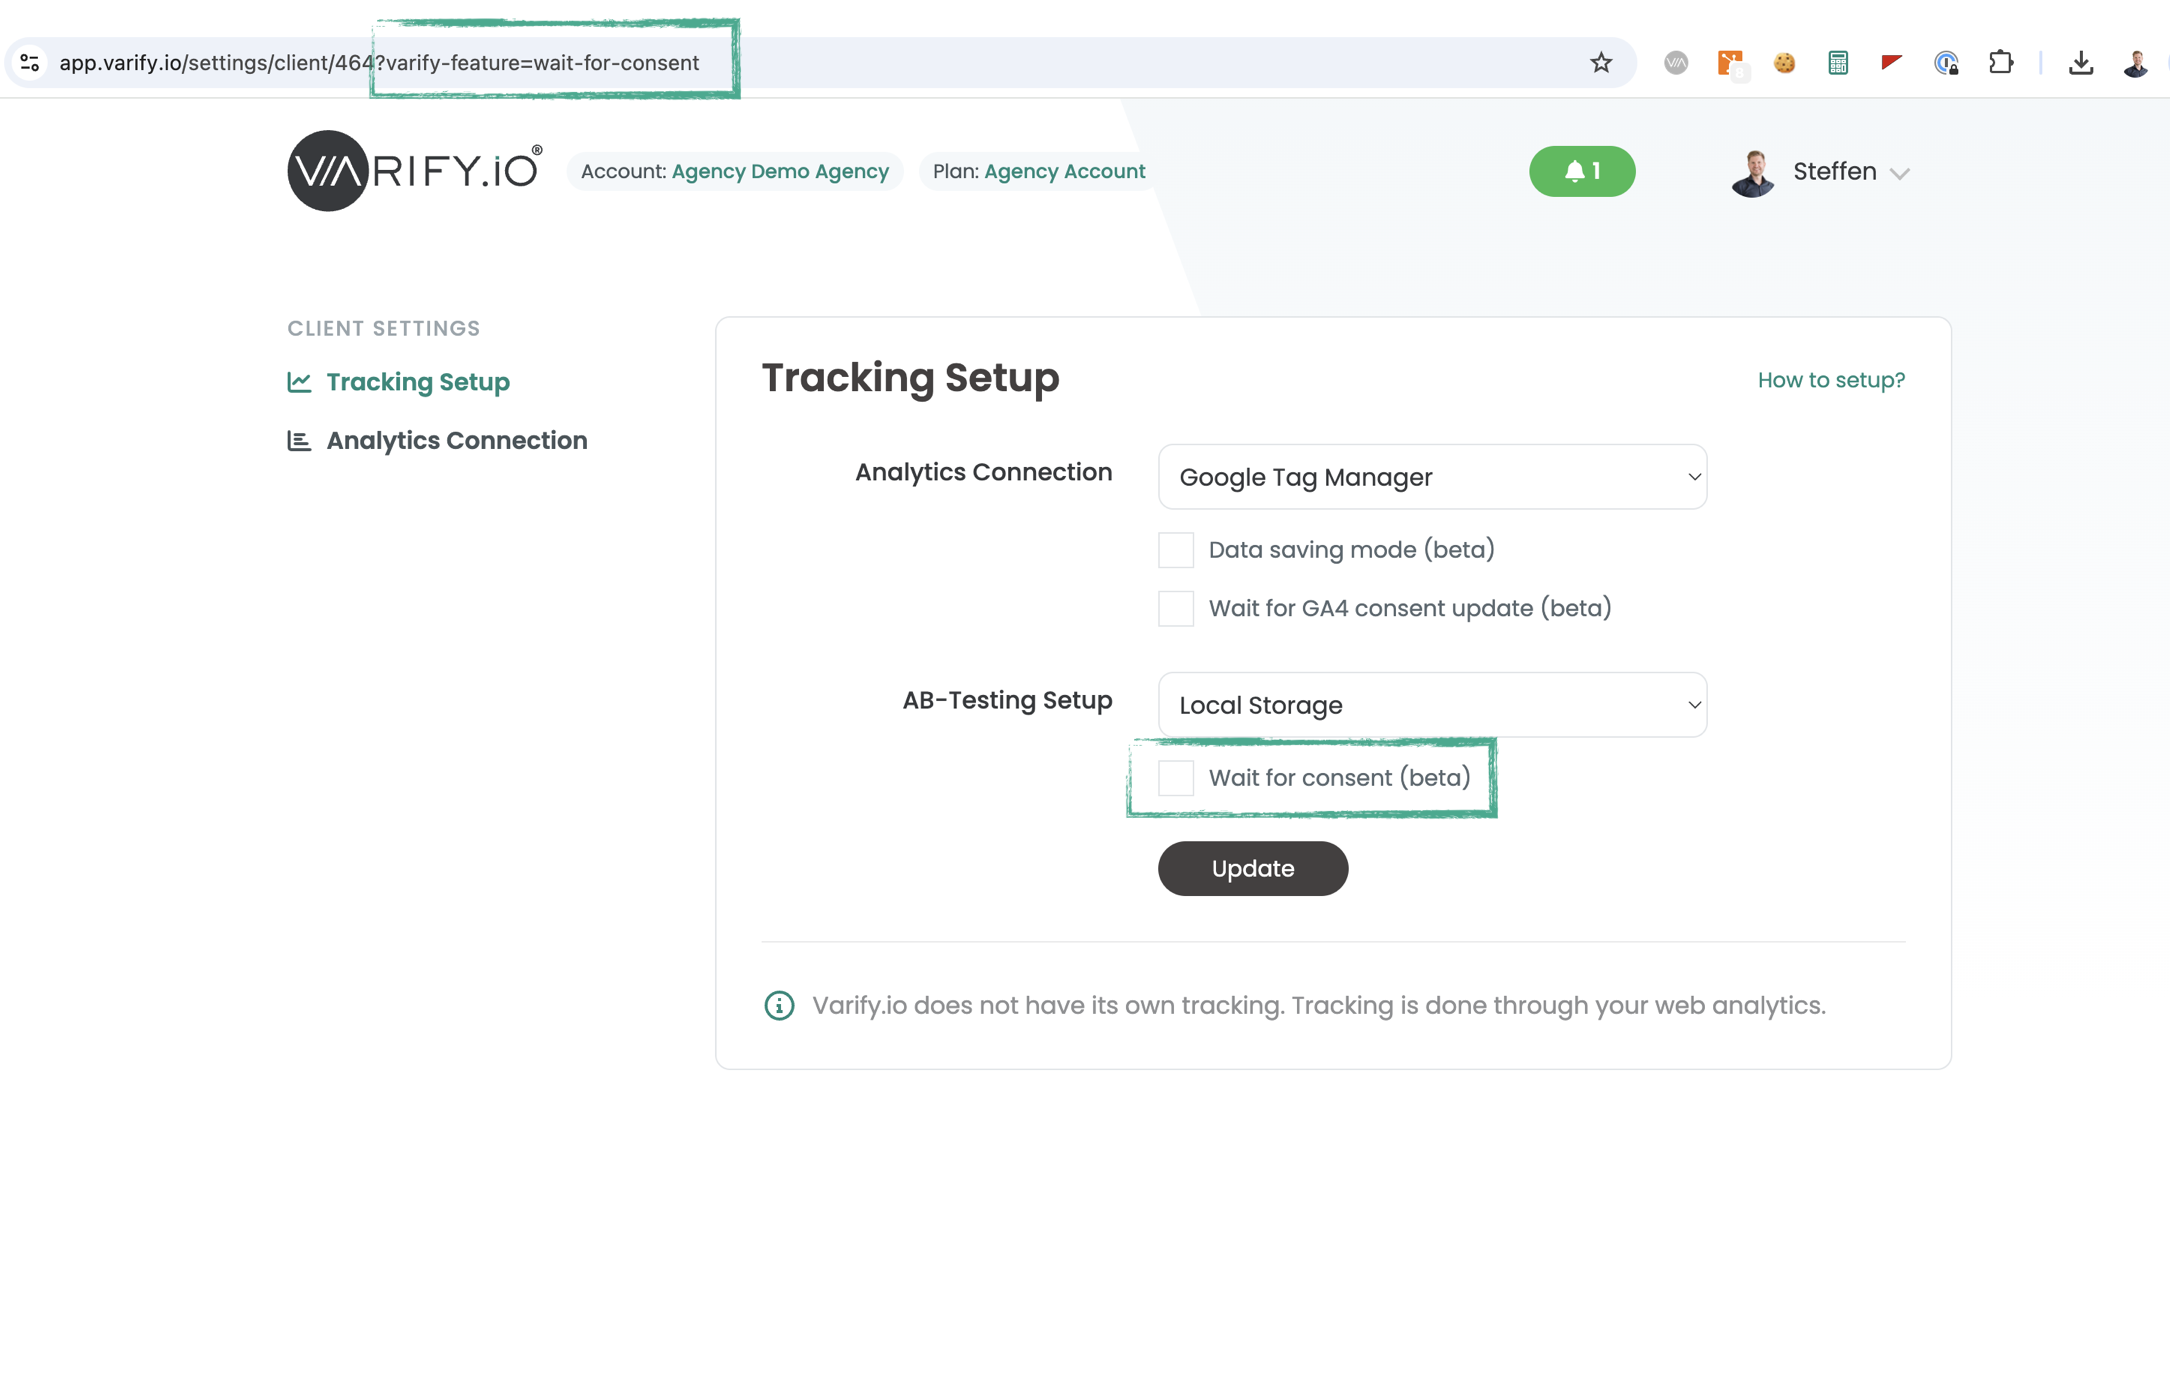
To activate the Consent Mode, you must first switch to the 'Tracking Setup'. Then add the following URL parameter to the website URL: ?varify-feature=wait-for-consent.
You will then see the 'Consent Mode (beta)' option below the selection for the 'AB-Testing Setup'. As soon as you activate this function, the local storage is set and the Varify tracking events are only sent with consent.

How the Varify Consent Mode works
Regardless of whether consent mode is activated, a variant is played when the experiment is active.
If Consent Mode is deactivated, an entry is set in Local Storage to ensure that the user is always shown the same variant. In addition, if tracking is activated, a varify event is sent that contains information about the active experiment and the active variant as parameters.
If Consent Mode is activated, no data is initially saved in Local Storage and no tracking event is sent. Only when consent has been granted is data written to the local storage and the Varify tracking event sent.
If consent is withdrawn again, no further tracking events are sent and the local storage is no longer written to.
How to give consent
window.varify.setConsent(true);
How to withdraw consent
window.varify.setConsent(false);
Application in common consent tools
Important Notice:
Hello world
Cookiefirst
You can create the Varify Consent Mode in Coockiefirst with the following steps.
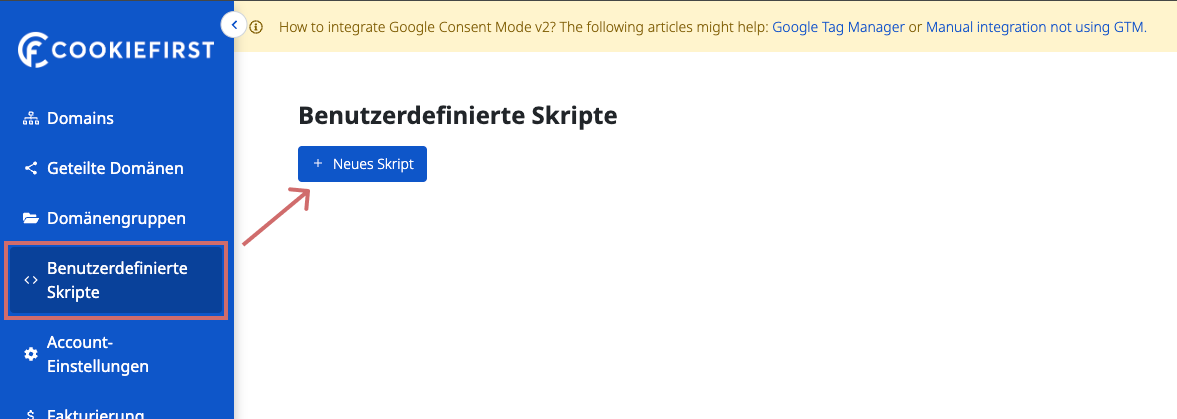
1. create a new user-defined script under "User-defined scripts

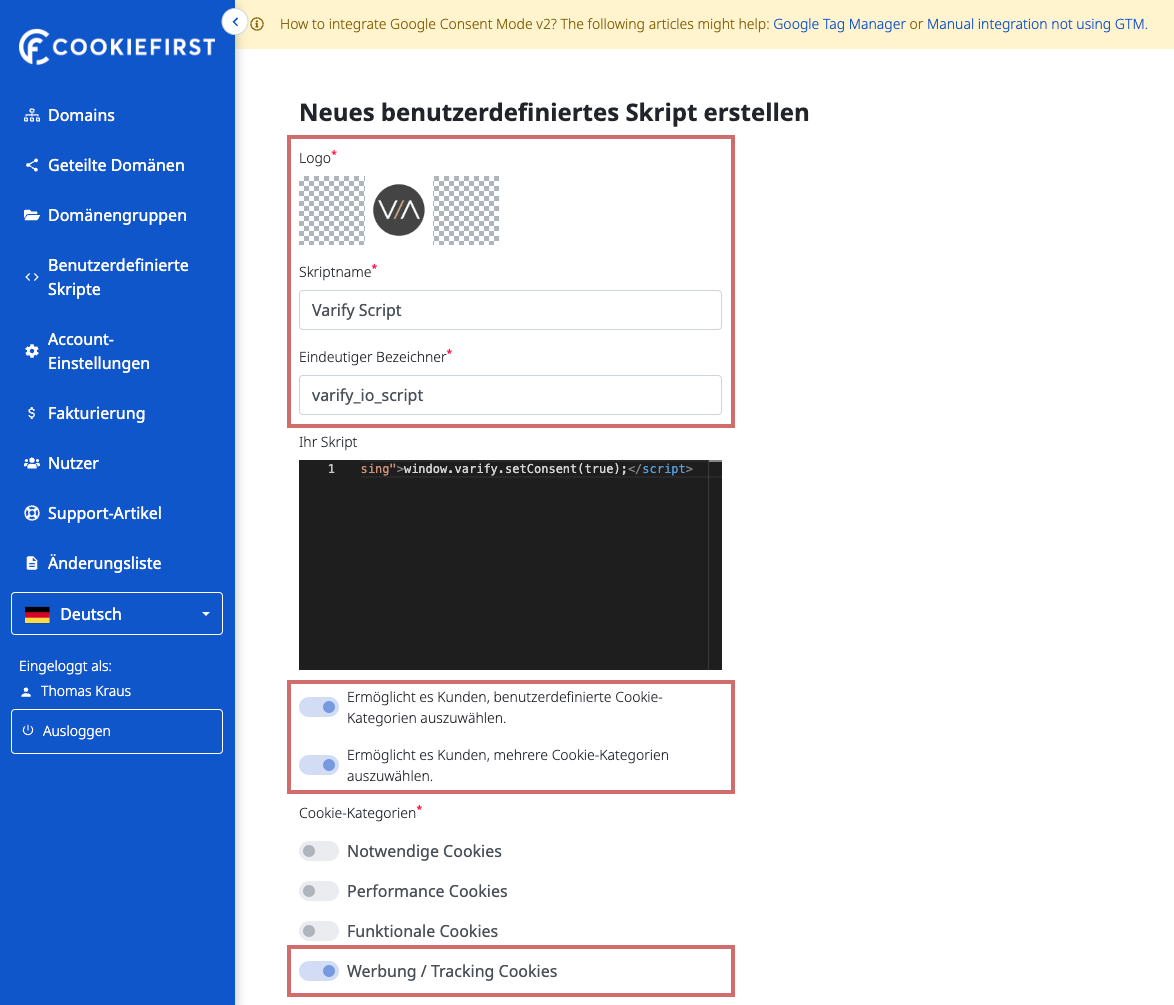
2. fill in the mandatory fields accordingly and activate the buttons shown

3. paste the following HTML code into the "Your script" field.
<script type="text/plain" data-cookiefirst-category="advertising">window.varify.setConsent(true);</script>
4. save the user-defined script.
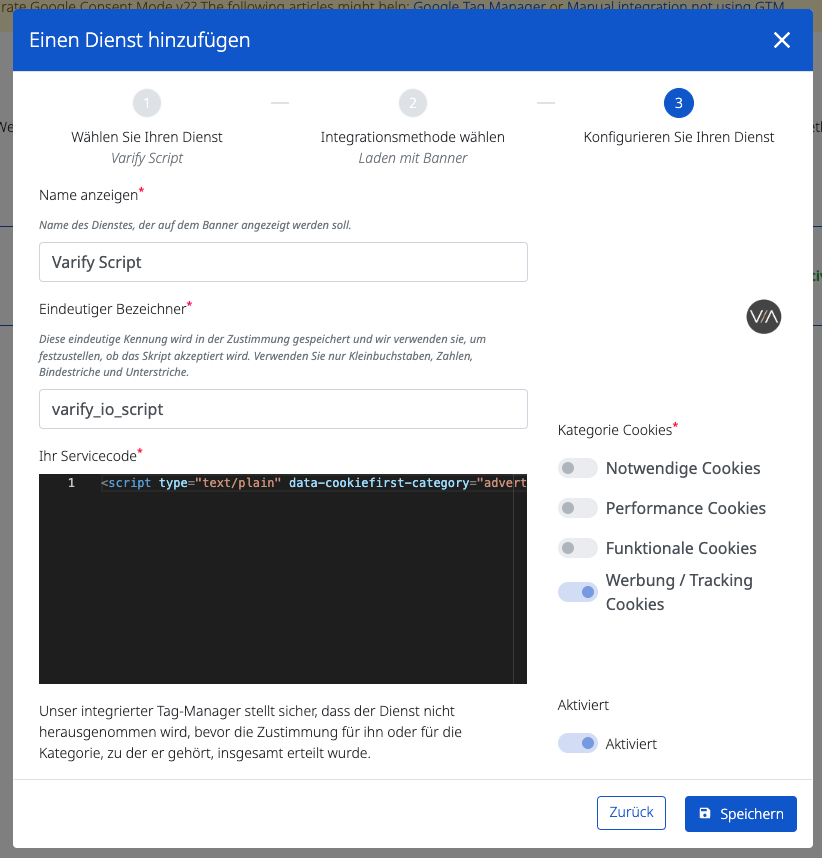
5. now go to the "Settings of your domain" under "Domains" and then click on "Scripts"
6. select "Add service" and search for the Varify script you just created.
7. select "Load with banner" as the integration method
8. activate the "Activated" switch and save the change.

Borlabs Cookies
Coming soon...
First steps
Tracking & Evaluation
- Tracking with Varify.io
- GA4 reporting in Varify.io
- Segment and filter reports
- Audience-based evaluation in GA4
- Segment-based evaluation in GA 4
- Matomo - Results analysis
- etracker evaluation
- Calculate significance
- User-defined click events
- Evaluate custom events in explorative reports
- GA4 - Cross-Domain Tracking
Web analytics integrations
Further integrations
Create experiment
Expert functions
Visual editor
- Campaign Booster: Arrow Up
- Campaign Booster: Exit Intent Layer
- Campaign Booster: Information Bar
- Campaign Booster: Notification
- Campaign Booster: USP Bar
- Add Link Target
- Browse Mode
- Custom Selector Picker
- Edit Content
- Edit Text
- Move elements
- Hide Element
- Keyword Insertion
- Redirect & Split URL Testing
- Remove Element
- Replace Image
- Responsive Device Switcher
- Style & Layout Changes